Project configuration
Prerequisites
- A paid Apple Developer Account
- An Apple Sandbox Account

Tap to Pay Capability Enablement
Follow the instructions provided later in this document.
Once the iPhone setup is completed, you can proceed with the development phase.
Create a New Project in Xcode
Set the Minimum Deployment Target to iOS 16.4.
Add Required Packages via Swift Package Manager (SPM)
Add the following packages to the project:
github.com/Alamofire/Alamofire.git github.com/SwiftyJSON/SwiftyJSON github.com/SwiftyBeaver/SwiftyBeaver.git github.com/Kitura/Swift-JWT
Note: Do NOT integrate AlamofireDynamic when prompted by Xcode.
1.In Xcode, go to File → Add Package Dependencies, then insert the GitHub URLs above to download the libraries.
2.The developer has to hadd the github url to download libreries in the finder bar
- Once completed, all libraries will be correctly added to the project.


SDK Installation via CocoaPods
Now, install the SDK using CocoaPods.
Open Finder, navigate to your project folder, and open Terminal there.


Type the following command:
pod init

The Podfile will be created.
Open the Podfile and paste the following content (make sure to insert the correct target name, as specified in your Xcode project, e.g. sdk-ios-swiftui01):
source 'https://github.com/CocoaPods/Specs.git'
platform :ios, '16.4'
plugin 'cocoapods-art', :sources => [ 'libs-nexi-pos-a2a-ios-release' ]
def shared_pods
pod 'App2AppSDK', '1.0.2' pod 'Softpos', '1.0.71'
end
target 'sdk-ios-swiftui01' do use_frameworks!
shared_pods end
post_install do |installer| installer.pods_project.targets.each do |target| if target.respond_to?(:product_type) and target.product_type == "com.apple.product-type.bundle" target.build_configurations.each do |config| config.build_settings['CODE_SIGNING_ALLOWED'] = 'NO' config.build_settings["IPHONEOS_DEPLOYMENT_TARGET"] = "16.4" end end end end
Then type: pod install
Once the installation completes successfully, the Pods are integrated into your project.


First Build Error and how to fix
During the first build, you might encounter the following error.
To fix it, open Build Settings and set:
User Script Sandboxing = NO


App Registration on Apple Developer Site
Once your app appears on the Apple Developer portal, go to the App ID configuration section and enable the Tap to Pay capability.

Verify Provisioning Support
If the provisioning support is set only to Development, the generated Distribution Provisioning Profile will not include Tap to Pay capability. You must request Apple to extend Tap to Pay functionality to the Distribution mode.


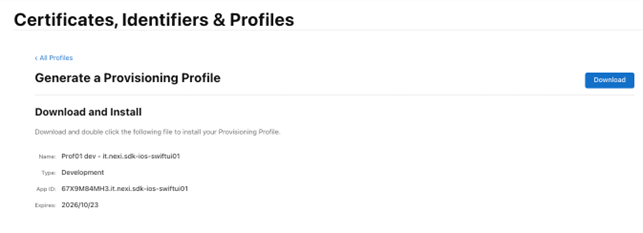
Creating a Provisioning Profile
- Click the + button to create a new profile.
- Select Development
- Choose the corresponding App ID, Certificate, and Devices, then click Continue to save
Your Development Provisioning Profile is now generated.


How to handle if Tap to Pay Capability Not Available
If the Tap to Pay capability is not available, submit a request to Apple using the following form:
https://developer.apple.com/contact/request/tap-to-pay-on-iphone/