Click to Pay
This page outlines the basics of using Click to Pay via Netaxept and gives you instructions needed for a successful implementation and integration of Click to Pay.
Before you start
Currently, Click to Pay in Netaxept supports only one-off payments. Credential-on-file payments are out of scope.
Overview
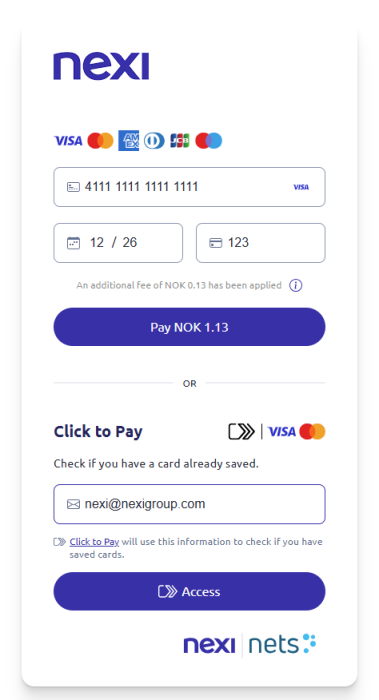
Click to Pay is a simple and secure wallet-like payment solution designed to streamline the checkout process for your customers.
By enabling Click to Pay, merchants can offer a quick way to complete purchases with a payment method that enhances the customer experience, while ensuring high levels of security and fraud prevention, since Click to Pay uses network token technology provided by the card schemes.
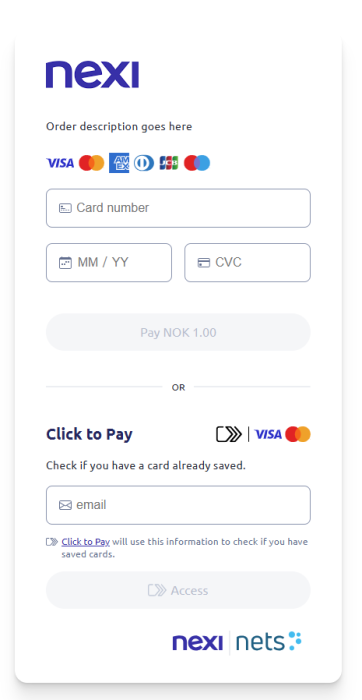
In Netaxept, Click to Pay is a part of the latest Terminal UI update.
Click to Pay in Desktop mode
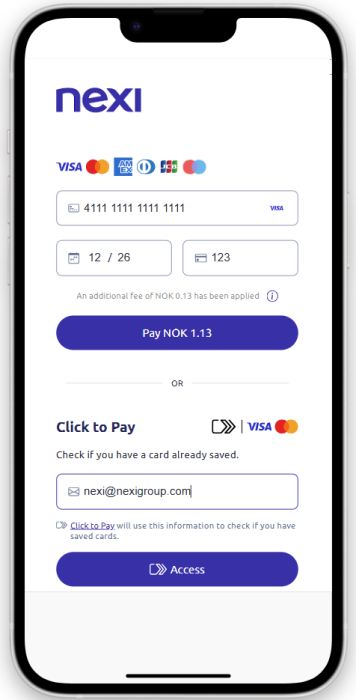
Click to Pay in Mobile mode
Click to Pay is not supported as a native view in the Mobile SDK but the web-based payment form is well suited and adapted for mobile devices. In-app purchases are to be completed through a web view embedding the web-based Netaxept Click to Pay payment page.
In order to see the Click to Pay payment page on mobile devices please ensure that the mobile terminal view is disabled.
Supported card schemes
Click to Pay payments are currently supported for:
- Visa
- Mastercard
Payments for all other schemes, for which you have a contract, will be processed using manual card entry.
Notes
- Click to Pay is supported as web-based payment page, but also optimized for use on mobile devices.
- Click to Pay supports only one-off payments.
Benefits
- Faster Checkout: Offer cardholders a wallet-like card-not-present payment process.
- Increased Security: Benefit from advanced security measures that protect sensitive payment information.
- Brand Trust: Leverage the recognized Mastercard and Visa brands to instil confidence in your customers.
- Mobile and Desktop Friendly: Seamlessly integrates into both mobile and desktop environments for a consistent shopping experience.
Functionalities
| Functionality | Details |
|---|---|
| Payment type | Card |
| Subscriptions/recurring | ❌ |
| Refunds | ✅ |
| Partial Refund | ✅ |
| Cancel Payment | ✅ |
| Pre-auth | ❌ |
| Reservation & charge | ✅ |
| IPSP | ✅ |
| Currencies | All |
| Countries | All |
Activation
Before activating Click to Pay please make sure that all prerequisites described below are fulfilled:
- If you are using a “customized payment window design” as described on this page: Create customized Payment Window designs | Netaxept | Nexi group developer portal, Click to Pay form may work without any problems but it is strongly recommended that all templates are deactivated and not dynamically triggered with the Register call (using
terminalDesignparameter). - Make sure you are not using “custom template” (
terminalLayout=customsent in Register call). See this page for reference: Custom templates | Netaxept | Nexi group developer portal - Make sure you are sending the single page mode parameter (
terminalSinglePage=true) in the Register call. See this page for details on single page mode: Single Page Mode | Netaxept | Nexi group developer portal - OPTIONAL - Upload your company logo to Netaxept’s Admin portal and make sure to activate it.
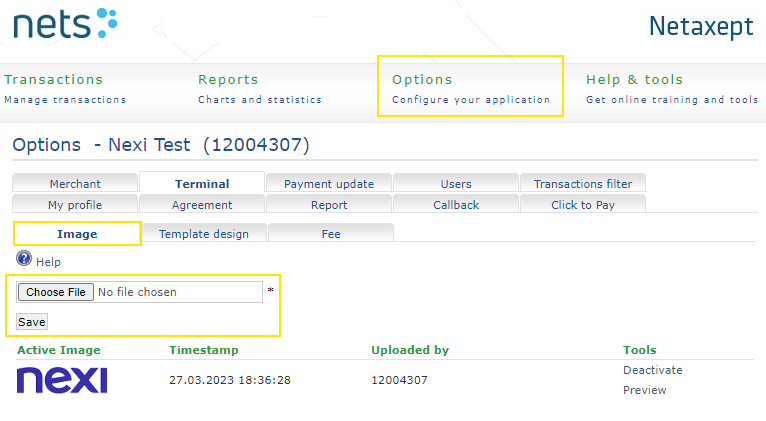
The image above is an example of an uploaded and activated logo image in the Admin portal.
Administration
There are two separate configuration options available to control Click to Pay:
- Enable Click to Pay – This controls the Click to pay payment flows, i.e. making payments.
- Enable Click to Pay enrolment at checkout – This controls the enrolment flows during checkout (enrolment is currently supported only for Mastercard), e.g. registering a new card with Click to Pay.
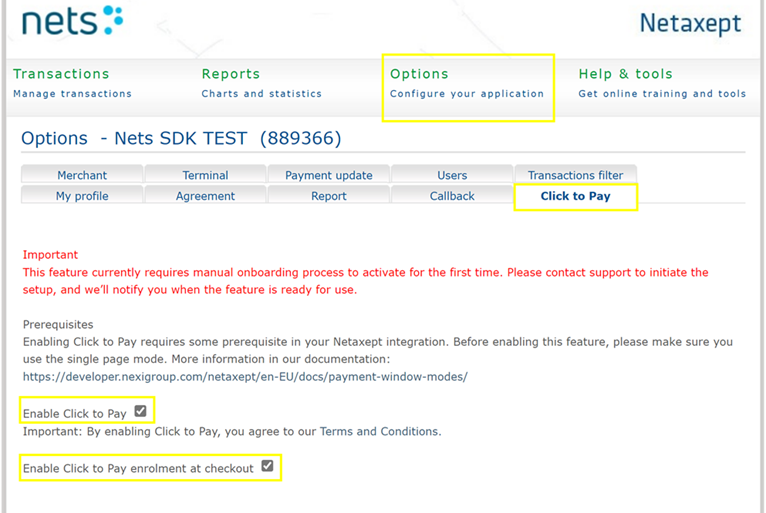
In the image above you can see how to administrate Click to Pay in the Netaxept Admin portal
Trouble shooting
If the Click to Pay terminal isn’t loaded as expected after activation, it might be because of the two common pitfalls in the bullets below:
- If you are using custom template (sending
terminalLayout=customin the Register call). In this case Click to Pay widget is not loaded at all. - If you are using customized template in combination with very specific HTML. For most of these cases Click to Pay widget will override all merchant settings, but there is a chance that some HTML content emerges on the surface.
Order description
To add a descriptive text in the payment window, you include the orderDescription parameter and specify a value for it. In the picture below, orderDescription=Order description goes here was sent in the Register call.
Storing card-on-file
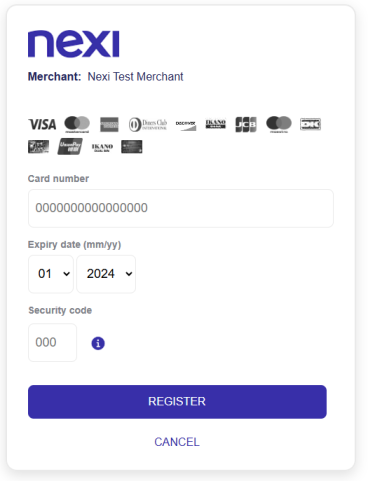
Click to Pay yet only supports one-off payments. When entering the payment flow for initializing a stored credential-on-file payment (easy payment, recurring, UCOF, etc.), Click to Pay will, for this specific payment request, use the legacy card entry form of Netaxept.
If you do not have your own "customized payment window design" to enhance the appearance of the legacy hosted payment window, you can apply the Nexi/Nets UI design CSS to achieve the look shown in the image below.
How to test Click To Pay
To create Sandbox account for Mastercard C2P go to: https://sandbox.src.mastercard.com/profile/enroll
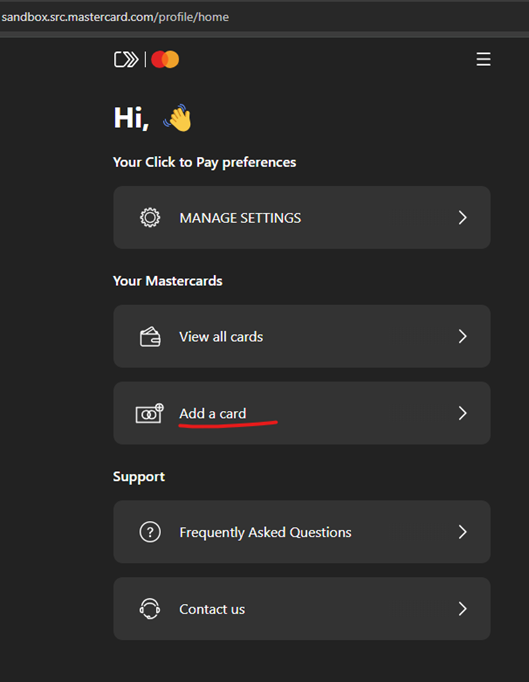
Once you create your C2P account you can use the test cards below and add them to your profile.
Mastercard C2P test cards: https://developer.mastercard.com/mastercard-checkout-solutions/documentation/testing/test_cases/click_to_pay_case/#test-cards
To create Sandbox account for Visa C2P go to: https://sandbox.secure.checkout.visa.com/
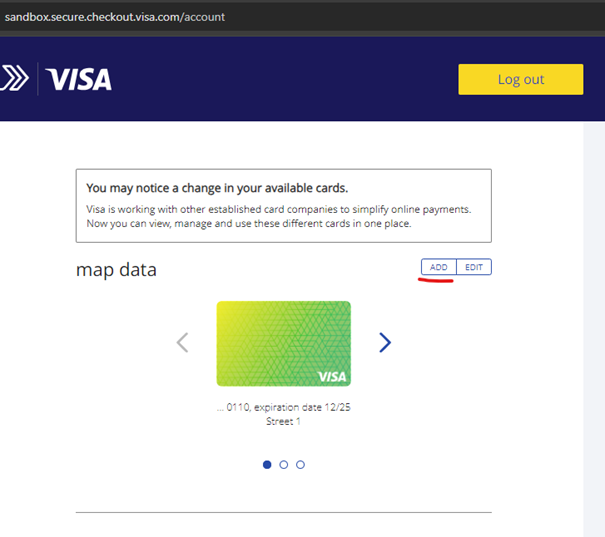
Once you create your C2P account you can use the test cards below and add them to your profile.
| PAN | Exp Date | CVV2 | Description |
|---|---|---|---|
| 4622943123114762 | 12/27 | 591 | |
| 4622943123114770 | 12/27 | 050 | |
| 4622943123114788 | 12/27 | 939 | |
| 4622943123114796 | 12/27 | 643 | |
| 4622943123114804 | 12/27 | 218 | |
| 4622943123114812 | 12/27 | 950 | |
| 4622943123114820 | 12/27 | 947 | |
| 4622943123114838 | 12/27 | 695 | |
| 4622943123114846 | 12/27 | 697 | |
| 4622943123114853 | 12/27 | 322 |
Conclusion
Implementing Click to Pay with Mastercard and Visa can significantly enhance your customers' shopping experience while providing secure and efficient transactions. It will also update the look and feel of your payment window. Start today to streamline your checkout process and boost customer satisfaction.