Payment flow - Outline
This article walks you through an example of how to process card payments with Netaxept. The endpoints and parameters are referring to the RESTful API integration. Please find corresponding examples for SOAP in the API reference.
Before you start
In order to try the code examples, you need your:
- Netaxept Merchant ID
- Netaxept test API token
Overview
The following examples refer to the test environment. For production you need to use your Netaxept API token and the production environment url instead.
test environment url: https://test.epayment.nets.eu/netaxept/
production environment url: https://epayment.nets.eu/netaxept/
The following example refers to card payments. The requirements for direct bank payments might be different.
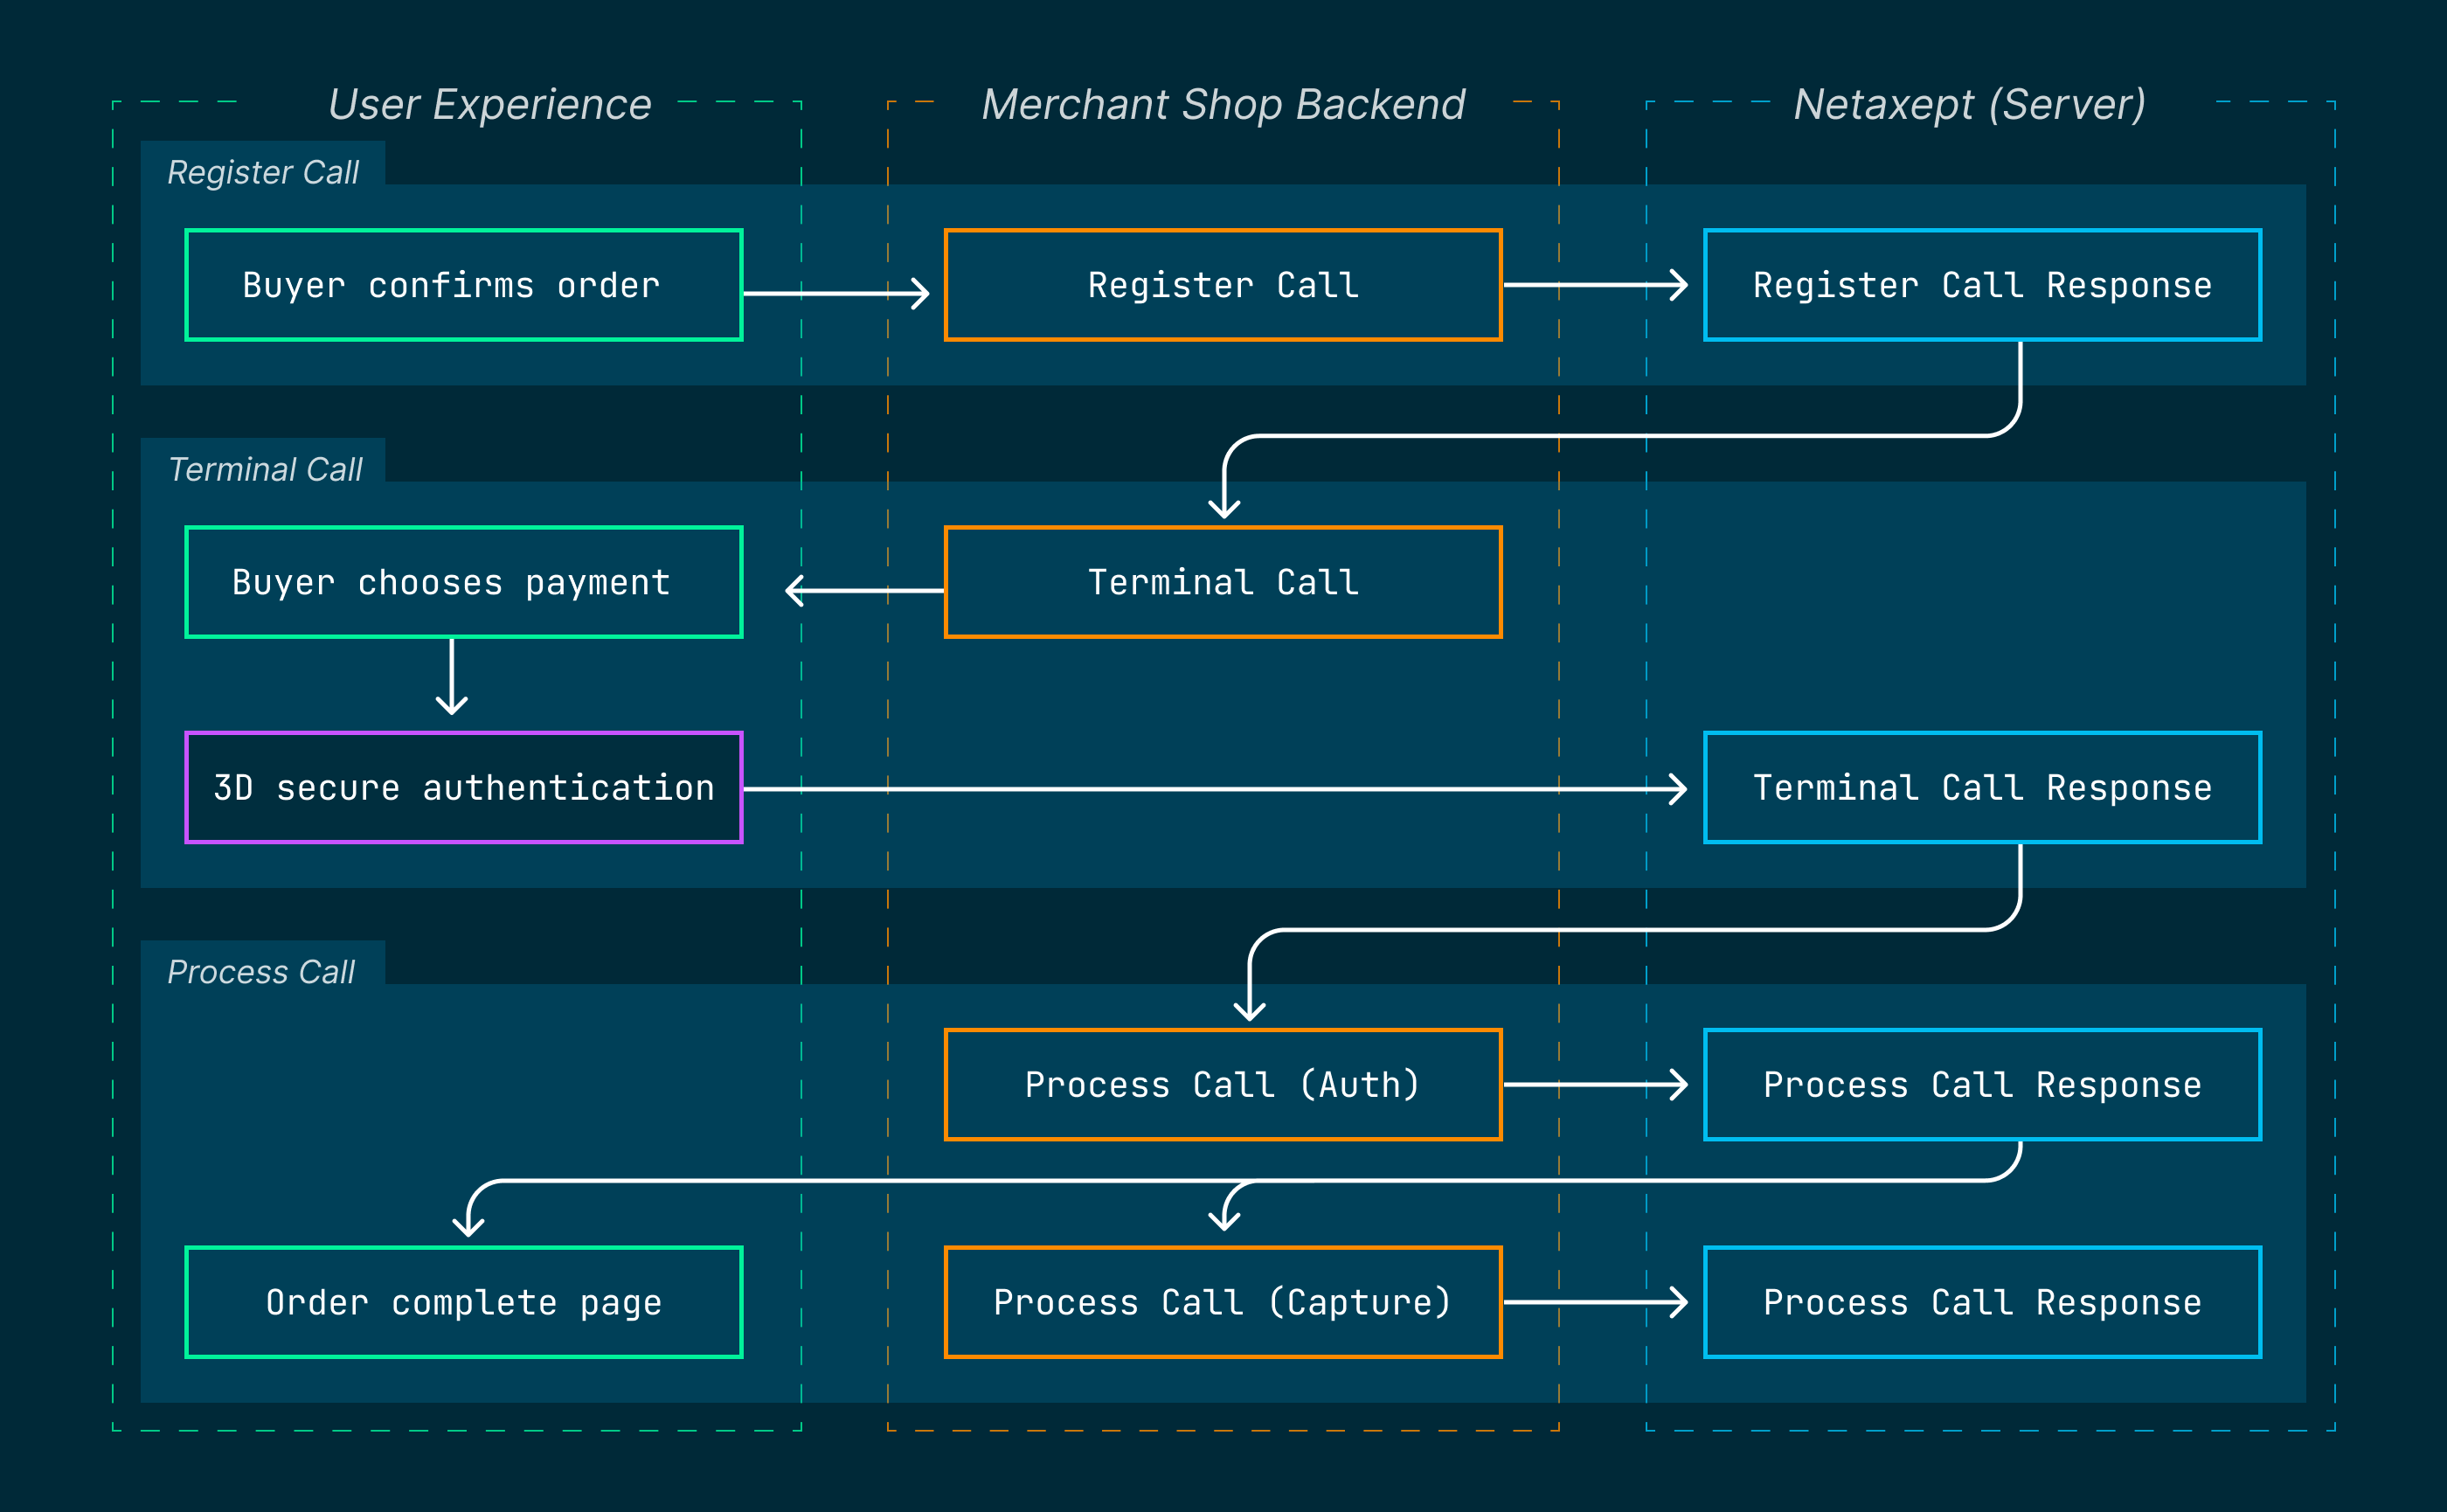
The complete payment flow consists of three stages: Register, Terminal and Process. It starts with the customer confirming the order on your shop. It ends with you sending the Process call to capture the payment.

The endpoints and parameters of the following examples are referring to the RESTful API integration. Please check the SOAP section in our API reference for the corresponding SOAP API examples.
1. Send Register call to Netaxept
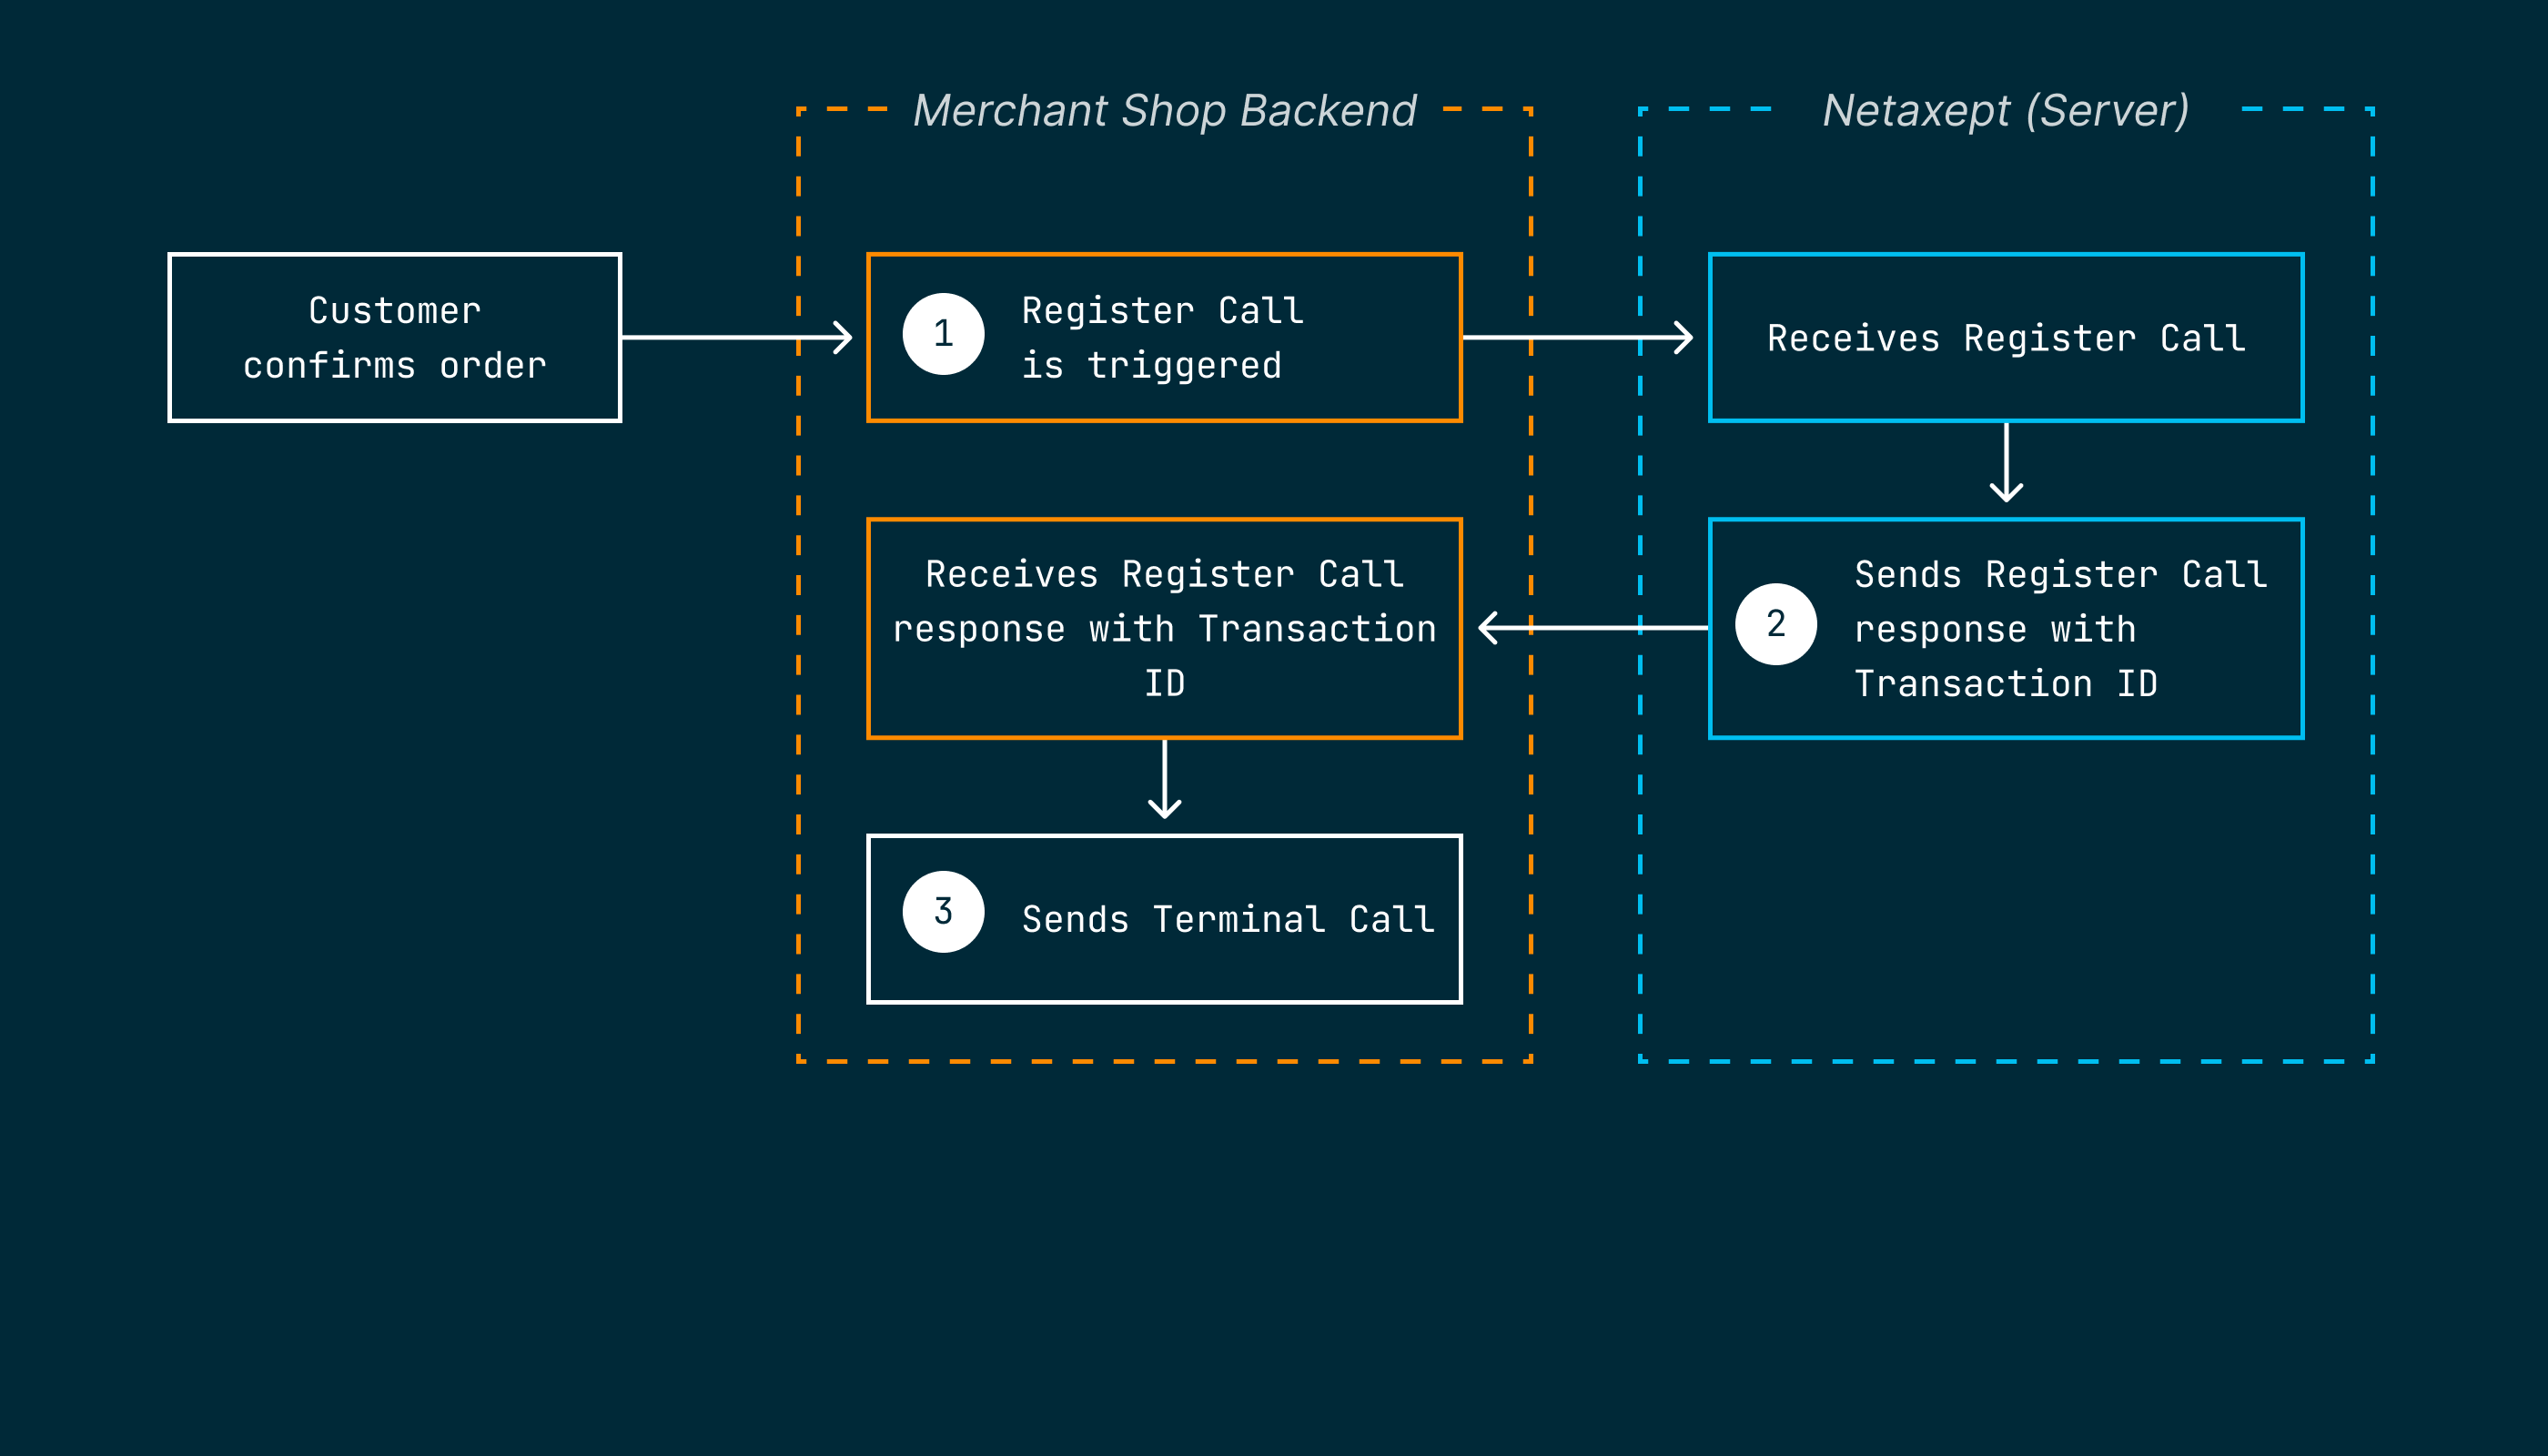
When your customer confirms the order on your webshop, the Register call to Netaxept must be triggered.

With the Register call you send your Netaxept Merchant ID merchantId, the Netaxept API (test) token token, the Order number orderNumber, the currency currencyCode and the amount of the purchase amount.
You also send the Redirect URL redirectUrl to define the page where your customer is directed to after he has confirmed the transaction.
In our example we assume the customer is going to choose the payment method on the Netaxept hosted Payment Window and the above-mentioned parameters are sufficient for the Register call to work.
Example Register call - line breaks added for readability
https://test.epayment.nets.eu/Netaxept/Register.aspx?
  merchantId=MERCHANTID&
  token=TESTAPITOKEN&
  orderNumber=T12345&
Please learn more about available Register call parameters in the API reference.
For instance, the serviceType parameter would be needed, if you don’t use a Netaxept hosted Payment Window: serviceType=M. If you are integrating the Netaxept payment solution to an App, serviceType=A would be necessary.
Also, the Payment Window’s language default is Norwegian, which can be changed with the language parameter.
The optional paymentMethodActionList parameter allows you to define specific fees and actions per payment method.
If you are using SOAP instead of RESTful API, the Environment.WebServicePlatform parameter is required as well.
2. Receive Transaction ID
As a response to the Register call, Netaxept sends the TransactionId. The Transaction ID is the unique identifier for the specific transaction.
Netaxept has now stored the transaction under the given TransactionId.
3. Send Terminal call

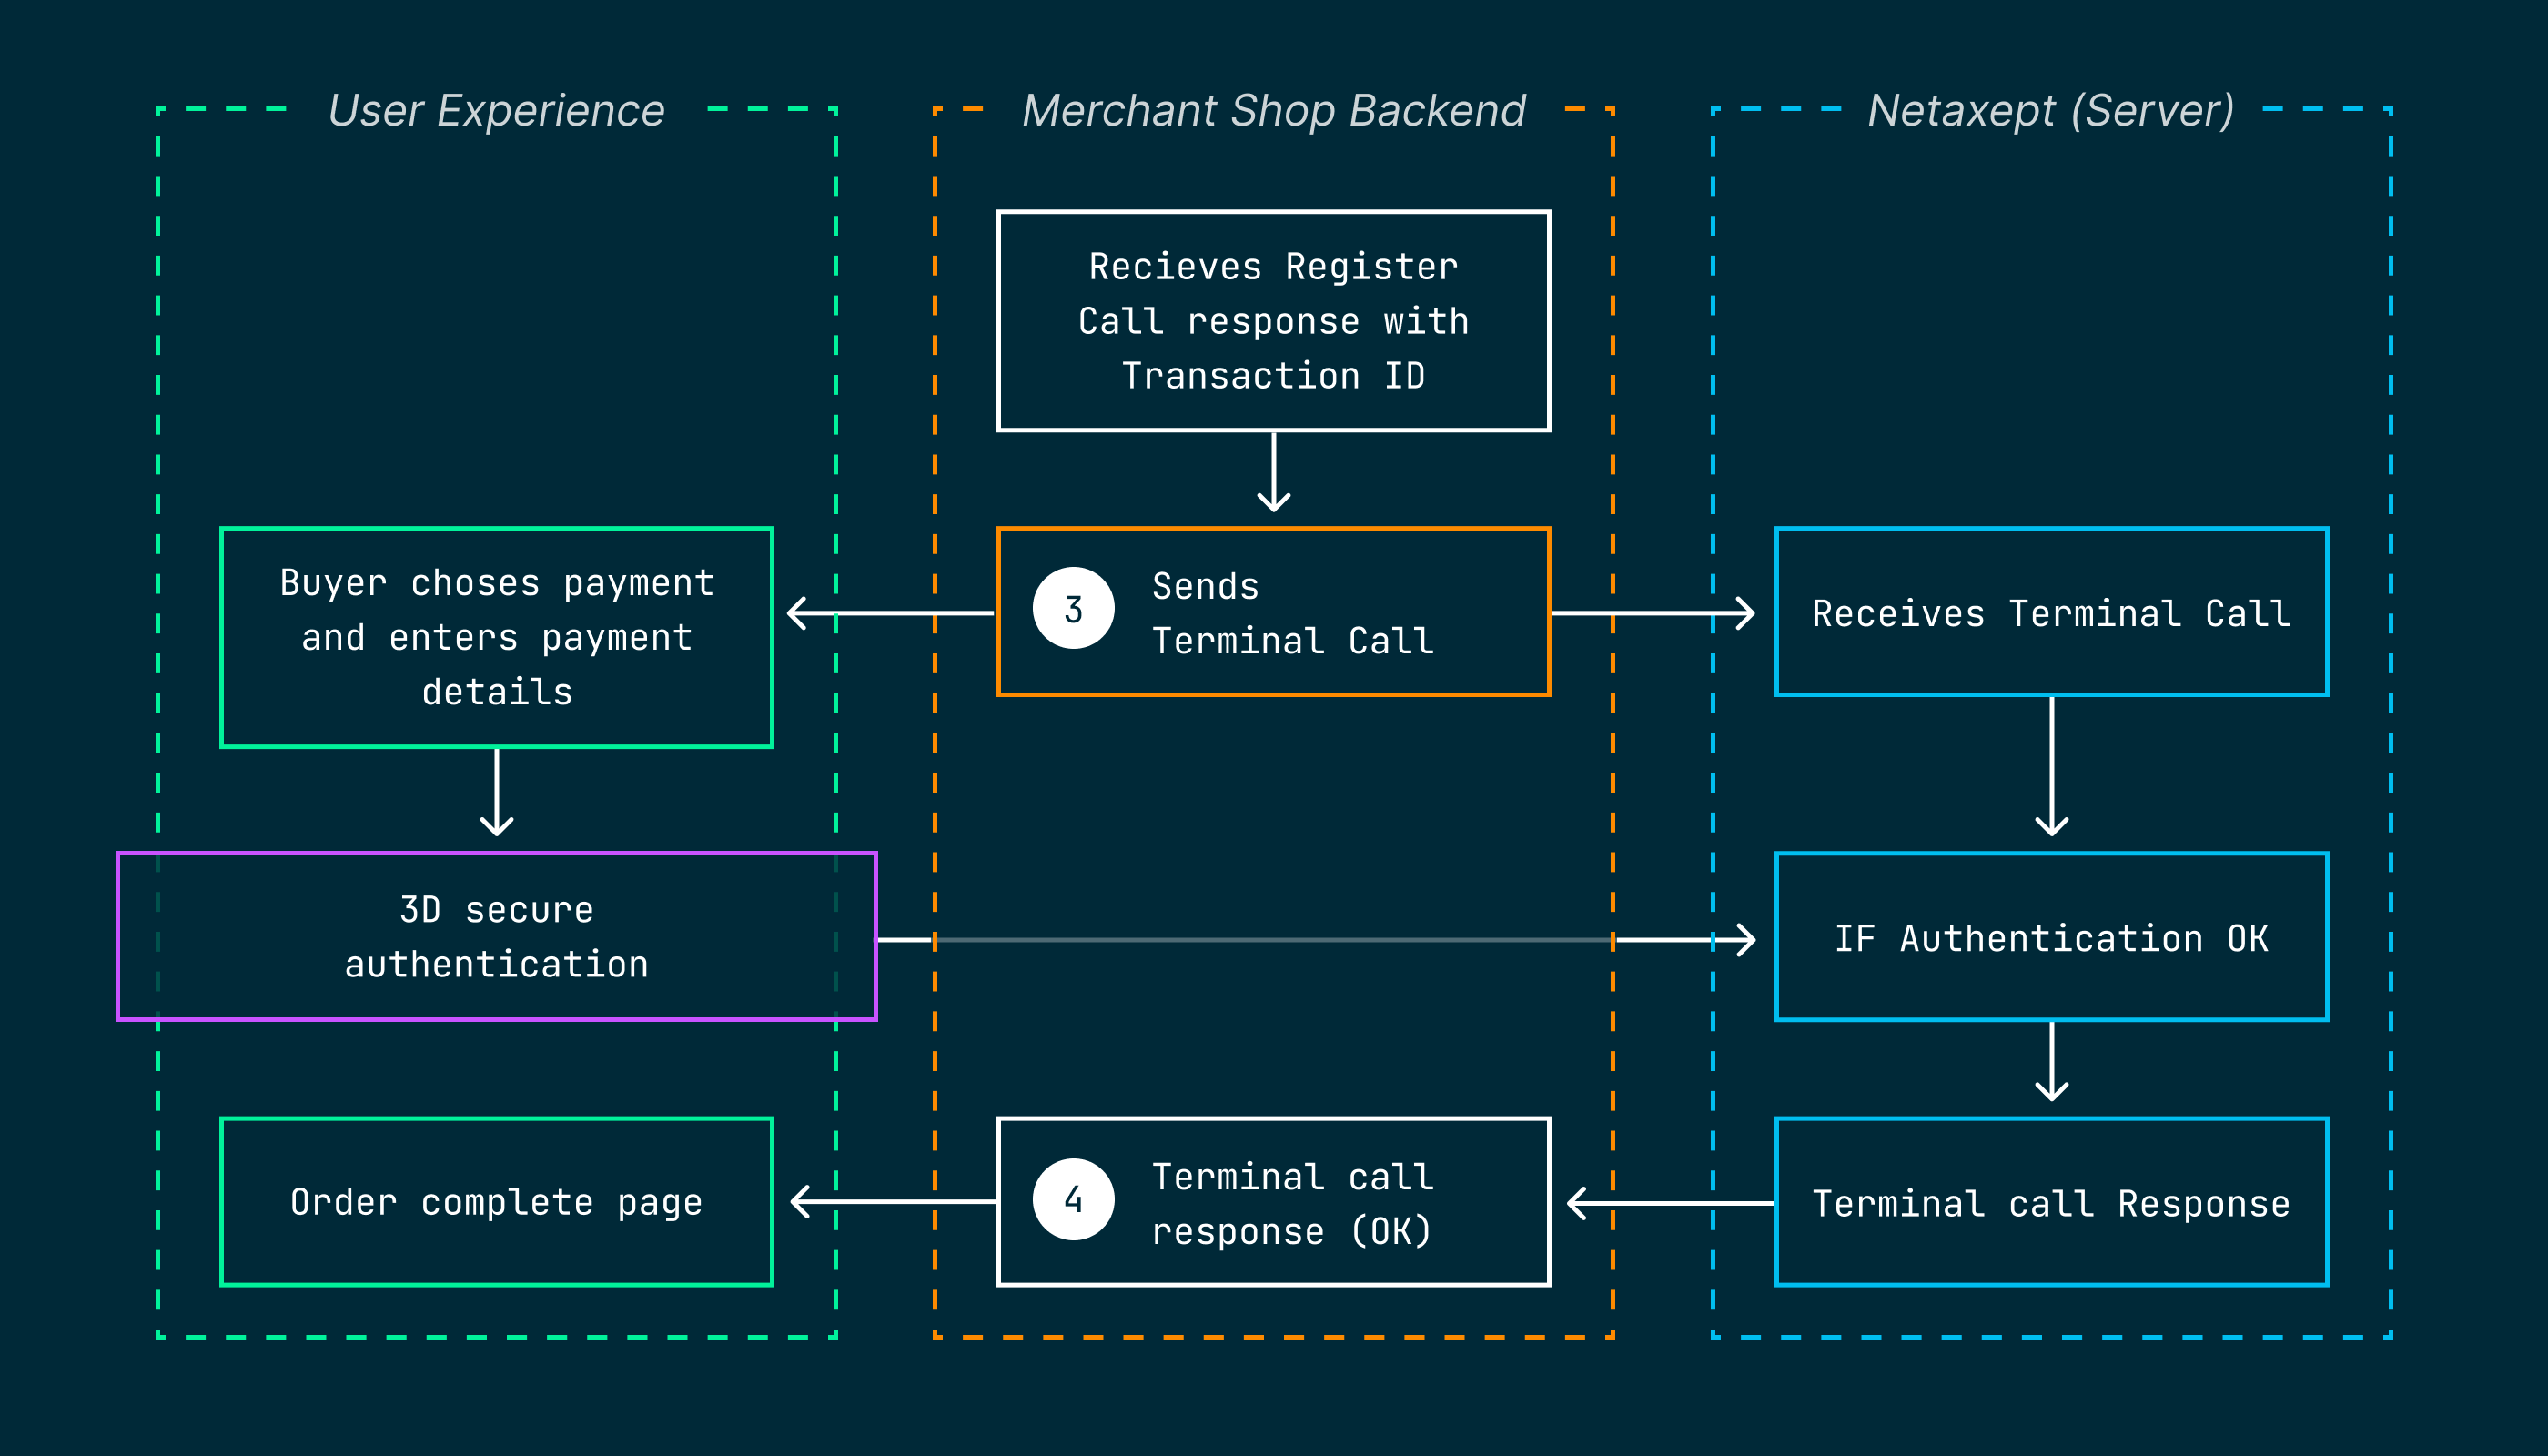
The Netaxept response to your Register call should trigger the Terminal call. The Terminal call must contain your MerchantId as well as the unique TransactionId.
Example Terminal call - line breaks just for readebility
https://test.epayment.nets.eu/Terminal/default.aspx?
  merchantId=MERCHANTID&
  transactionId=TransactionID
As a result of you sending the Terminal call, the customers will be directed to the Netaxept hosted Payment Window . Here they can choose from the available payment methods and enter their payment details. In our example, they choose a card, enter their payment details and must pass the third parties 3D secure authentication.
Please note that it is required to send the Terminal call even if your Payment Window is hosted by you instead of Netaxept. In that case you would have to define the Register call’s Service type parameter serviceType=M to direct your user to a Payment Window hosted by you. For serviceType=M additional Terminal call parameters become mandatory.
4. Terminal response
If Netaxept gets an OK response from the 3D authentication, we send the redirect URL redirectUrl as defined by you in the Register call with the Transaction ID transactionID and the Response code responseCode=OK as the URL's query parameter.
The “OK” response doesn’t mean, the payment was completed yet – it only means the customers have successfully submitted their payment details and potentially passed 3D authentication.
5. Process payments
With the completed Terminal phase, you are now ready to process the transaction and do financial operations such as authorization Process(AUTH), authorization and capture Process(SALE) or account verification Process(VERIFY).