How to connect Integration keys from the Payengine Merchant Center to the Paylink Portal
How to connect Integration keys from the Payengine Merchant Center to the Paylink Portal
Step 1: Create a free Test Account for Paylink. If you already have a Test Account, you can continue with step 2.
The free of charge Test Account can be created via: https://signup.pay-link.eu/en
Your Paylink Test Account is already preconfigured with a Test Merchant ID.
Step 2
Step 2: After testing has been finished, please contact ecomhelp@nexigroup.com and ask for activation of your Paylink Account. Please mention your Instance Name (https://INSTANCENAME.pay-link.eu) in your request.
Step 3 + 4
Step 3: After you receive confirmation from ecomhelp@nexigroup.com that your Paylink Account is activated, you need to login to your Paylink account via https://login.pay-link.eu/de
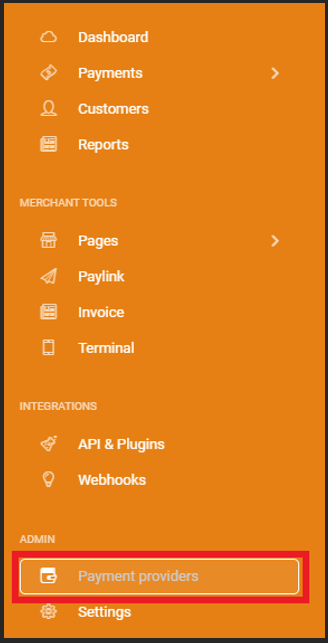
Step 4: Go to Admin -> Payment providers
Select Payment Providers
Step 5
Step 5: Click on „Configure“
Configure Payment Providers

Step 6
Step 6: General Settings
In the General Settings sections, set Mode to „Productive“
Select Productive

Step 7
Step 7: Payment Settings
Activate the payment methods in your Paylink account. Make sure to activate only payment methods which are also set active in your Payengine account.
To review the active payment methods in your Payengine account, login to your Merchant Center. If a Payment Method which is „Inactive“ in your Payengine account but „Active“ in your Paylink Account, your customers will be able to select the payment method but the payment itself will fail.
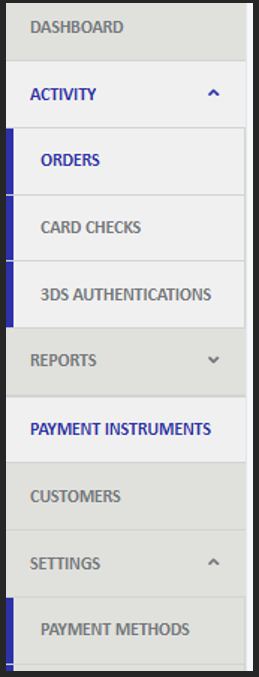
Click on the Menu Tab „Settings“ and „Payment Methods“
Payment Methods
Note
Note: To review which Credit Card Brands are activated in your Merchant Center click on the „Eye“ under „Actions“. All active Credit card Brands are displayed.
Step 7.1
Step 7.1.: Payment methods
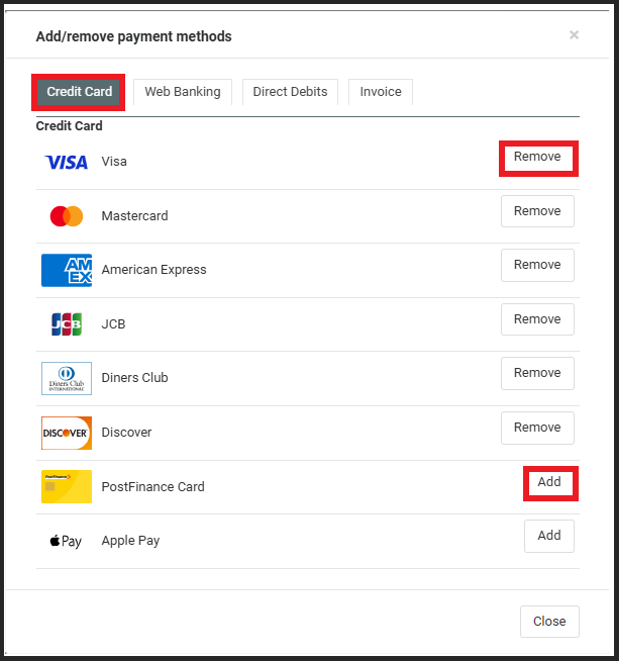
Return to your Paylink Account and click on „Add/remove payment methods“
Add/Remove payment methods

Activate/Deactivate payment method
Select the payment methods by clicking on „Add“ to activate the payment method or „Remove“ to deactivate the payment method. To save the payment method settings, click on „Close“
Credit card Add/Remove
Step 7.2
Note: The individual payment methods are divided into different categories. To view other payment methods, click on the corresponding tab.
Step 7.2.: Currencies
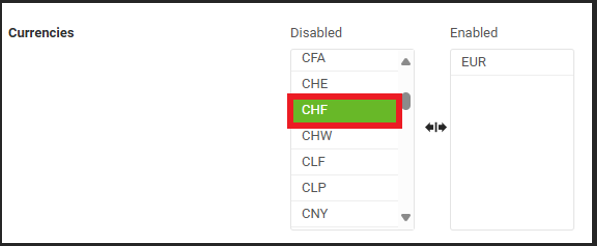
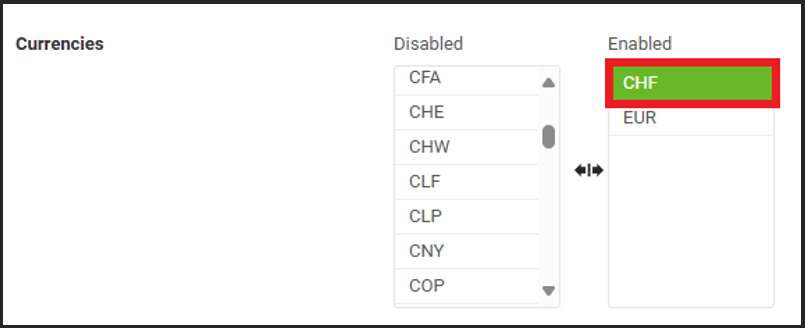
Add all currencies which you wish to enable by clicking on the according Currency displayed in the „Disabled“ section
Currencies
Enabled currencies
To remove an active Currency, click on the according currency at the Tab „Enabled“
Enable currency
Step 8
Step 8: Connection Settings
To technically connect your Paylink account to your productive Payengine account, the Integration Keys from your Merchant Center have to be deposited in your Paylink Account. The required Keys are your Merchant ID and your API Key which can be reviewed in your Merchant Center.
- Login to your Merchant Center
- Your Merchant ID can be reviewed on the Top Right Side on the Screen of your Merchant Center
Review Merchant ID

Generate/Reset API Key
Your API Key can be generated or reset by following the Instructions on this page.
Enter these Keys in your Paylink account via „Connection Settings“ > „Productive account settings“
Connection settings

Step 9
Step 9: Save
Click on the „Save“ button by scrolling down to the end of the page.
Save settings

Paylink setup done
Your Paylink Account is now set up and can be used for live transactions.