Track events using webhooks
This guide is for developers who want to subscribe to different events that affect a payment using webhooks.
Before you start
This guide assumes that you already have integrated Checkout so that you can create payments using the test environment.
Why use webhooks?
Webhooks (or HTTP callbacks) allow you to subscribe to different events that affect a payment and to be notified directly when these events happen. When an event occurs in Checkout, for example when a charge is made or a payment is refunded, this event can be sent along with the associated data.
To keep your backend in sync with Checkout, we highly recommend that you use webhooks. The advantages are many:
- Webhooks are robust against various runtime failures (network failures and other temporary processing failures). Checkout reposts the events until you acknowledge the webhook by returning a 200 HTTP status code.
- Webhooks are efficient since they avoid polling Checkout for state changes.
- Some payment methods (mobile wallets for example) don't guarantee that your customer will return to your checkout page after a completed payment. By using webhooks, you are able to track all payment events even though your customer has left your site.
If you want to get notified for successful subscription charges, you should listen to payment.charge.created.v2. If you want to get informed about failed subscription charge attempts, you should listen to payment.reservation.failed.
This guide shows you the steps you need to take in order to receive notifications from Checkout.
Step 1: Receive a webhook
To be able to receive a webhook, you first need to set up an HTTPS endpoint on your site. The endpoint should read and parse the JSON body of the request in order to get the data associated with the event that was triggered.
The data associated with each event varies. However, all events share the same basic structure. Here is an example:
Webhook payload example
{
   "id": "bcec42e7ba964e568b14691f259cfa3a",
   "merchantId":100017120,
   "timestamp": "2018-01-12T09:40:19.8919+00:00",
   "event": "payment.created",
   "data": {
      ...
   }
}
The data object contains properties specific to each type of event. See the Webhooks API reference for more information about the various properties.
It's time to implement the webhooks endpoint on your website. The following code shows how to read and parse the event payment.created:
Process payment.created event
- PHP
- Node
<?php

$json = file_get_contents('php://input');
$payload = json_decode($json, true);
To acknowledge the webhook sent from Checkout, a 200 HTTP status code is required. Any other status code, even other 2XX codes, will be treated as a failed attempt.
If the webhook was not successfully posted to your endpoint, Checkout will continue to send the webhook with an increasing waiting time between each attempt. If your site still has not responded with 200 after this period, the webhook will not be attempted any more.
Step 2: Test your webhook endpoint
You can use any HTTP(S) client for testing and verifying that your webhook endpoint works as expected. However, two tools that are popular for sending JSON over HTTP(S) are Insomnia and Postman.
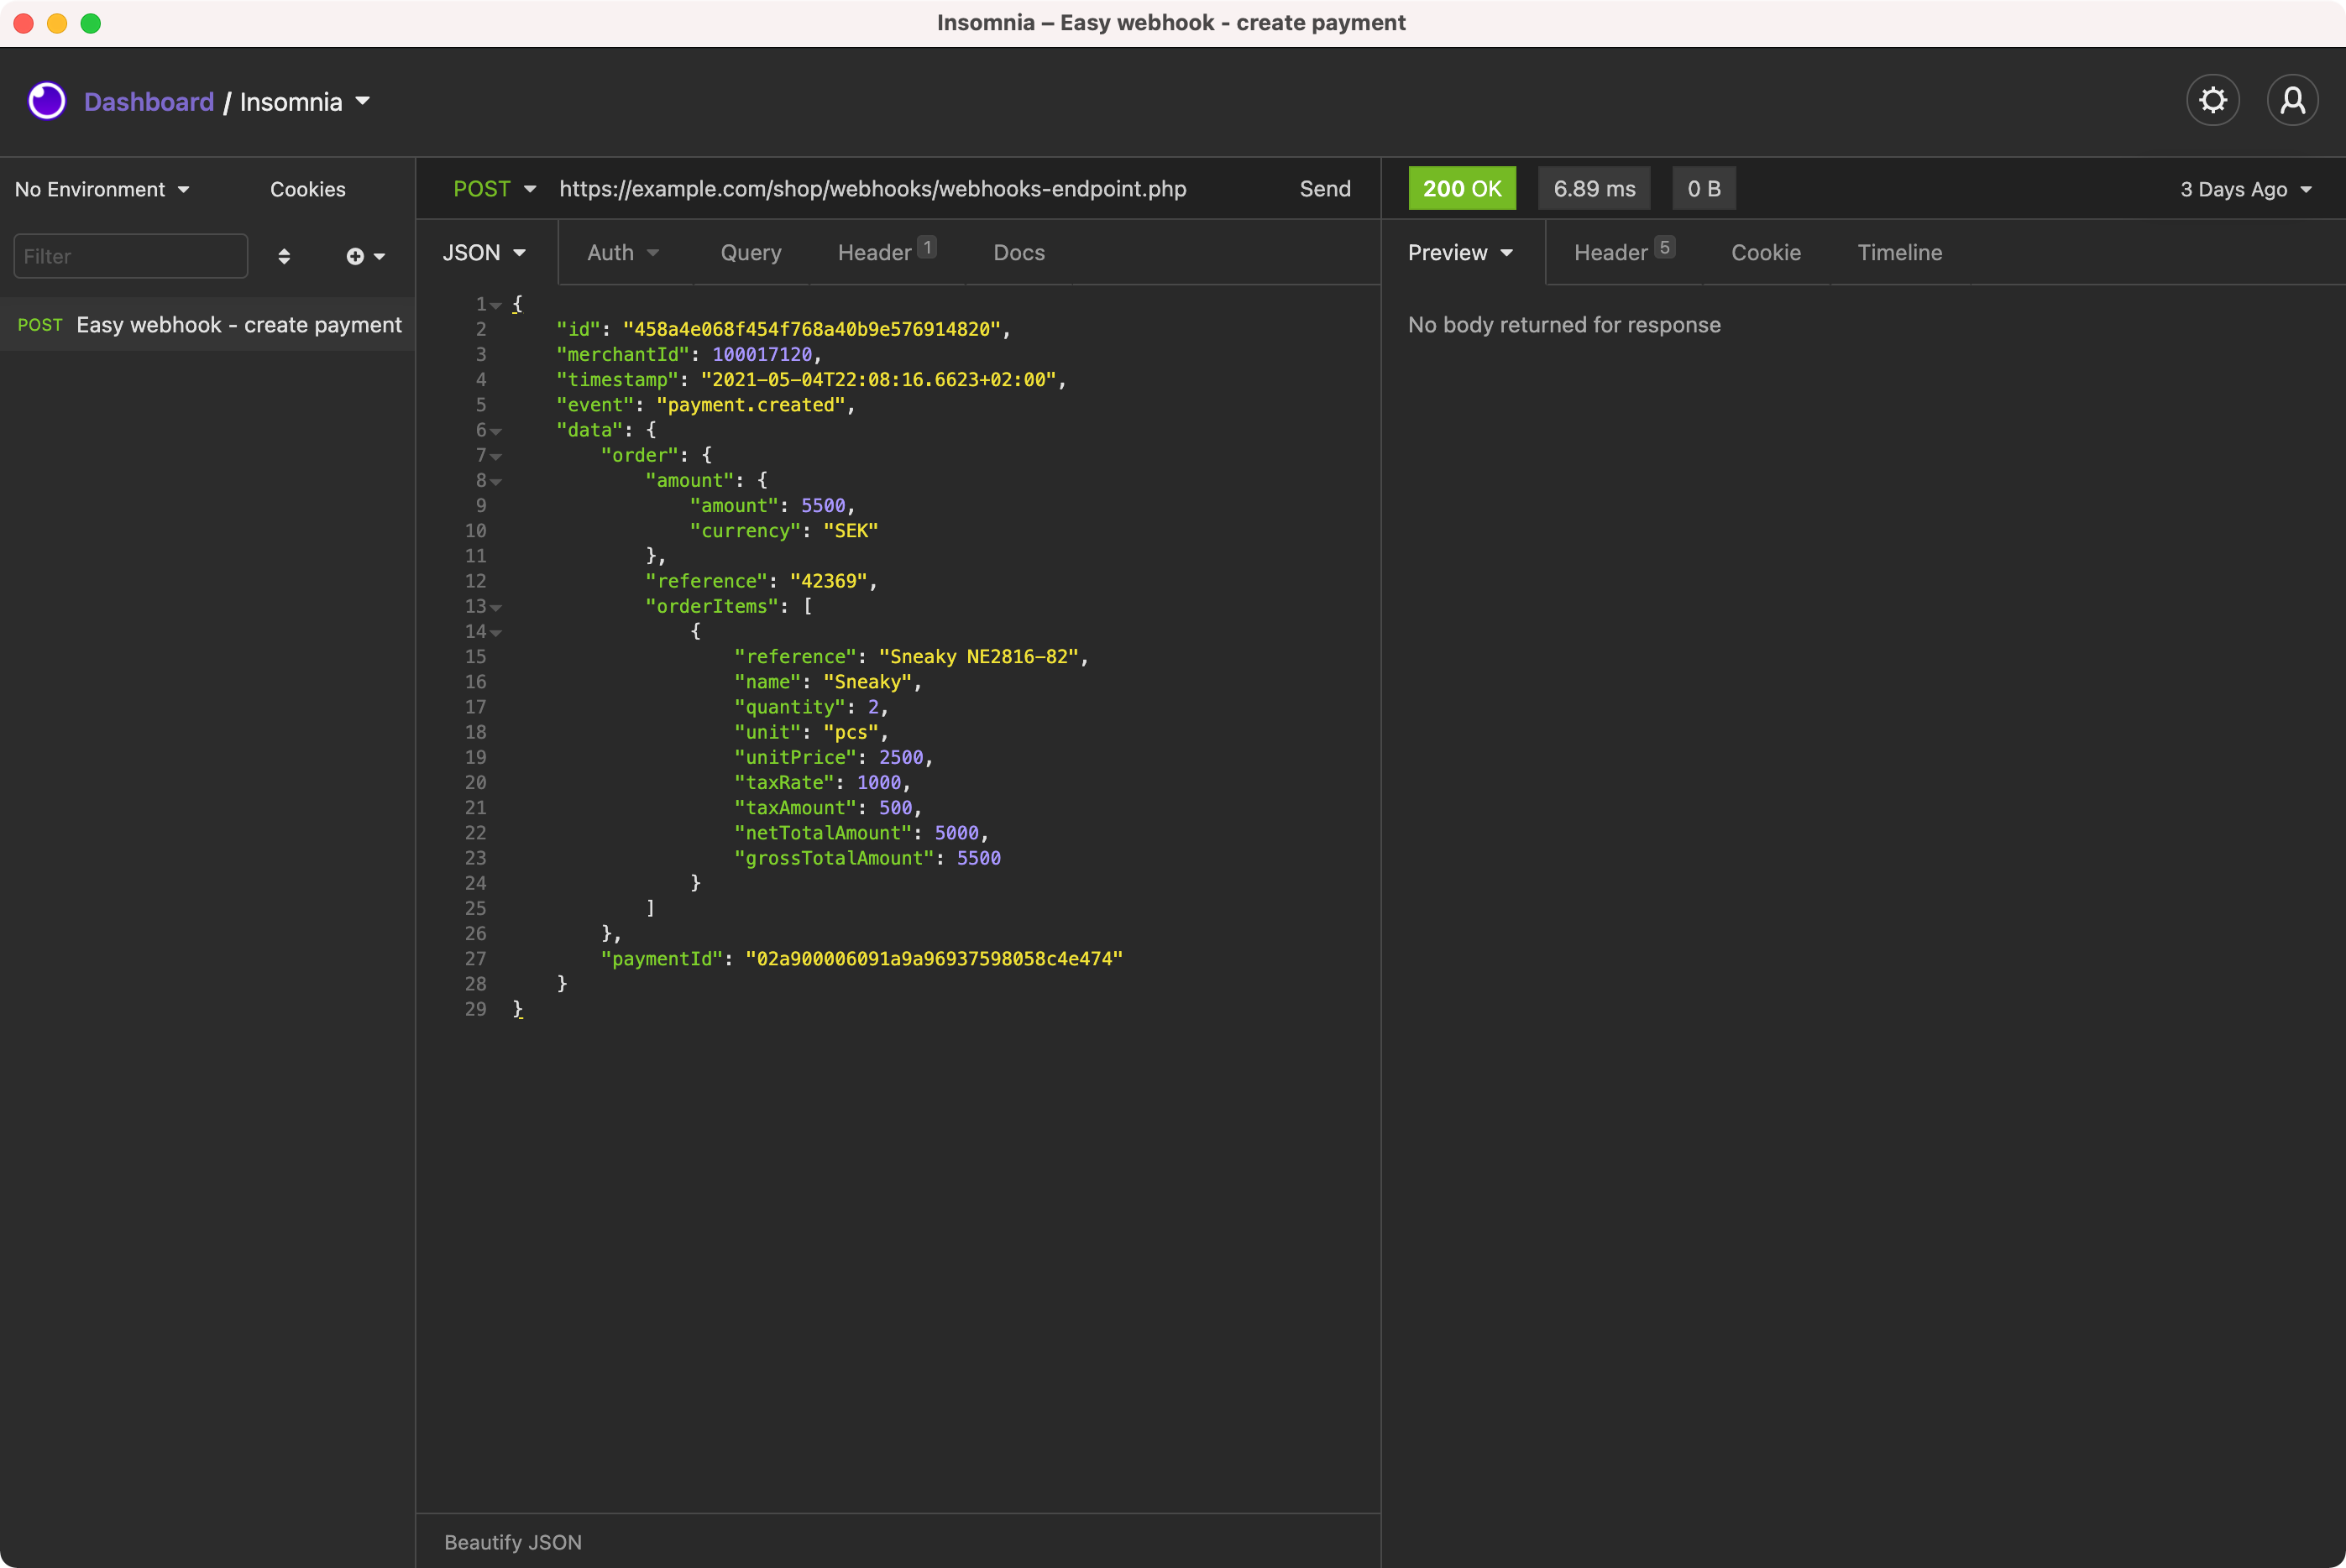
In the following screen shot, Insomnia is used to test an endpoint receiving a webhook. You can see that the endpoint returns the response code 200 (OK).

Test your endpoint using the following payload from the create-payment event. Make sure that your endpoint returns the response code 200.
Payload for the payment.created event
{
    "id": "458a4e068f454f768a40b9e576914820",
    "merchantId": 100017120,
    "timestamp": "2021-05-04T22:08:16.6623+02:00",
You can find complete example request bodies in the API reference for Webhooks.
Checkout requires a secure connection using HTTPS when sending webhook notifications to your endpoint.
Make sure you can send and parse a sample webhook notification request over HTTPS before moving on to the next step.
Step 3: Subscribe to events
Once your HTTPS endpoint has been implemented and tested, you can now subscribe to various events using the Payment API.
Webhooks are configured per payment and can be specified in the request body of the following methods:
The methods accepts a notifications object that contains a list of webhooks.
In the following example, you can see how to subscribe to the 'create.payment' event using the Create payment method:
Subscribe to events
{
   "order": {
      "items": [
         {
Each webhook specifies an eventName and an url that should be invoked whenever the specied event is triggered in Checkout for the associated payment.
The value specified in the authorization property will be set in the HTTP Authorization request header sent from Checkout. You can also define customer headers that will be added to the HTTP request for a specific webhook. Here is an example where two additional headers (HeaderX and HeaderY) will be added to the webhook notification request:
Using customer headers
{
   "order": {
     ...
   },