Checkout for PrestaShop
This guide describes how to install, configure, and use the Checkout webshop module for PrestaShop 1.7.
Before you start
Before you start, you need an Checkout Portal account. See the guide Create account for more information about creating a free test account.
Overview
Our PrestaShop 1.7 plugin is the perfect extension that enables you to use the Checkout to its full potential for your PrestaShop store. Checkout supports most popular payment methods.
You may see below all the payment methods offered by Checkout. This list refers to all markets.
Depending on your country or region, the list may vary. If you are uncertain about a specific payment method and whether it is available in your country or region, please contact Support for more information.
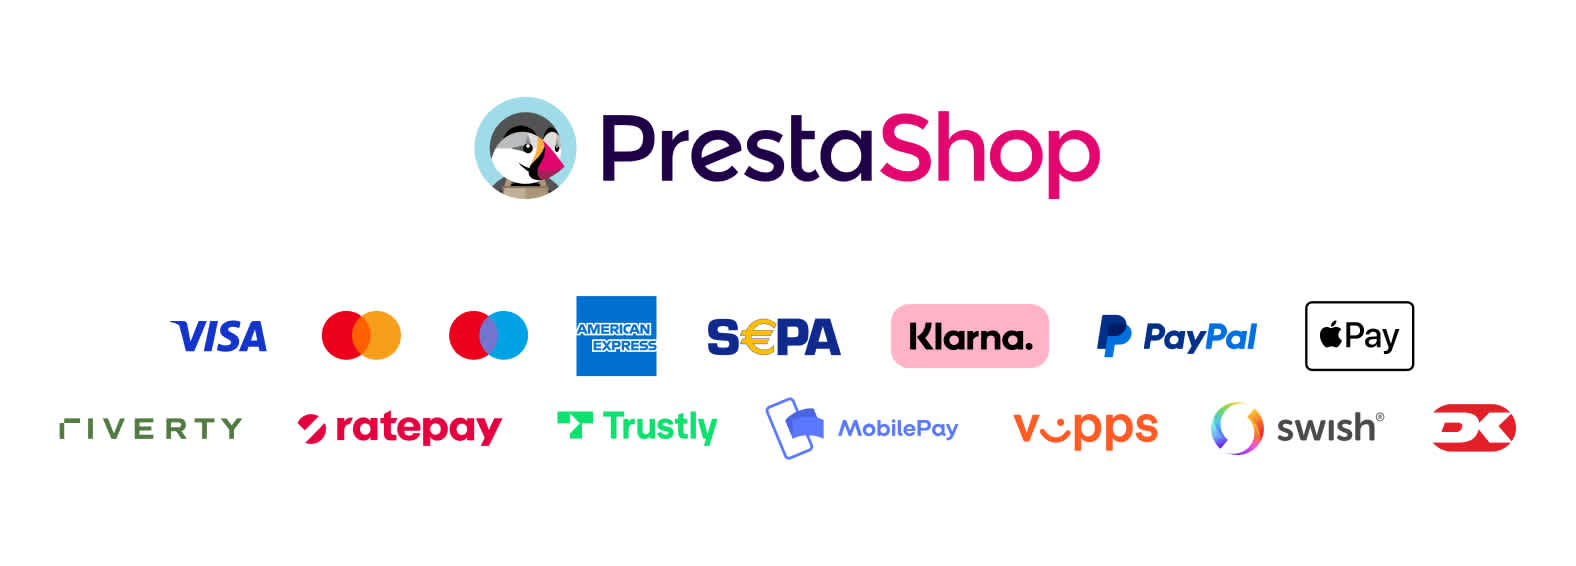
Apple Pay configuration for PrestaShop plugin is described on the Apple Pay payment method page.
Shop features
- The fast checkout with "remember me" functionality.
- Embedded checkout for an optimized user experience. Users are not redirected outside PrestaShop.
- A smart mix of payment methods to suit all preferences.
- Multiple checkout languages and currencies for selling in your domestic market and abroad.
- Fully syncronized payment statuses in admin order page with Checkout portal.
- Intuitive order management with synchronized captures and refunds from admin order details page.
- Custom webhook events for real-time payment statuses.
- Custom Build-in debugging features.
- The option to show each payment method as separate option, before loading the checkout.
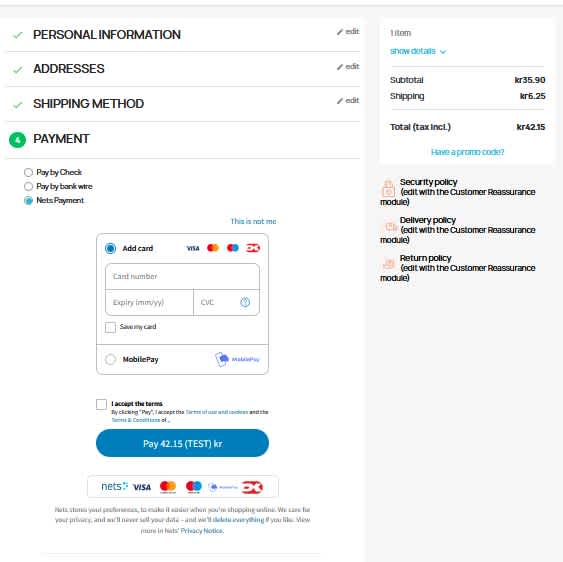
The following screenshot shows a checkout page provided by the Checkout module (Embedded and Nexi Group Payment as one payment option):
Alternatively, merchants can use the setting Payment Split to change the UI. When activated the UI shows the following:
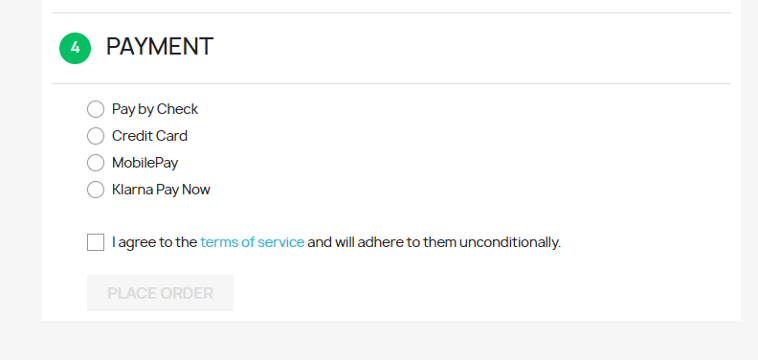
Selecting one of the options will load the Checkout showing only the selected payment method:

This setting is especially recommended if you use other payment providers/payment options outside the Checkout, such as all payment methods are visible right away.
Administration area features
- Quick setup and flexible configuration.
- Intuitive order management with synchronized captures and refunds.
- Compatibility with discounts, tax (VAT), and shipping options.
- Compatible with PrestaShop multistore feature for managing multiple shops.
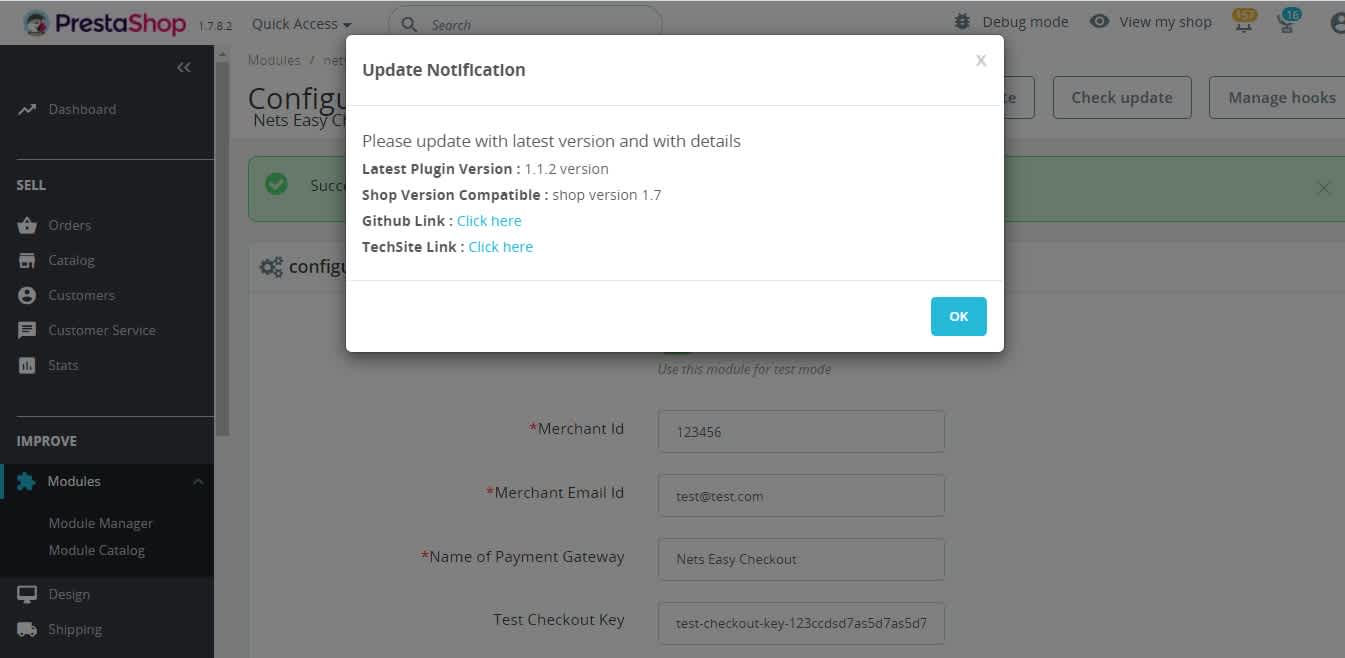
- Latest plugin version notification with compatibility, github and techsite link.
Installation
Install module
Follow the step below to install the Checkout module in PrestaShop.
- Download the plugin from above github link.
- Extract the zip file.
- Rename extract folder name to netseasy with folder name
- Create zip of netseasy folder.
- Login to Admin Panel.
- Click on Modules > Module Manager tab and click on "Upload a module".
- Drop your netseasy folder zip archive here or select from your machine.
- After installation completed, press “Configure”.
- Set your API Credentials and configuration.
Configuration
After installing the module, you need to do some basic configuration of the module:
- Navigate to Improve > Modules > Modules Manager in PrestaShop.
- Select category as Payment or search nexicheckout in searchbox and click on Configure.
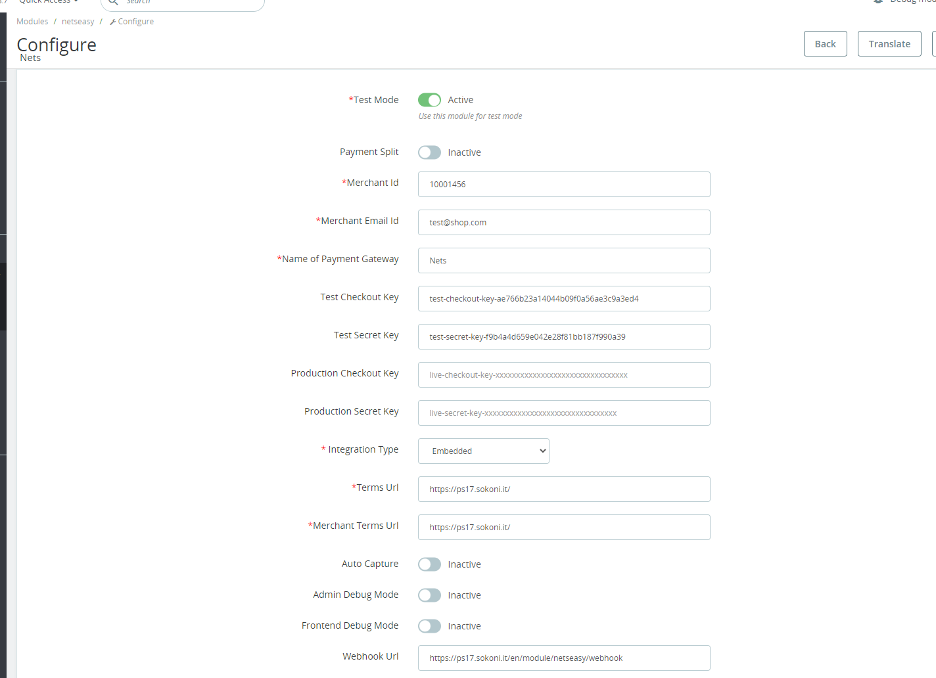
- Fill out the required fields, such as Test Mode, integration keys (secret keys and checkout keys), Terms Url and Merchant Terms Url.
The integration keys can be found in Checkout Portal. See the following pages for more help:
The screenshot below shows the configuration page in the administration area for the module:
Payment split is a new setting. When activating this setting, the merchant can configure each payment method on its own:
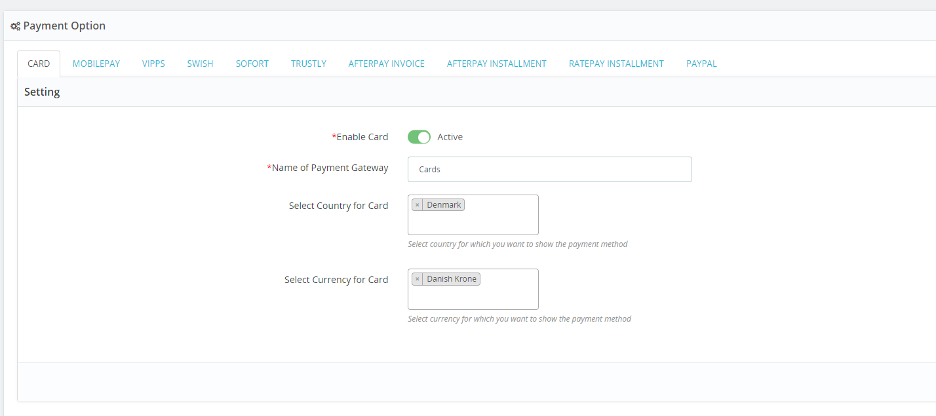
To show each payment method as a separate option, you have to activate all the payment methods that you have activated with Checkout and enable them for the right countries and currencies.
The screenshot below shows the latest plugin version notification in configuration page in the administration area for the module:
The following table lists all the settings you can configure in the administration area for the Checkout module:
| Configuration setting | Description | ||||||||||||||||||||||||||||||||||||||||||||||||||||||||||||||||||||||||||||||||||||||||||||||||||
|---|---|---|---|---|---|---|---|---|---|---|---|---|---|---|---|---|---|---|---|---|---|---|---|---|---|---|---|---|---|---|---|---|---|---|---|---|---|---|---|---|---|---|---|---|---|---|---|---|---|---|---|---|---|---|---|---|---|---|---|---|---|---|---|---|---|---|---|---|---|---|---|---|---|---|---|---|---|---|---|---|---|---|---|---|---|---|---|---|---|---|---|---|---|---|---|---|---|---|---|
| Test mode | Choose test mode if you want to make test purchases using the test environment. There are sample card numbers and invoice addresses for testing purposes. Live mode requires an approved account. | ||||||||||||||||||||||||||||||||||||||||||||||||||||||||||||||||||||||||||||||||||||||||||||||||||
| Payment Split | Choose to show the payment methods as separate options before loading the checkout. This is especially recommended if you use other payment methods outside Checkout. | ||||||||||||||||||||||||||||||||||||||||||||||||||||||||||||||||||||||||||||||||||||||||||||||||||
| Merchant Id | Your merchant id from Checkout Portal | ||||||||||||||||||||||||||||||||||||||||||||||||||||||||||||||||||||||||||||||||||||||||||||||||||
| Merchant Email Id | Your merchant email address. | ||||||||||||||||||||||||||||||||||||||||||||||||||||||||||||||||||||||||||||||||||||||||||||||||||
| Name Of Payment Gateway | It display payment gateway name as payment option in checkout page. | ||||||||||||||||||||||||||||||||||||||||||||||||||||||||||||||||||||||||||||||||||||||||||||||||||
| Test Checkout key | Your checkout key for test purchases from Checkout Portal. | ||||||||||||||||||||||||||||||||||||||||||||||||||||||||||||||||||||||||||||||||||||||||||||||||||
| Test Secret key | Your secret key for test purchases from Checkout Portal. | ||||||||||||||||||||||||||||||||||||||||||||||||||||||||||||||||||||||||||||||||||||||||||||||||||
| Production Checkout key | Your live checkout key from Checkout Portal. | ||||||||||||||||||||||||||||||||||||||||||||||||||||||||||||||||||||||||||||||||||||||||||||||||||
| Production Secret key | Your live secret key from Checkout Portal. | ||||||||||||||||||||||||||||||||||||||||||||||||||||||||||||||||||||||||||||||||||||||||||||||||||
Congratulations!
You've now installed and configured the Checkout webshop module. If you have further questions, please see the troubleshooting section below or reach out to our support.
Order management
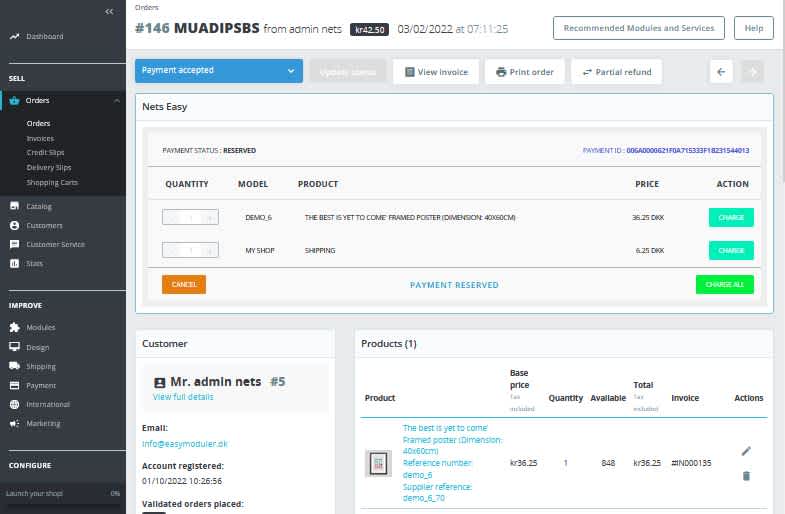
It's possible to manage orders directly in the PrestaShop administration area:
- Navigate to SELL > Orders in PrestaShop.
- Click on an order line to access order details.
- Choose your desired action. Click Charge All or click the Charge button for partial charge. Click Refund All or click the Refund button for partial refund. Click Cancel to cancel the payment. Checkout plugin will synchronize automatically. The payment status will also be updated in Checkout portal.
All transactions performed by Nexi Group are accessible in Checkout Portal.
The following screenshot shows the list of orders in the PrestaShop administration area:
Troubleshooting
Below are some of the most common configuration errors, their cause and steps that you can follow to solve them.
Checkout payment plugin is not visible as a payment method
- Temporarily switch to the PrestaShop 1.7 standard template. Custom templates might need additional changes to display correctly. Consult with your web designer or developer.
Nexi Group payment window is blank
- Ensure your integration keys in the Nexi Group plugin settings are correct and do not contain additional blank spaces.
- Temporarily deactivate third party plugins that might affect the functionality of the plugin.
- Check if there are any temporary technical inconsistencies: https://nets.eu/Pages/operational-status.aspx
Payments in live mode don't work
- Ensure you have an approved Live Checkout account for production.
- Ensure your Live Checkout account is approved for payments with the selected currency.
- Ensure payment method data is correct and supported by your Checkout agreement.
Go live checklist
For more information, refer to the section Go-live checklist.