Support subscriptions
This guide is for developers who want to add support for subscription payments to their checkout page.
Before you start
This guide assumes that you have followed and implemented the guide Integrate Checkout on your website. So, before you read this guide you should already have a checkout page up and running that handles single payments.
Overview
Subscription payments (recurring payments) enable you to charge your customers on a regular basis, for example a monthly subscription for a product the customer must pay for every month.
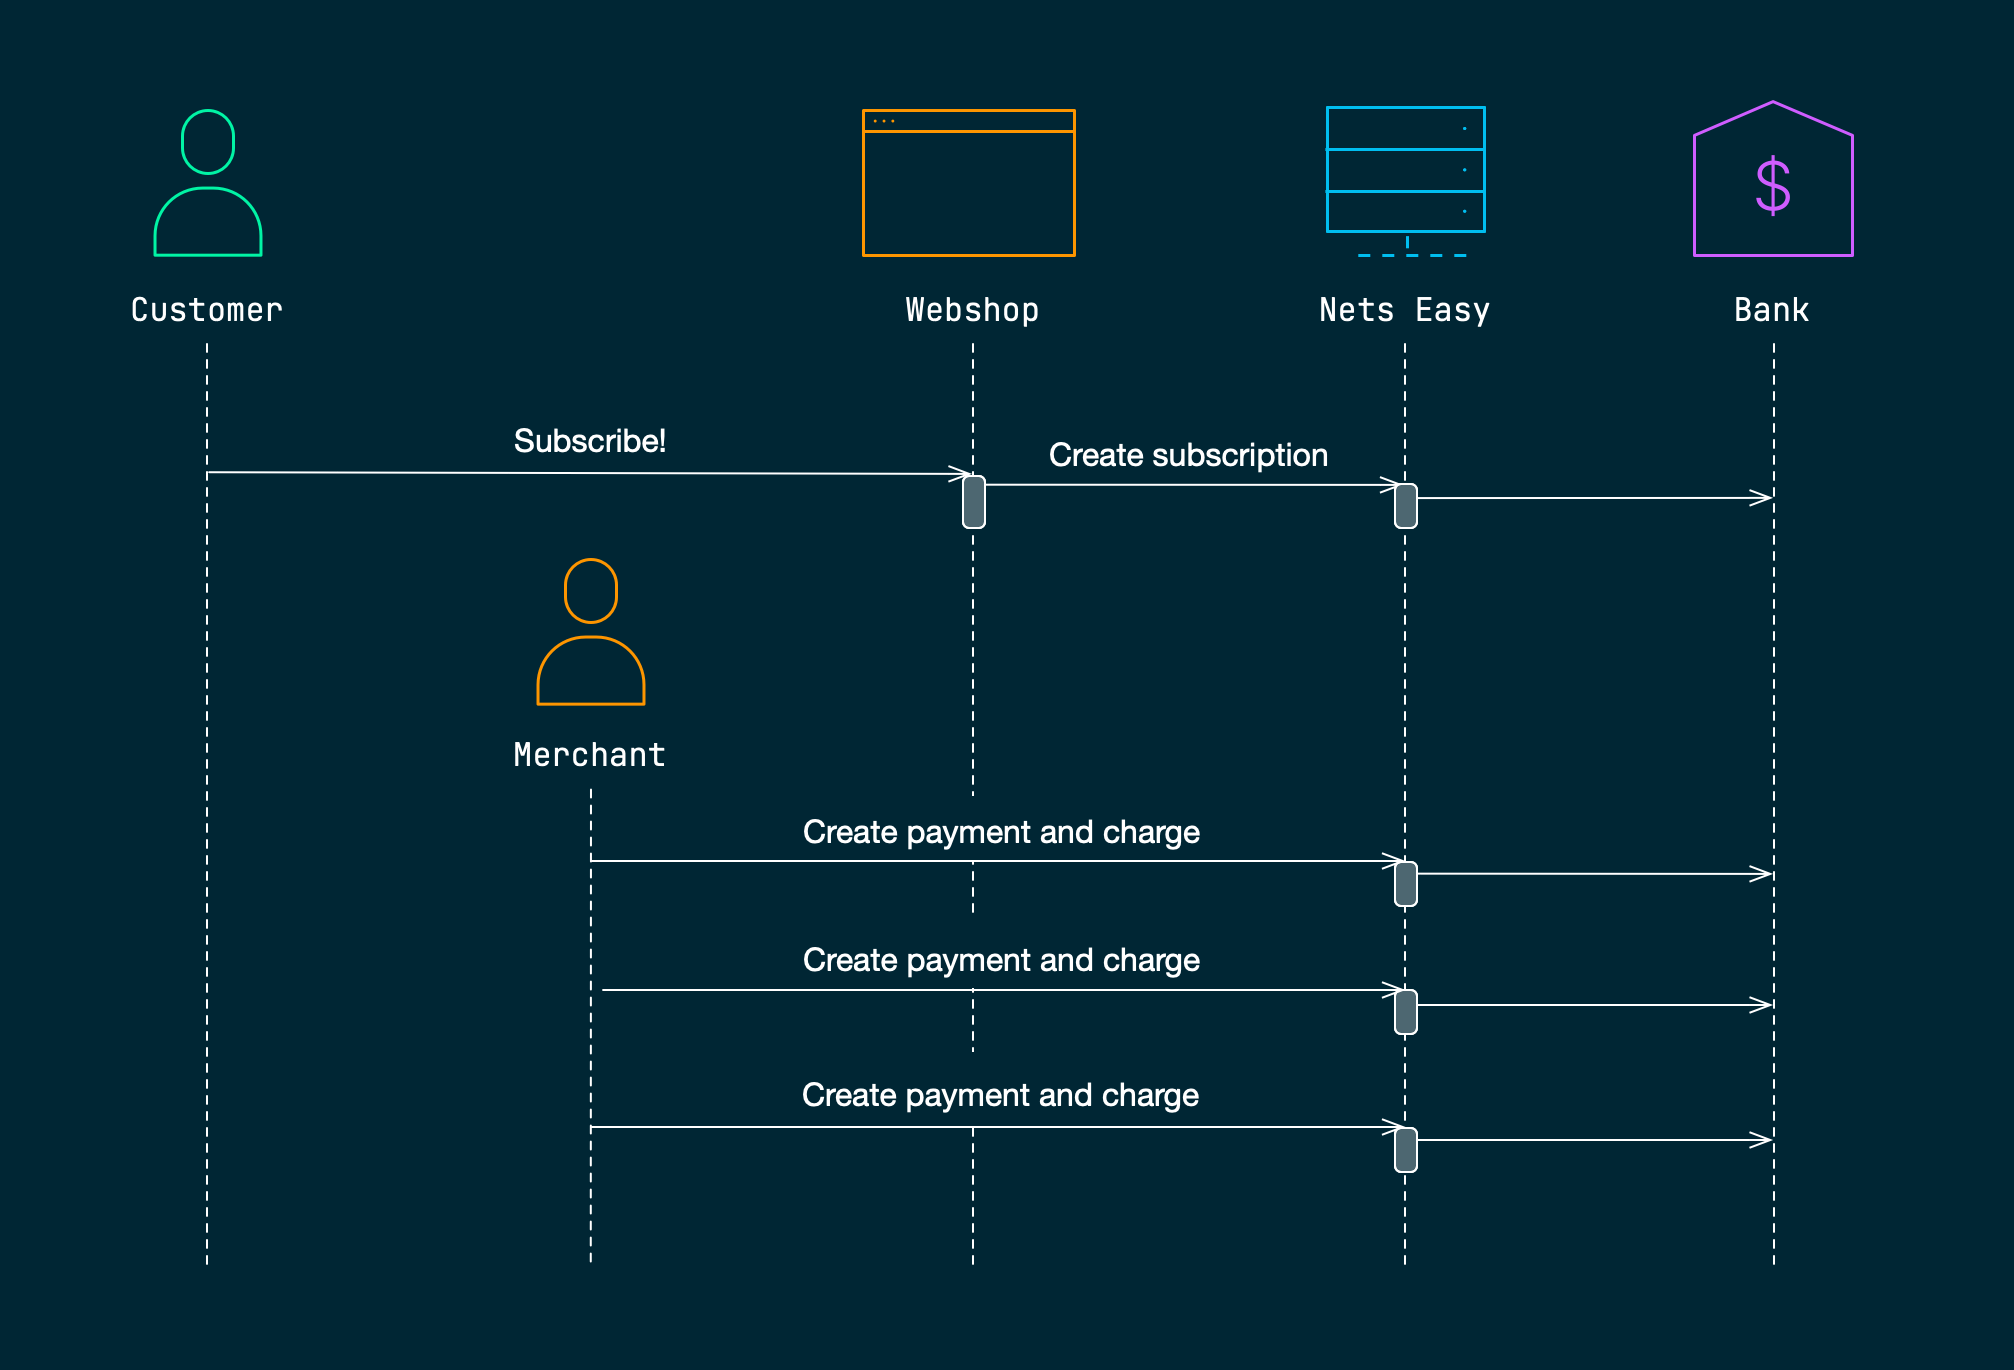
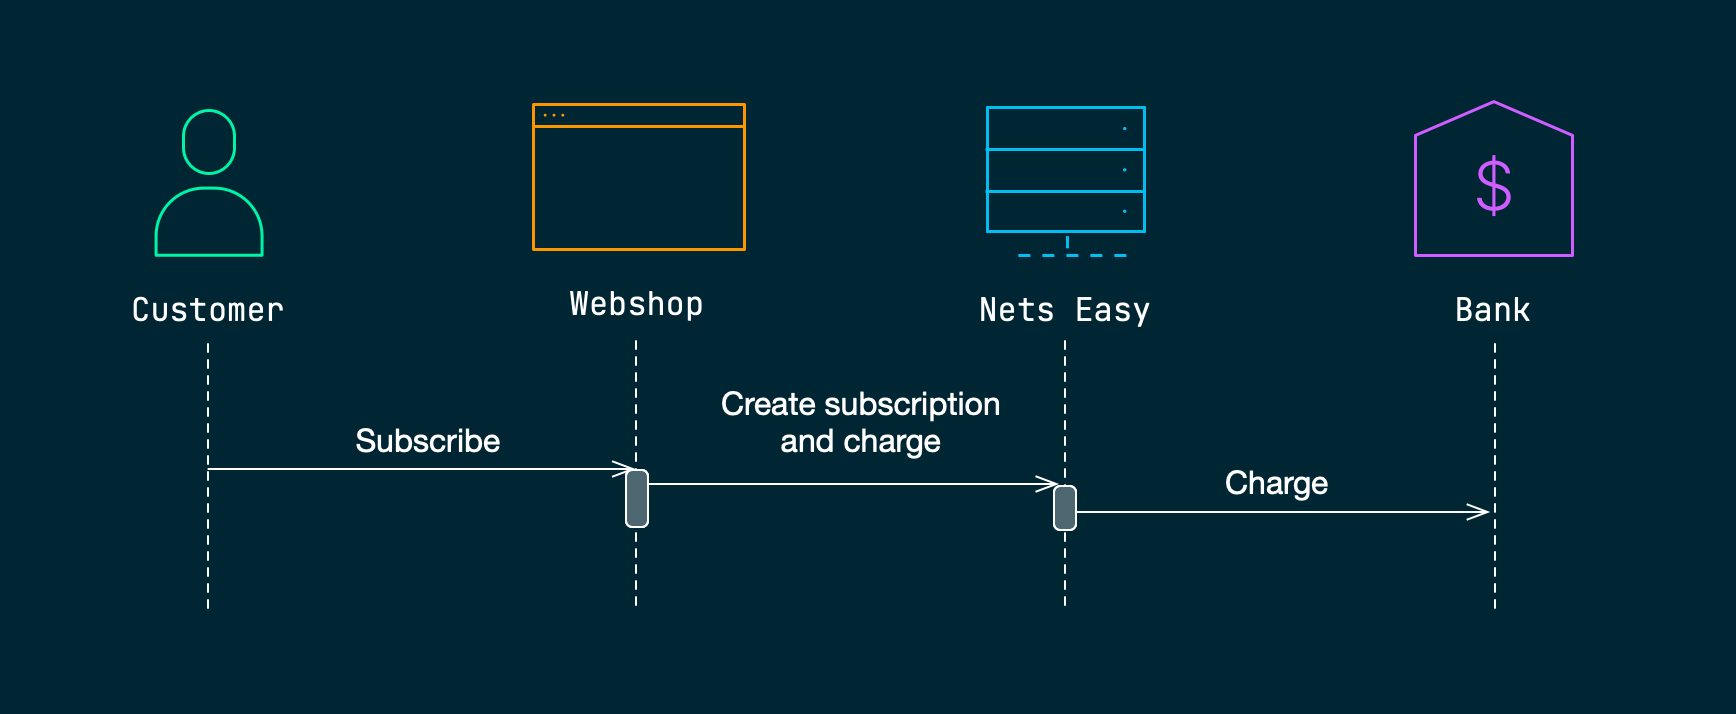
A subscription is always associated with at least one payment object. A new subscription is created by the Create payment method but with some additional parameters that specify the terms for the subscription. Once a subscription has been created, you can charge the subscription. At every charge, a new payment object is created and then automatically charged.
The subscription regulates how often and for how long you are allowed to create new payments. However, you are free to provide new order items and alter the amount for each individual payment.

As the image above shows, once the subscription has been created, you can create new payments and charge the subscription without the need for additional interaction with the customer.
Important
It is important to create a payment with unscheduled subscription object amount=0 to verify the card.
If the card is valid, you will be able to query for the token (unscheduled subscription ID) and use it for future charges.
This is the compliant way to register a card without charging the customer, and at the same time to be able to get a token back.
Step 1: Create a new subscription
Assuming that you already have a checkout page that can manage single payments, the change required to create a subscription is straightforward.
As already mentioned, this guide builds upon the web integration guide (embedded or hosted). To change the checkout to handle subscription payments rather than single payments, update the JSON request body that is passed when calling the Create payment method. Here is an example of an updated version of payload.json that includes the required subscription properties:
Create subscription
{
    "order": {
        "items": [
            {
Remember to replace the text <YOUR_WEBSITE> in the JSON request body.
It is possible to specify an amount greater than zero and make an initial charge when creating the subscription (see the following step).
Troubleshooting
It is expected that zero-amount is the correct setting in the Create Payment request. In case this setting does not pass and cards are getting declined when verifying, that is likely because the issuing bank doesn't allow zero-amount verifications.
To overcome this problem, please contact Support and we will navigate you through this issue.
Notice the subscriptions properties added to the end of the body:
- The property
subscription.intervaldefines the minimum number of days between each recurring charge. In this case we use the value 0 which means no payment interval restrictions. - The property
subscription.endDatespecifies the date that the subscription will expire. You are not allowed to charge the subscription after this date has passed.
A successful request will return a JSON response similar to this:
Create subscription (response)
{
  "paymentId": "0260000060003b7b47f0833960dc60d6"
}
The reponse object only contains a paymentId which will be used throughout your customer's checkout flow. Once a valid payment card has been provided and your customer accepts the subscription, a new subscriptionId will be created.
Step 2: Make an initial charge (optional)
When you create a subscription, you have the option to make an initial charge at that time.

By setting the boolean property checkout.charge to true, you tell Checkout that you want to charge the customer at the actual time when the subscription is created. The following JSON payload will create a new subscription and also automatically charge the customer for the specified order:
Create subscription with initial charge
{
    "order": {
        "items": [
            {
Step 3: Test the subscription checkout
It's time to test the subscription checkout:
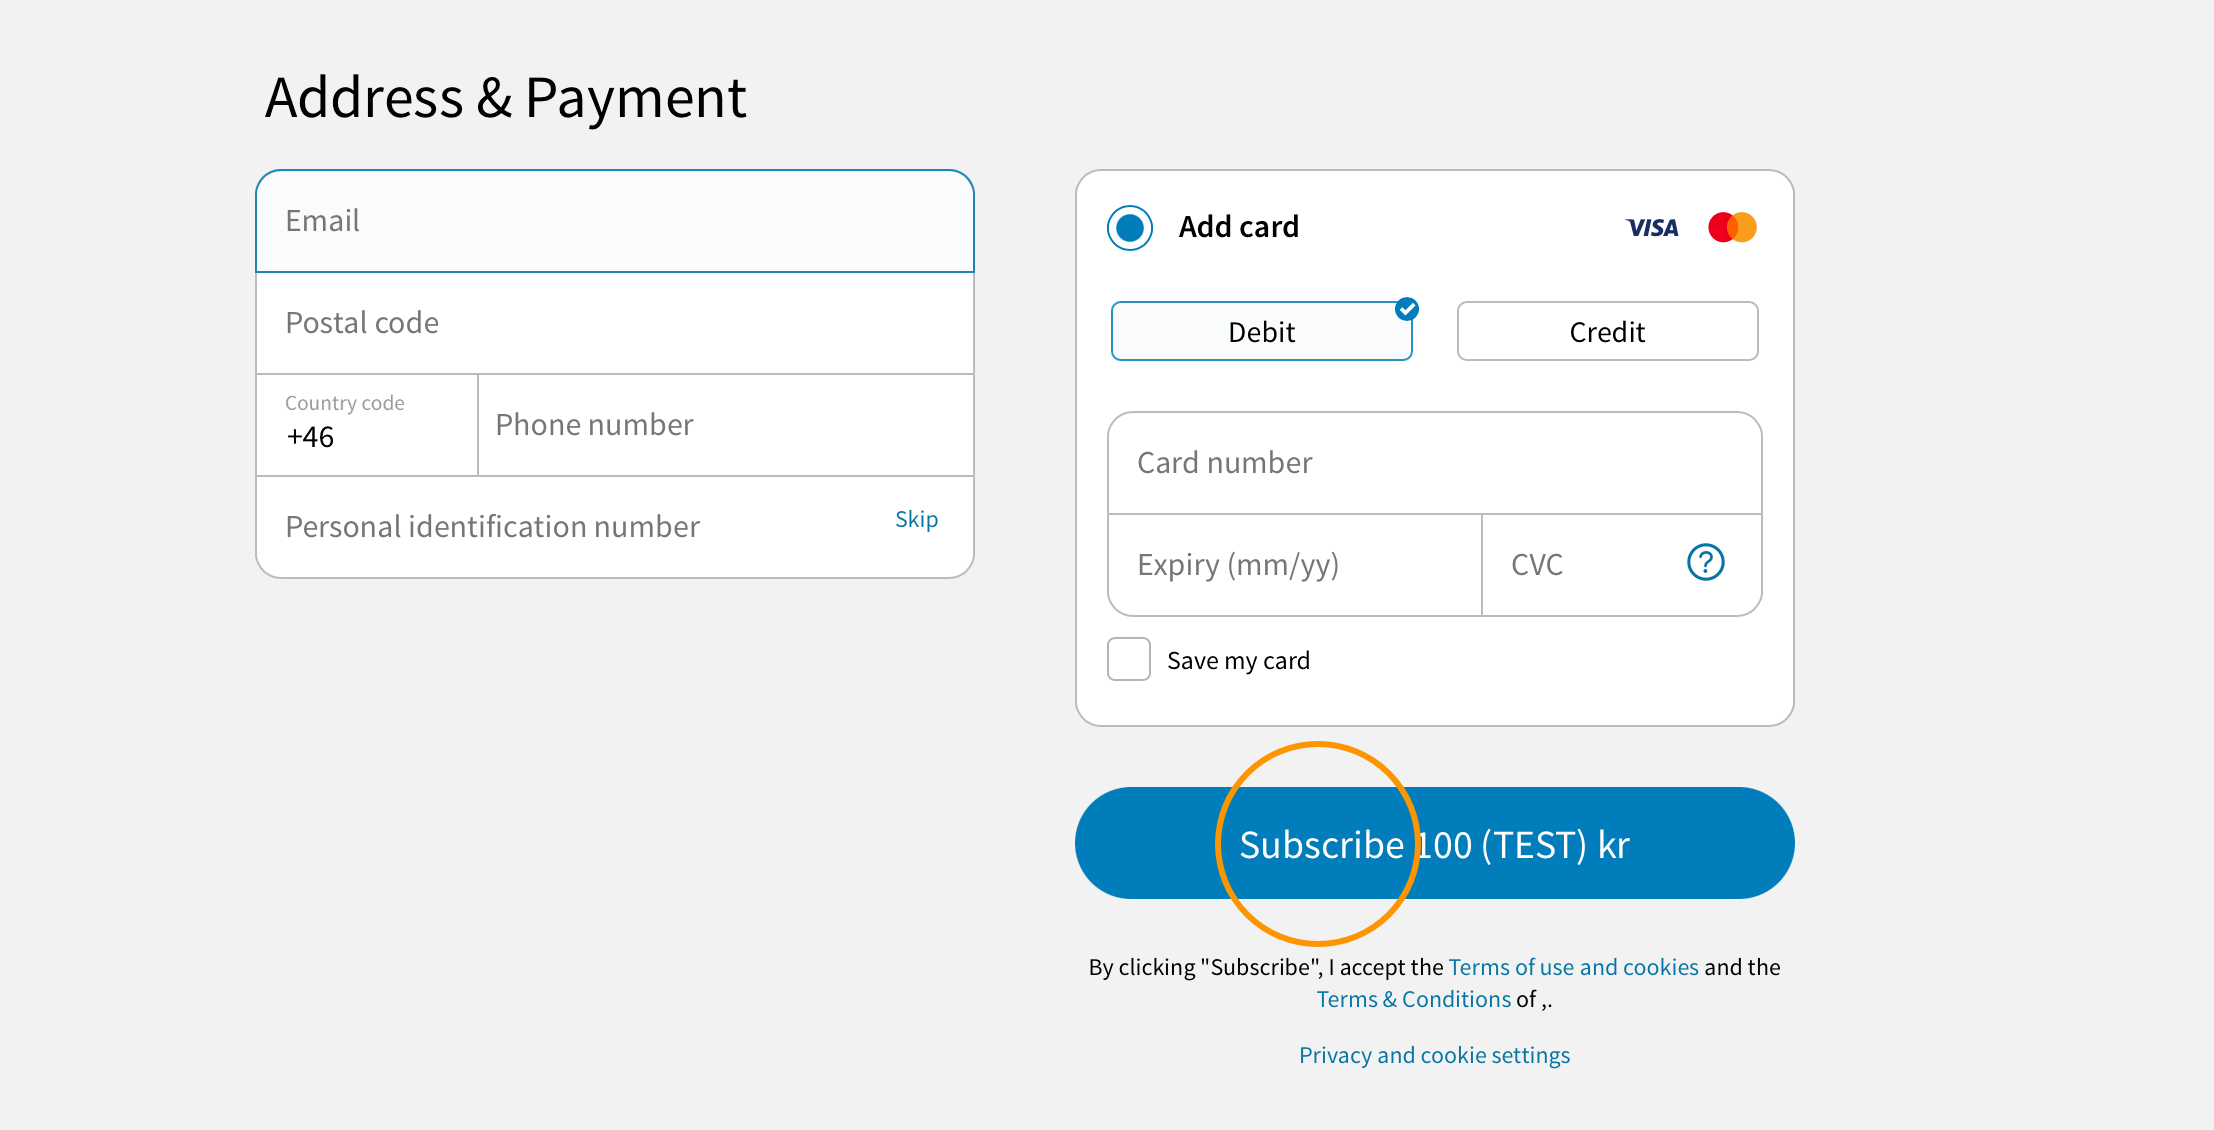
- Navigate to your checkout page in a web browser. If you have successfully created a subscription payment, the text on the payment button should read "Subscribe" rather than "Pay" (see the image below).
- Fill out the address form using your email, phone, and postal code.
- Insert any of the sample card numbers and click the "Subscribe" button.

It is possible to customize the text on the Subscribe button. See the guide Customize content for more information.
Troubleshooting
In the example request body from step 1, an embedded integration is used. If you are using a hosted integration, you need to change the checkout parameters in the request body to match a hosted checkout.
Once the subscription has been created, you need to obtain the subscription identifier. Typically you would persist all the subscription identifiers in your backend so that you can charge them on a regular basis later on.
There are two ways to retrieve information about a new subscription:
- Find the subscription payments in Checkout Portal
- Get payment and subscription details using the Payment API
Step 4: View subscriptions details in Checkout Portal
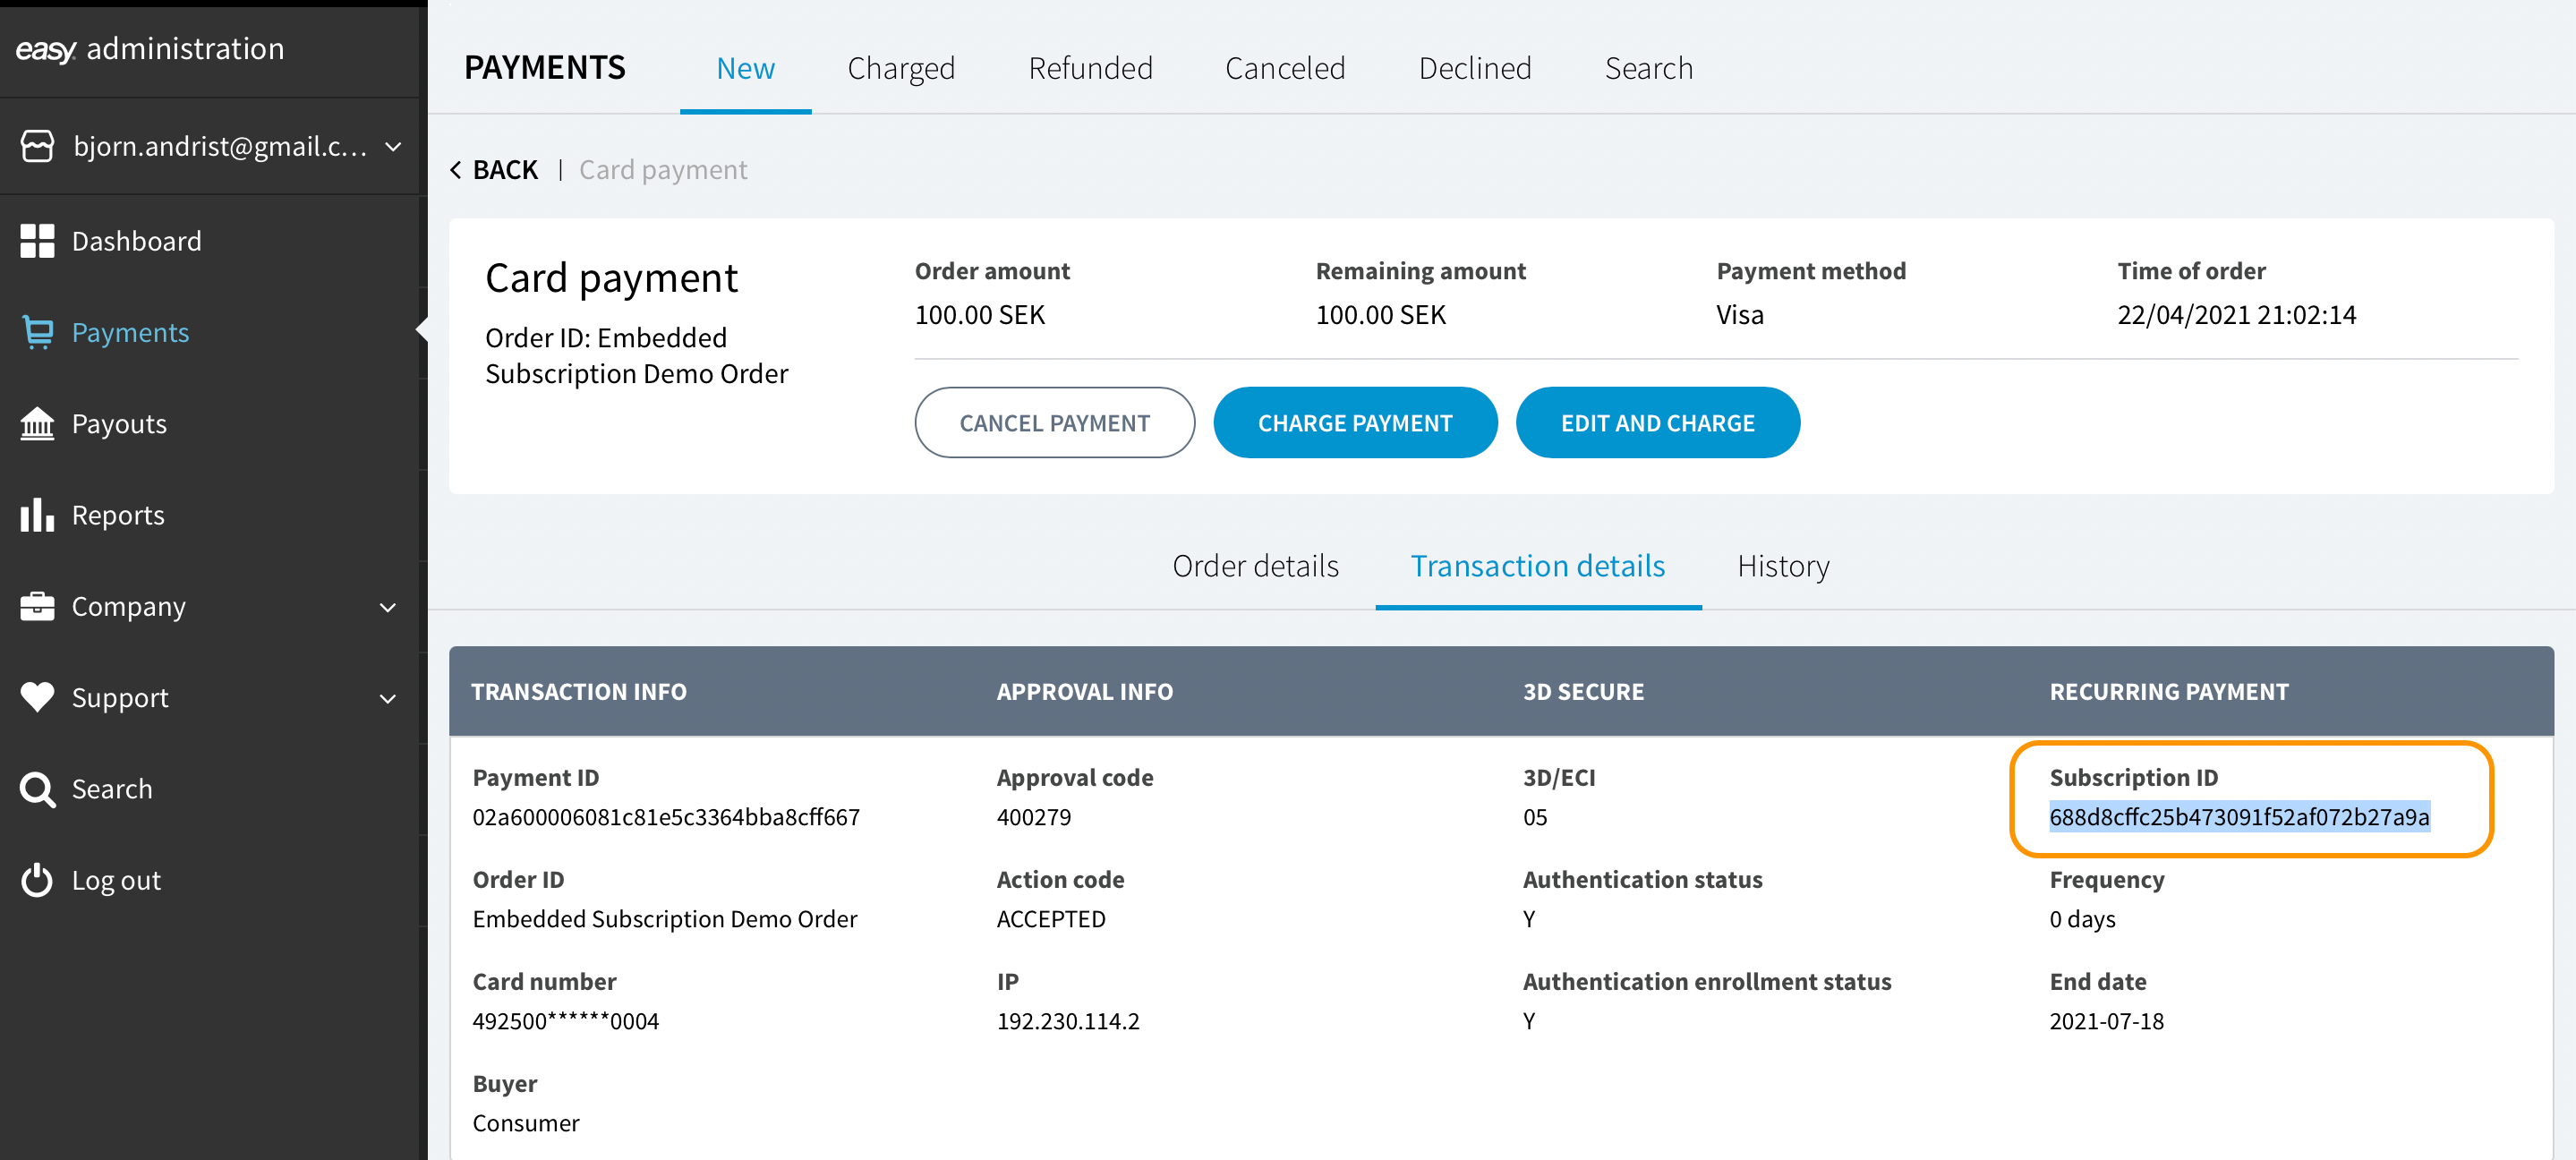
After you have created a subscription payment, you can find the subscription details in Checkout Portal:
- Login to Checkout Portal
- Click "Payments"
- Under "New" payments, your new subscription should be visible
- Click the newly created payment object
- Click "Transaction details"

In the column named RECURRING PAYMENT, you should be able to see a subscription identifer. This identifier can be used when charging the subscription multiple times. You can also see the frequency (interval) and end date of the subscription.
Step 5: Retrieve subscription using the Payment API
It is possible to retrieve information about a subscription programmatically using the Payment API. First retrieve the subscription payment object using the sample code below:
Retrieve payment
- PHP
- Node
<?php

$paymentId = "<YOUR_PAYMENT_ID>";
$ch = curl_init('https://test.api.dibspayment.eu/v1/payments/' . $paymentId);
Remember to replace <PAYMENT_ID> with the payment identifier you received from the API when creating the subscription payment. The placeholder <YOUR_SECRET_KEY> should be replaced with your secret key.
A successful API call will return something similar to this:
Retrieve payment response
{
  "payment": {
      "paymentId": "0260000060003b7b47f0833960dc60d6",
      "summary": {
The property payment.subscription.id is the subscriptionId you are looking for. Now you can use that identifier to get more information about the subscription, like this:
Retrieve subscription details
<?php

$subscriptionId = "<SUBSCIRPTION_ID>";
Again, make sure you replace all the placeholder strings marked with <...>.
The JSON response from the retrieve subscriptions request can look something like this:
Subscription details response
{
    "subscriptionId": "205e808f6fba40828b0389c8b943aefe",
    "frequency": 0,
    "interval": 0,
Now you know how to retrieve the subscription identifier and other details related to a subscription payment. The subscription identifier is required when you want to charge a subscription at a later stage. You can charge multiple subscriptions in bulk using the API method Bulk charge subscriptions.
Congratulations!
Now you have a checkout page that supports subscription payments and you also know how to retrieve the subscription identifiers required for future charges.