Checkout for Plentymarkets
This guide describes how to install, configure, and use Checkout webshop module for Plentymarkets.
Before you start
Before you start, you need an Checkout Portal account. See the guide Create account for more information about creating a free test account.
Plentymarkets payment plugin
Find out more about Plentymarkets
Plentymarketplace payment integration
Visit Checkout Plentymarkets on GitHub
plentyShop LTS compatability
IO compatability
Overview
Our Plentymarkets plugin is the perfect extension to enable the Checkout to its full potential for your Plentymarkets store. Checkout supports most popular payment methods.
You may see below all the payment methods offered by Checkout. This list refers to all markets.
Depending on your country or region, the list may vary. If you are uncertain about a specific payment method and whether it is available in your country or region, please contact Support for more information.


Installation
You can install our Checkout module for Plentymarkets in three different ways:
Alternative 1: Integration via marketplace
1. Add the Nexi Group plugin to your Plentymarkets account/system.
- Navigate to Plugins and choose Plugin set overview from the dropdown menu.
- Select the plugin set in which you want to install the plugin.
- Click the + Add plugin button in the top left corner.
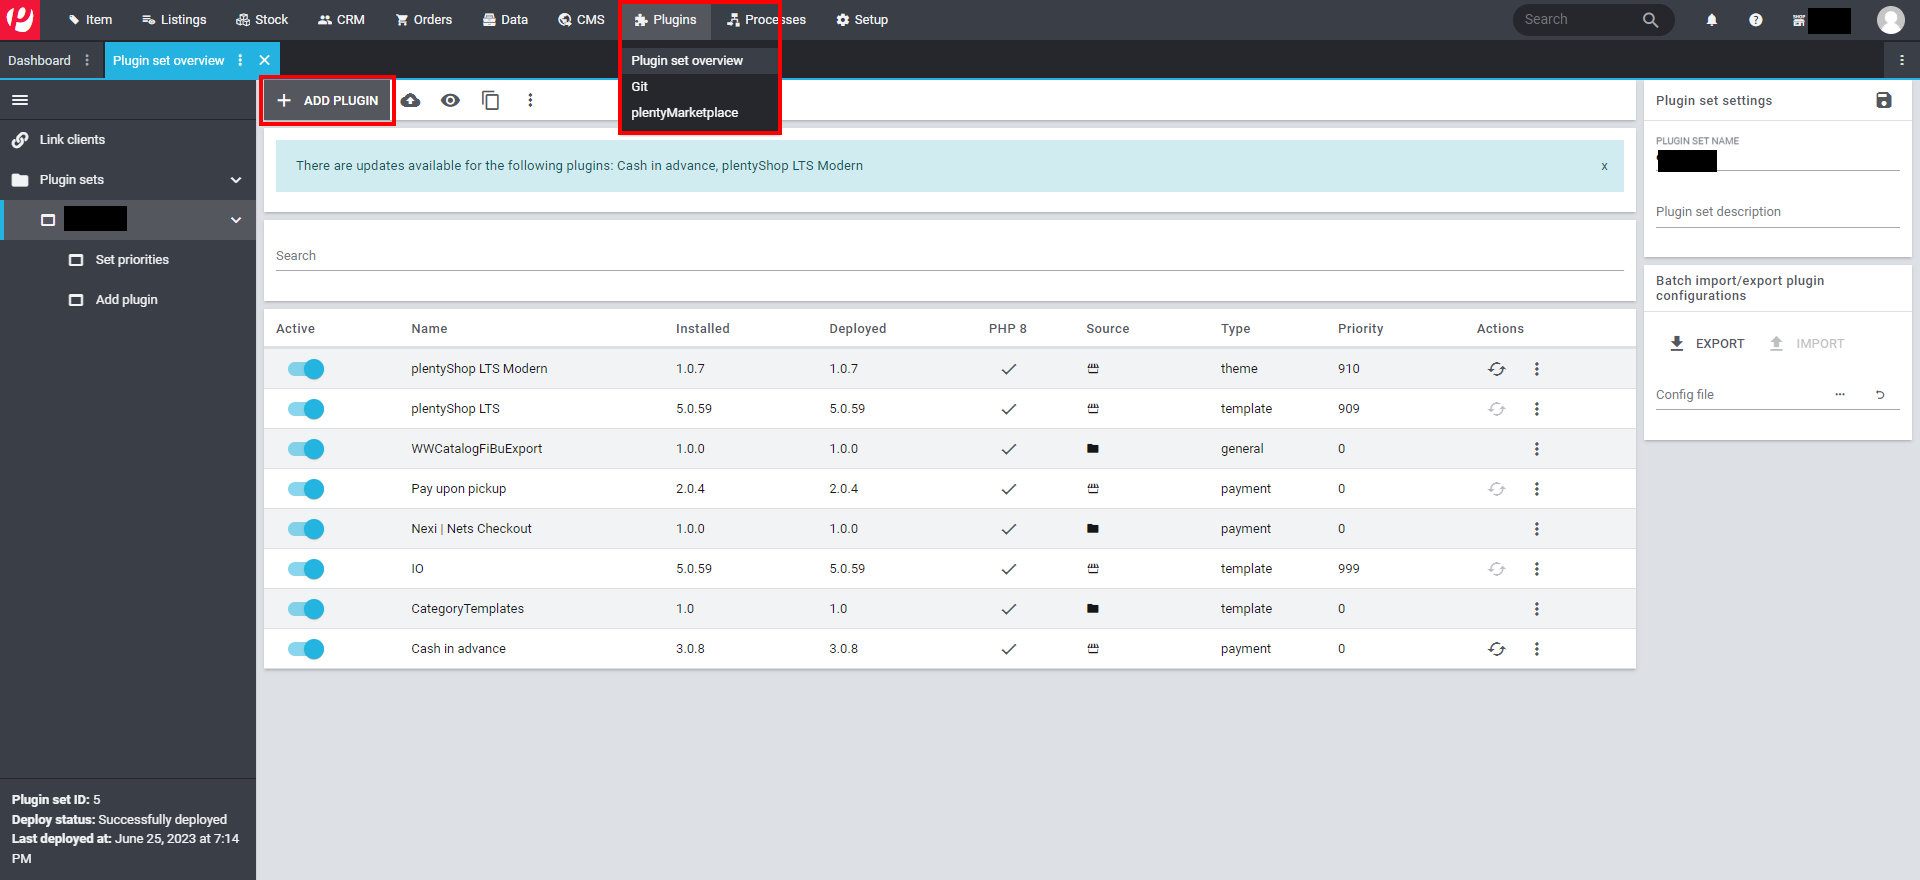
- Click on the MARKETPLACE button.
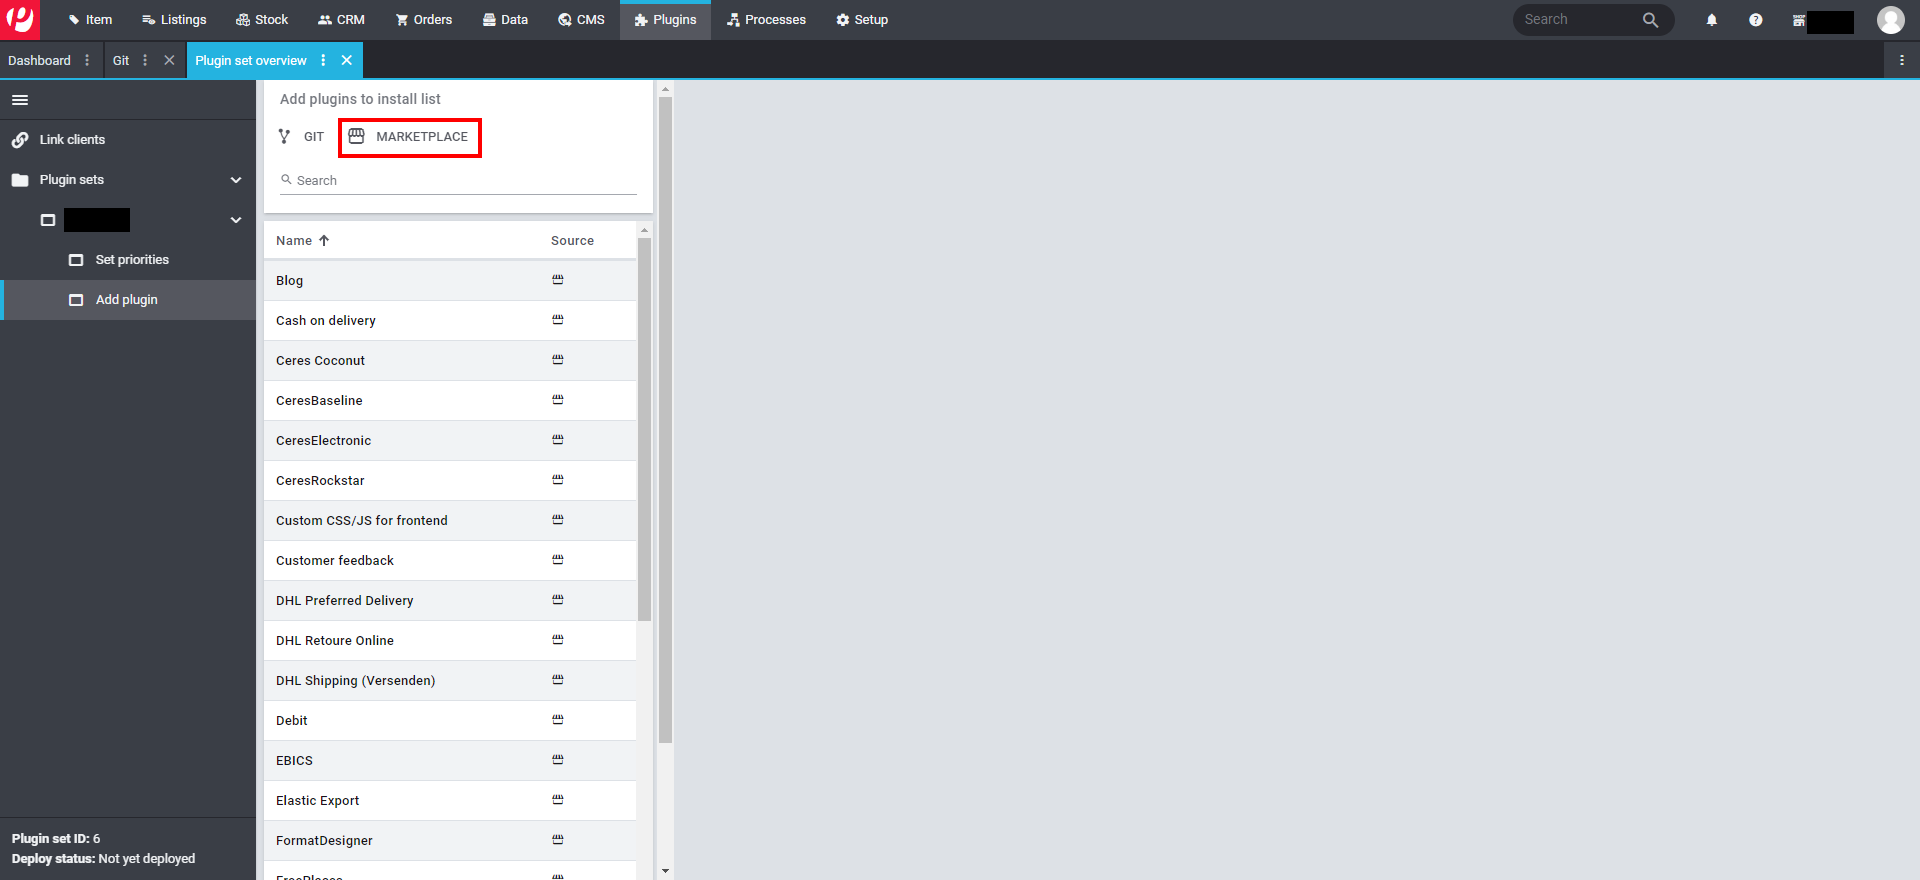
- In the Marketplace view, search for Nexi Group and add the plugin to your account/system.
- Once you have added the plugin to your account then go back to your backend.


2. Install the Nexi Group plugin in your plugin set.
- Navigate to Plugins and choose Plugin set overview from the dropdown menu.
- Select the plugin set in which you want to install the plugin.
- Click the + Add plugin button in the top left corner.
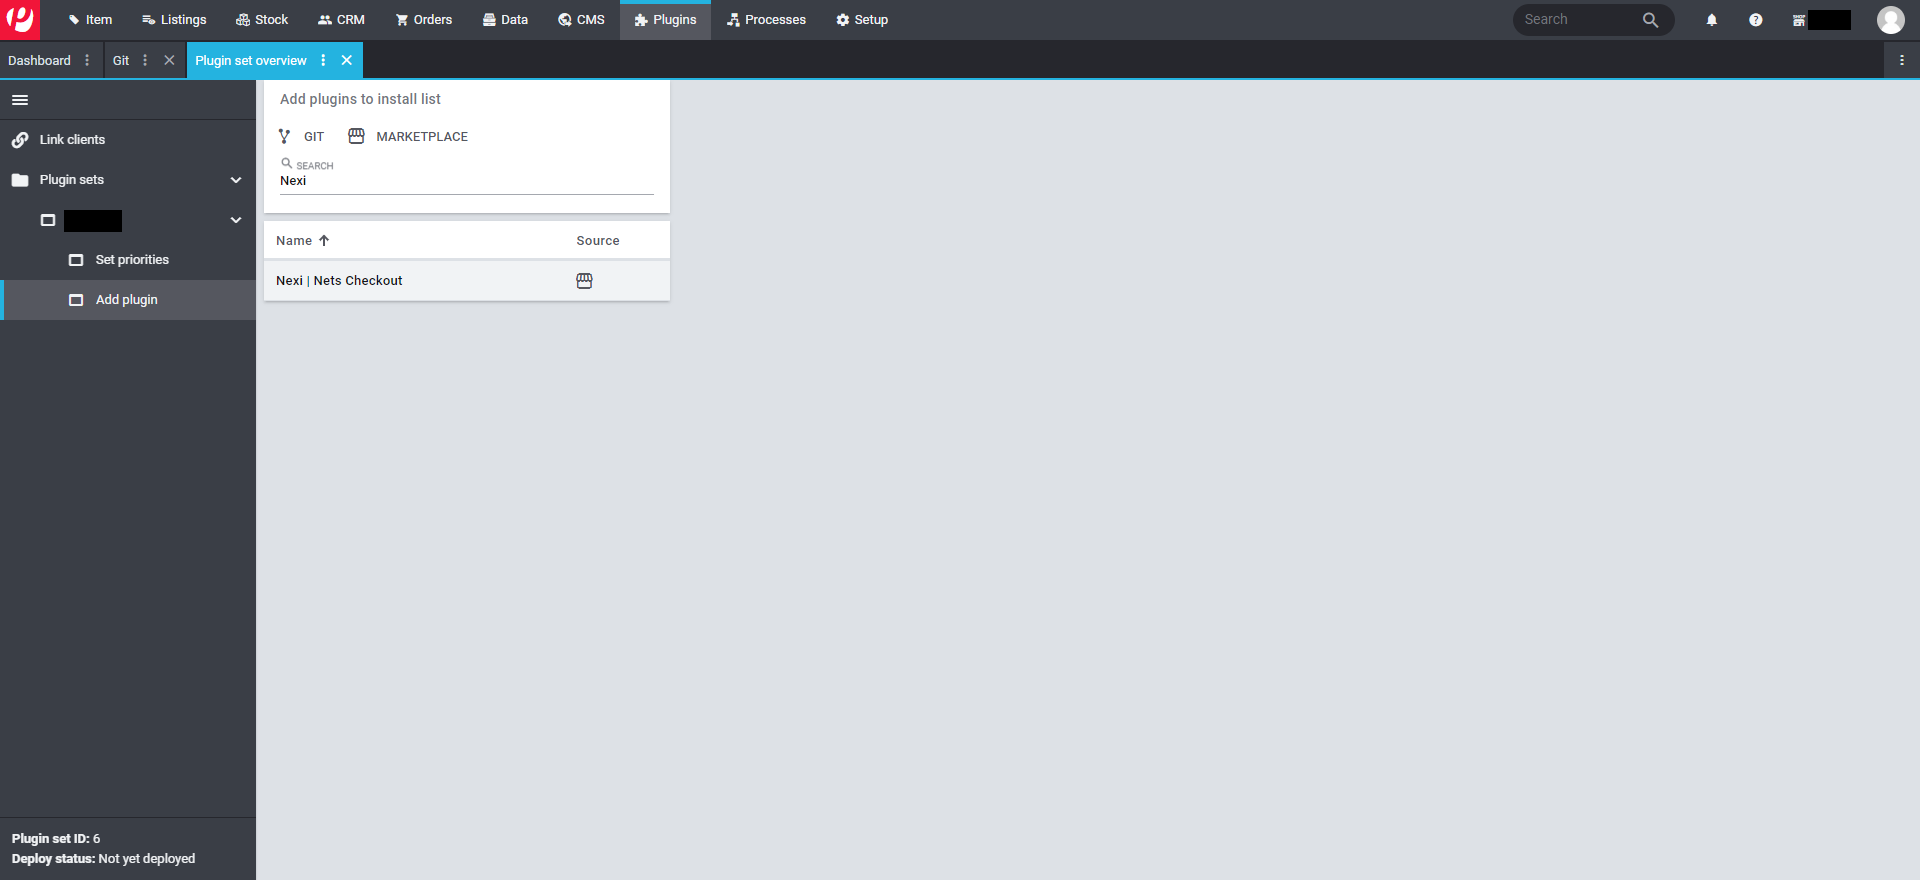
- Search for Nexi and install the plugin accordingly.

Alternative 2: Integration via Git
- The installation of the Plentymarkets plugin via git requires a deploy token. Here you can find out how to create it. Please note that the deploy token needs to have only the READ permission. To download the plugin as a ZIP file for the dev-tool installation, please click here.
- In your Plentymarkets system backend, go to the Plugins menu and choose Git.
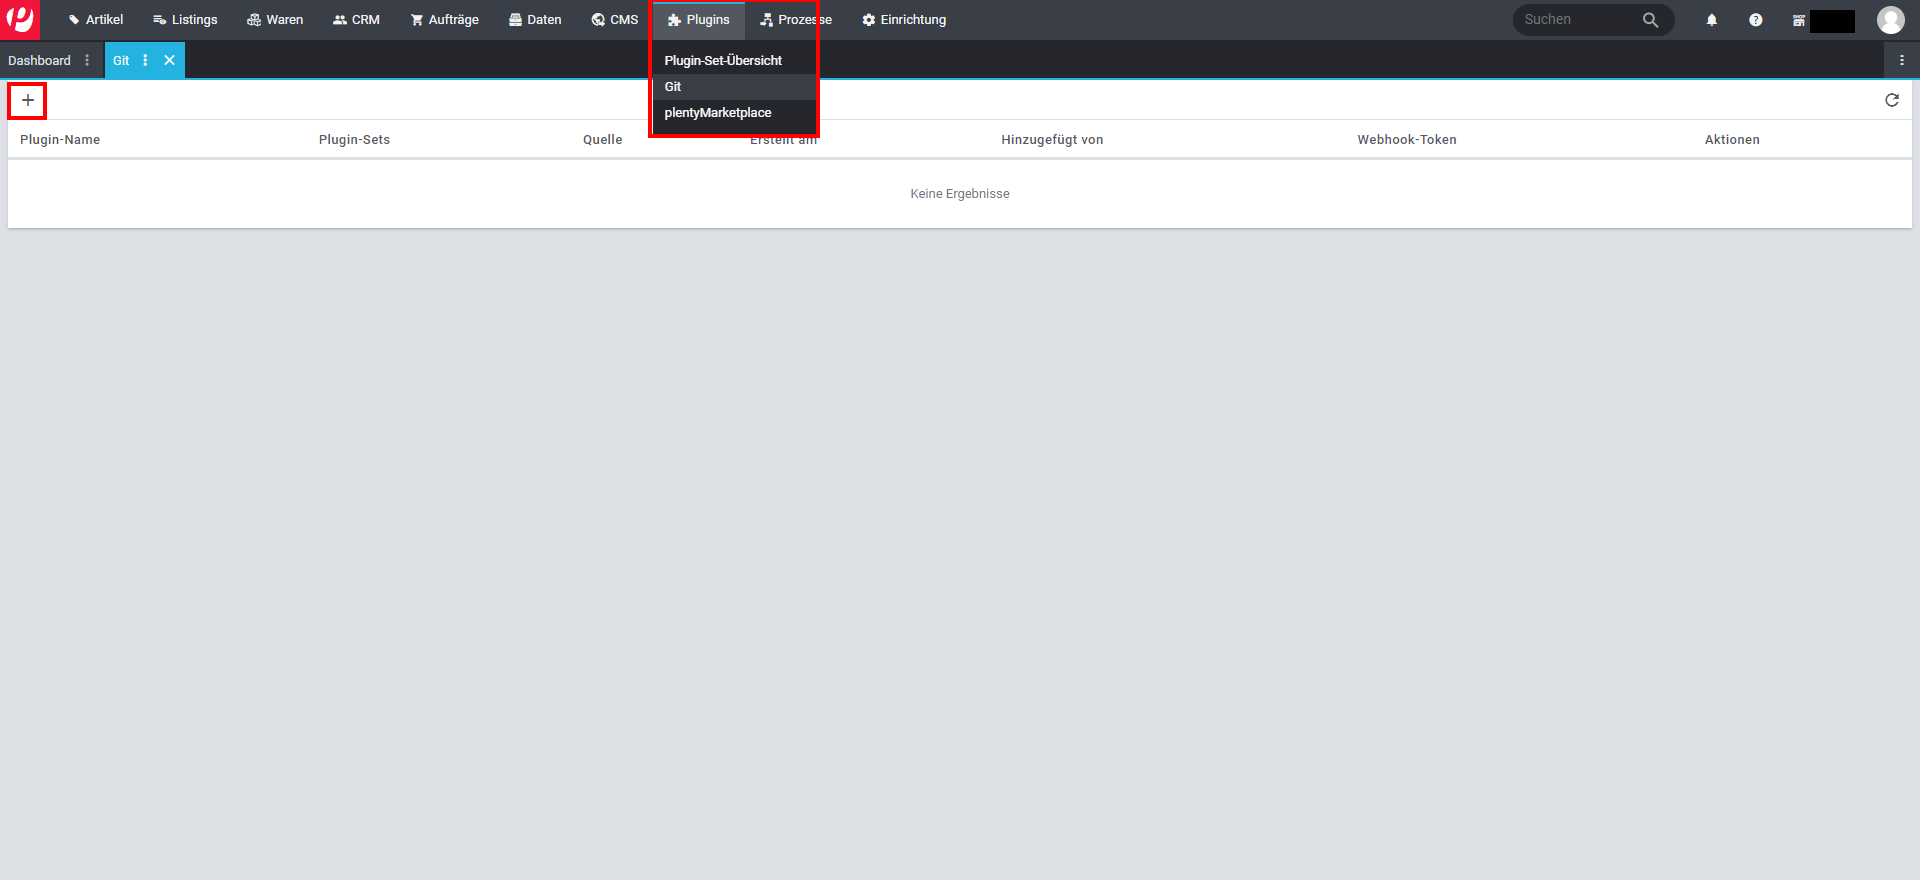
- Click on the “+” button in the top left corner.
- Enter the following information in the form:

| Parameter | Input |
|---|---|
| Username | |
| Token | |
| Repository | |
| Branch name | master |
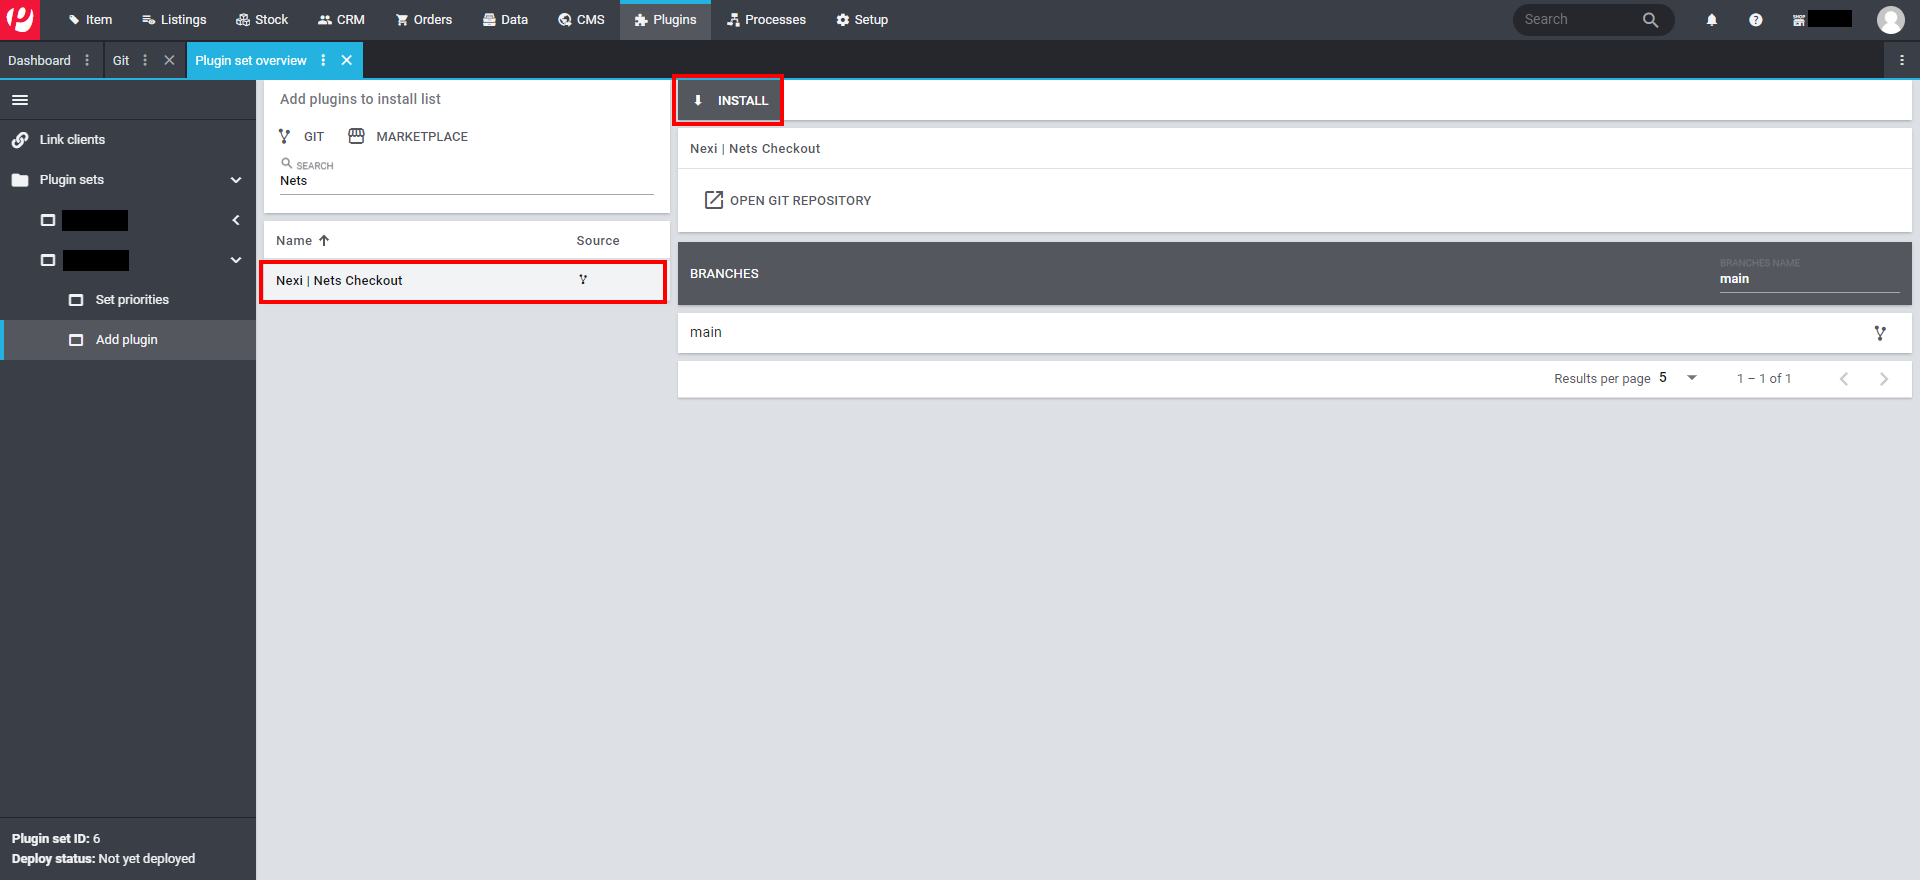
- Once the repository has been added successfully to your system, navigate to Plugins and choose Plugin set overview from the dropdown menu.
- Select the plugin set in which you want to install the plugin.
- Click the + Add plugin button in the top left corner.
- Search for Nexi Group and install the plugin accordingly.

Alternative 3: Integration via plentyDevTool
- Download the ZIP file.
- Make sure to extract the plugin files from the ZIP archive.
- Download and install the plentyDevTool.
- Refer to the explanation in the plentyDevTool link on how to use the DevTool and install the plugin in your Plentymarkets system.
Configuration
After installing the module, you need to do some basic configuration:
Assistants
- Navigate to Setup > Assistants > Plugins > Plugin-Set.
- Click the Checkout link in the list of available payment methods.
- Fill out the required fields under "Credentials", such as merchant ID and integration keys (secret keys and checkout keys).
- "Countries of delivery" and "Additional information" fields are optional.
- Under "Logo" field, you can modify which payment methods icons get displayed in your store. It helps to clearly communicate to your customers which payment methods are available through Checkout.
Both the merchant ID and the integration keys can be found in Checkout Portal. See the following pages for more help:
The screenshot below shows the configuration page for the module:


Payment methods in plentymarkets
Payment methods in plentymarkets must be activated according to your customer class to appear it in the checkout.
- Navigate to Setup > CRM > Customer classes.
- Add Easy Pay accordingly in the "Permitted payment methods".


Order management
It is possible to manage orders directly in the Plentymarkets administration portal:
- Navigate to Setup > events.
- Click on an order line to access order details.
- Choose one of the below operation to perform. The Checkout plugin will synchronize automatically. The payment status will also be updated in Checkout portal.
- Checkout Charge payment: This event allows you to charge an already reserved payment.
- Checkout Cancel payment: This event allows you to cancel a reserved payment. (Note: you cannot cancel a payment that has already been charged).
- Checkout Refund payment: This event allows you to refund a payment that has already been charged. (Note: A refund can only be made based on an order of type Credit).
Example
You can configure the event actions in your system as you like. Examples below are our recommendations to a standardised order-management process.
1. Charging a Payment - Checkout Charge payment:
We recommend you to debit a payment as soon as the appropriate goods have been transferred to shipping.
- Event: Goods issue posted.
- Filter: Payment types, order type if applicable.
- Action: Checkout Charge payment.


2. Cancel a payment - Checkout Cancel payment
You should map the cancellation of a payment using your cancellation status and use filters to ensure that the event is only executed for orders related to the relevant payment types.
- Event: Status change
- Filter: Payment types, order type if applicable.
- Action: Checkout Cancel payment.


3. Refund of a payment - Checkout Refund payment
We recommend you to create a corresponding status in the "Credit note" area - 11.x.
- Event: Status change
- Filter: Payment types, if necessary order type.
- Action: Checkout Refund payment.


Troubleshooting
Checkout troubleshooting is managed by our expert Plentymarkets partner, Web Wikinger.
If you still have problems and issues after you have gone through the steps in the link above, you're welcome to get in touch with us at kontakt@web-wikinger.de.
Before creating a support ticket, we recommend you to try and locate the issue yourself. Or at least please try to determine where the issue is located and prepare as much information as possible. For additional support, please visit our Support page.
Below you will be able to see some of the most common issues that can be encountered. Please note that these are just examples.
Nexi Group payment method is not showing up in the checkout
- Ensure that the payment method is enabled for the relevant customer classes.
- Make sure that the payment method is enabled for the country that is selected in the invoice address.
Nexi Group embedded checkout is not appearing
- Ensure that your integration keys in the Nexi Group plugin assistant are correct and do not contain additional blank spaces.
- Make sure that the standard buy-button widget from Plentymarkets is available in your checkout - this is used as an anchor element for placing the checkout.
- Check if there are any temporary technical inconsistencies by following this link.
Payments in live mode do not work
- Ensure that you have an approved Live Checkout account for production.
- Make sure your Live Checkout account is approved for payments with the selected currency.
- Ensure that the payment method data is correct and supported by your Checkout agreement.
Go live checklist
For more information, refer to the section Go-live checklist.