Payment
This guide outline the Payment functionalities within the Settings section of the Checkout demo store.
Overview
In this section, the Payment section inside of Settings of the Checkout demo store will be outlined.
This includes description for each of the possible payment settings, use case examples and how to set up for these use cases for testing purposes.
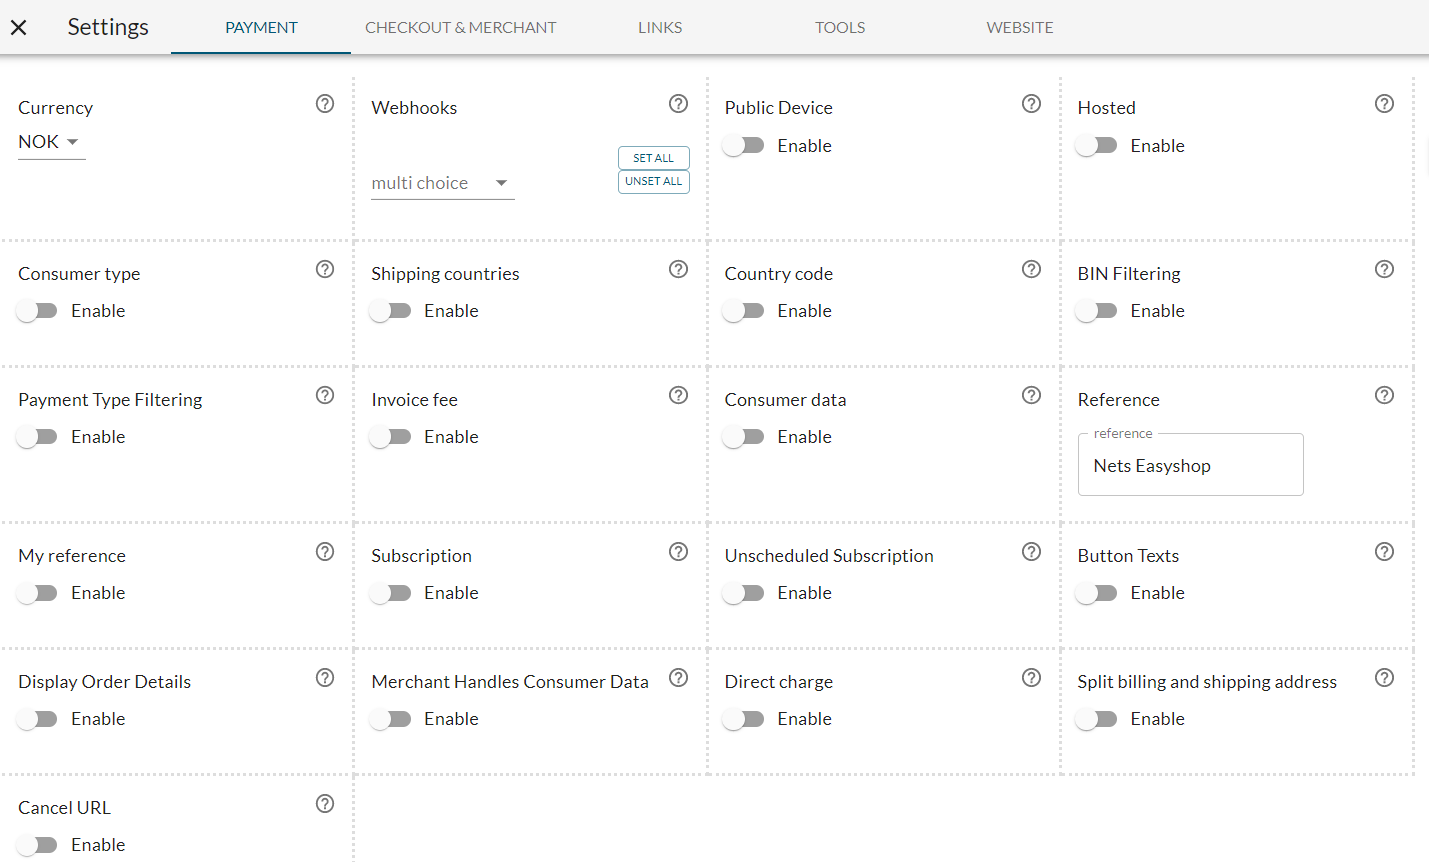
The payment section includes the 21 components such as Currency, BIN filtering and Unscheduled subscription. Find the complete list of the components below here:
| Currency | BIN filtering | Unscheduled subscription |
| Webhooks | Payment type filtering | Button texts |
| Public device | Invoice fee | Display order details |
| Hosted | Consumer data | MerchantHandlesConsumerData |
| Consumer type | Reference | Direct charge |
| Shipping countries | MyReference | Split billing and shipping address |
| Country code | Subscription | Cancel URL |
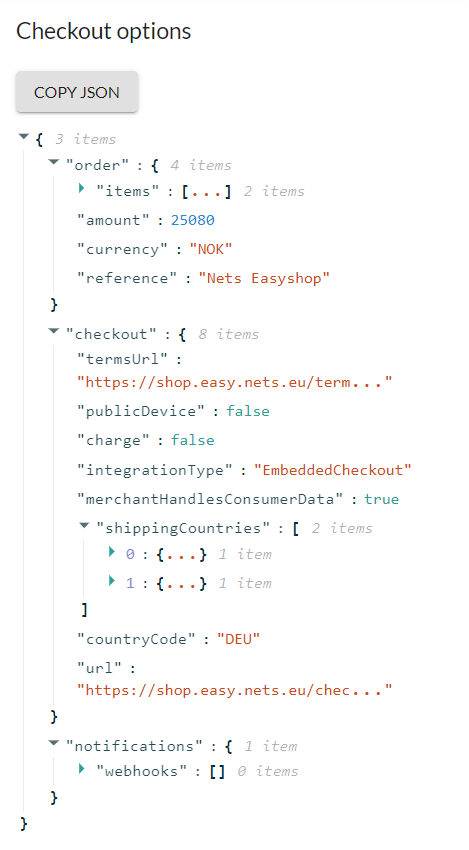
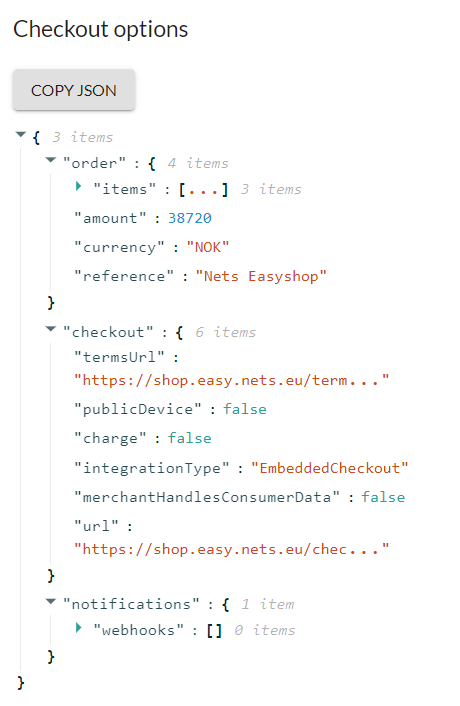
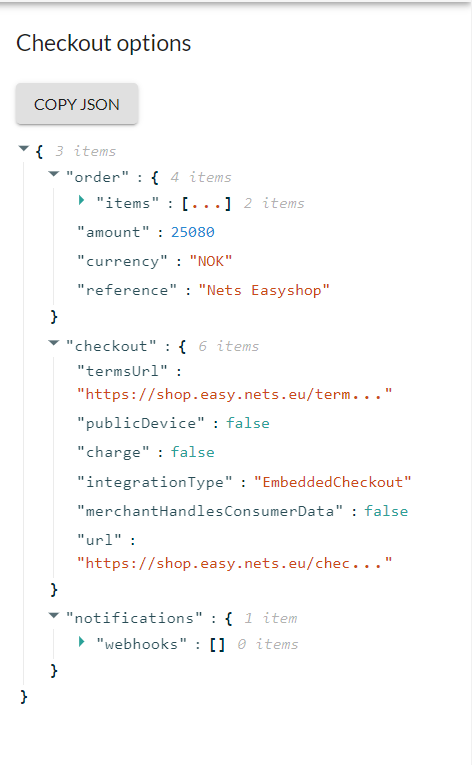
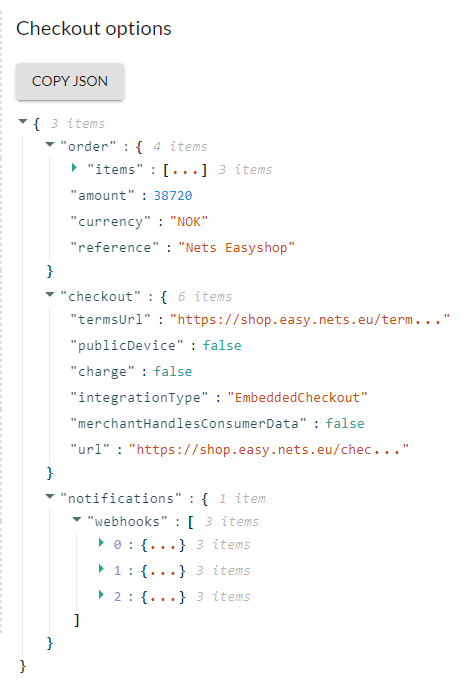
Whenever a component has been toggled, in the right-hand side of the Checkout options, it will show the updated information in JSON format.
You can generate and load the payment settings you have enabled and toggled into a load settings URL where you can see payment settings in an overview table.
You can also reset all the toggles off by clicking on the reset payment settings button.
Payment settings
Inside of the payment section of the Checkout demo store, it is possible to toggle various functionalities that can be tailored to your business and use case and therefore suitable for your consumers choice of options when navigating the checkout section of Checkout.
Each of the possible functionalities and toggles within the payment section will update the checkout options panel according to your adjustments. From here, you can copy and paste the auto-generated json output.
| Name | Functionality | Example | |||||||||||||||||||||||||||||||||||||||||||||||||||||||||||||||||||||||||||||||||||||||||||||||||
|---|---|---|---|---|---|---|---|---|---|---|---|---|---|---|---|---|---|---|---|---|---|---|---|---|---|---|---|---|---|---|---|---|---|---|---|---|---|---|---|---|---|---|---|---|---|---|---|---|---|---|---|---|---|---|---|---|---|---|---|---|---|---|---|---|---|---|---|---|---|---|---|---|---|---|---|---|---|---|---|---|---|---|---|---|---|---|---|---|---|---|---|---|---|---|---|---|---|---|---|
| Button texts | By default, the text displayed on the checkout button for the consumer to pay is set to "pay" with the total amount. However, with this component, you can change the button's text if needed. | A. If you are selling magazines, it would make sense to name the button subscribe. B. If you are a travel agency, it would make sense to name the button book or reserve. | |||||||||||||||||||||||||||||||||||||||||||||||||||||||||||||||||||||||||||||||||||||||||||||||||
| Cancel URL | If the consumer chooses to cancel a payment, you have the option to specify the URL that the consumer can fall back to. | If the consumer cancels the payment, A. the URL can refer the consumer back to a page about special offers B. go to a new page to ask for feedback about why not completing the checkout process or C. refer back to the homepage. | |||||||||||||||||||||||||||||||||||||||||||||||||||||||||||||||||||||||||||||||||||||||||||||||||
| Consumer data | If you already have the data on the consumer then Nexi Checkout can do a lookup to simplify the checkout experience. This means that the fields will be pre-filled and also potentially payment method details. | If you collect the consumer information in the webshop and passing the information to Checkout will simplify the checkout flow for the consumer. | |||||||||||||||||||||||||||||||||||||||||||||||||||||||||||||||||||||||||||||||||||||||||||||||||
| Consumer type | Sets which consumer type is available in the checkout window. B2C is meant for a private consumer and B2B is meant for a business consumer. | ||||||||||||||||||||||||||||||||||||||||||||||||||||||||||||||||||||||||||||||||||||||||||||||||||
| Country code | Sets the country code on the payment. | If you are doing business with EUR then you can enable this setting in order to ensure optimal local checkout experience. | |||||||||||||||||||||||||||||||||||||||||||||||||||||||||||||||||||||||||||||||||||||||||||||||||
| Currency | Depending on what payment methods you have enabled for your Checkout account, a varierty of curency options will be displayed. | You always have to set a currency in order to show the right local checkout options. If you are adding EUR, you should also set the country code as seen from above. | |||||||||||||||||||||||||||||||||||||||||||||||||||||||||||||||||||||||||||||||||||||||||||||||||
| Direct charge | Allows for direct charges. | If you are selling some services that you will receive online, you can use this direct charge solution instead of reserve and charge. This will simplify the process. | |||||||||||||||||||||||||||||||||||||||||||||||||||||||||||||||||||||||||||||||||||||||||||||||||
| Display order details | If you are using the hosted solution for your webshop, you can enable this setting in order to display merchant name and order details. | ||||||||||||||||||||||||||||||||||||||||||||||||||||||||||||||||||||||||||||||||||||||||||||||||||
| Hosted | You can either have the solution as hosted or embedded. The hosted solution will redirect you to a new page for checkout whilst the embedded will keep the consumer in the same checkout page. | ||||||||||||||||||||||||||||||||||||||||||||||||||||||||||||||||||||||||||||||||||||||||||||||||||
Use cases
The following will outline a few examples of use cases for the Payment section:
Use case #1
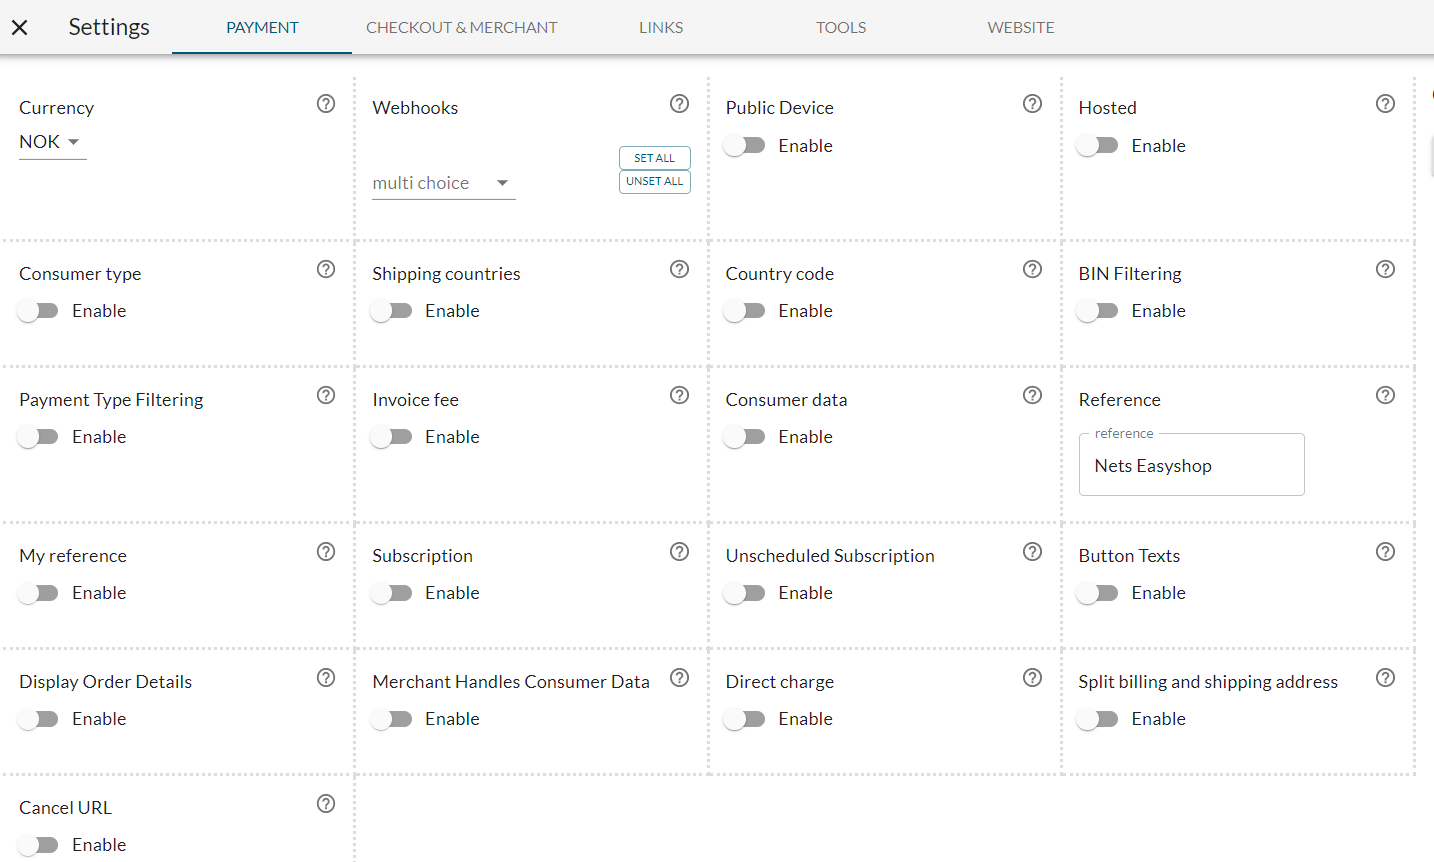
You have a webshop offering items to be sold in NOK currency.
| Use case # | Setup |
|---|---|
| Use case #1 |
|
Use case #2
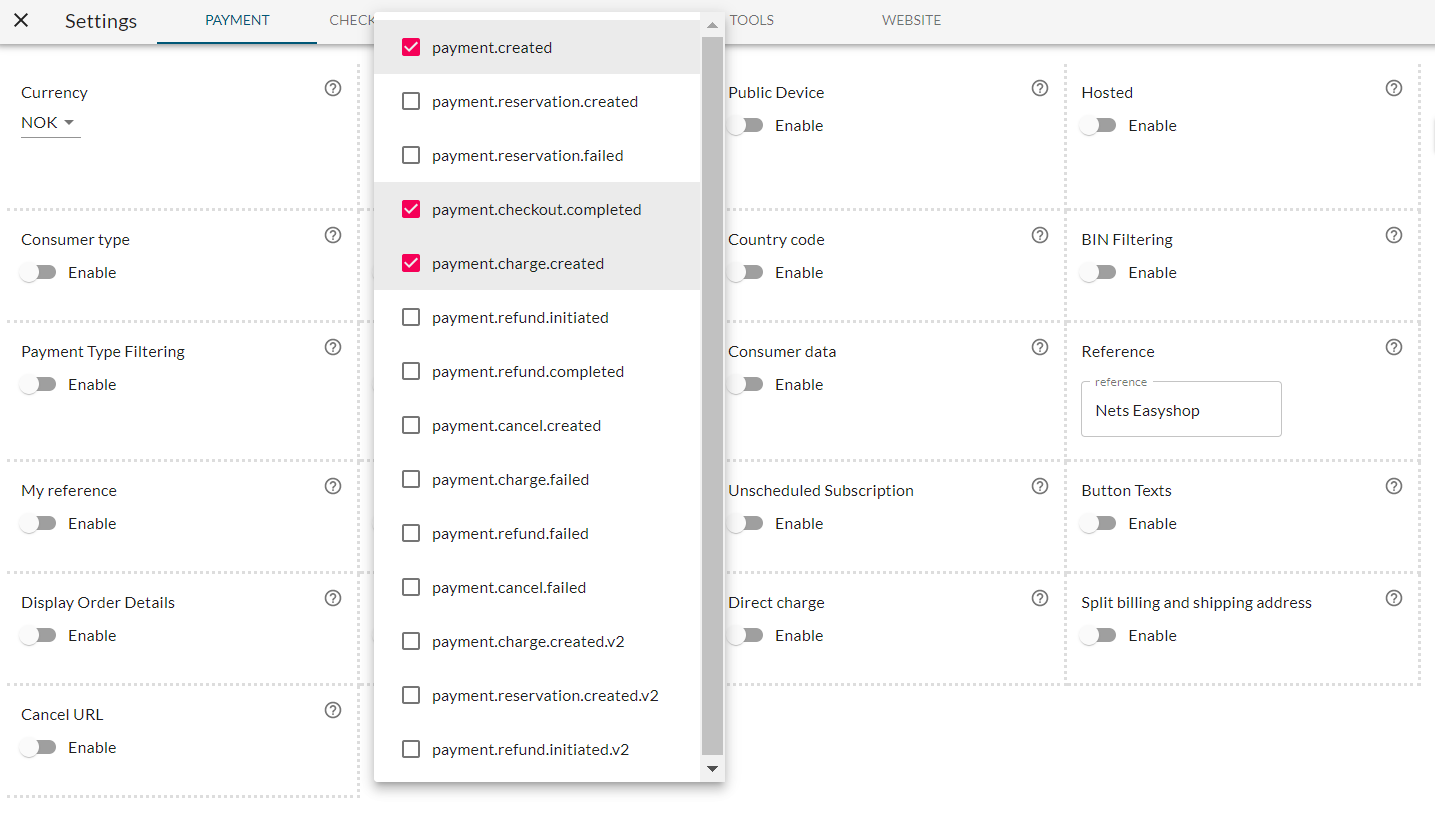
You have a webshop and you need to enable webhooks of payment.created, payment.charge.created, and payment.checkout.completed because you want to receive the notifications about the activities on the payments.
| Use case # | Setup |
|---|---|
| Use case #2 |
|
Use case #3
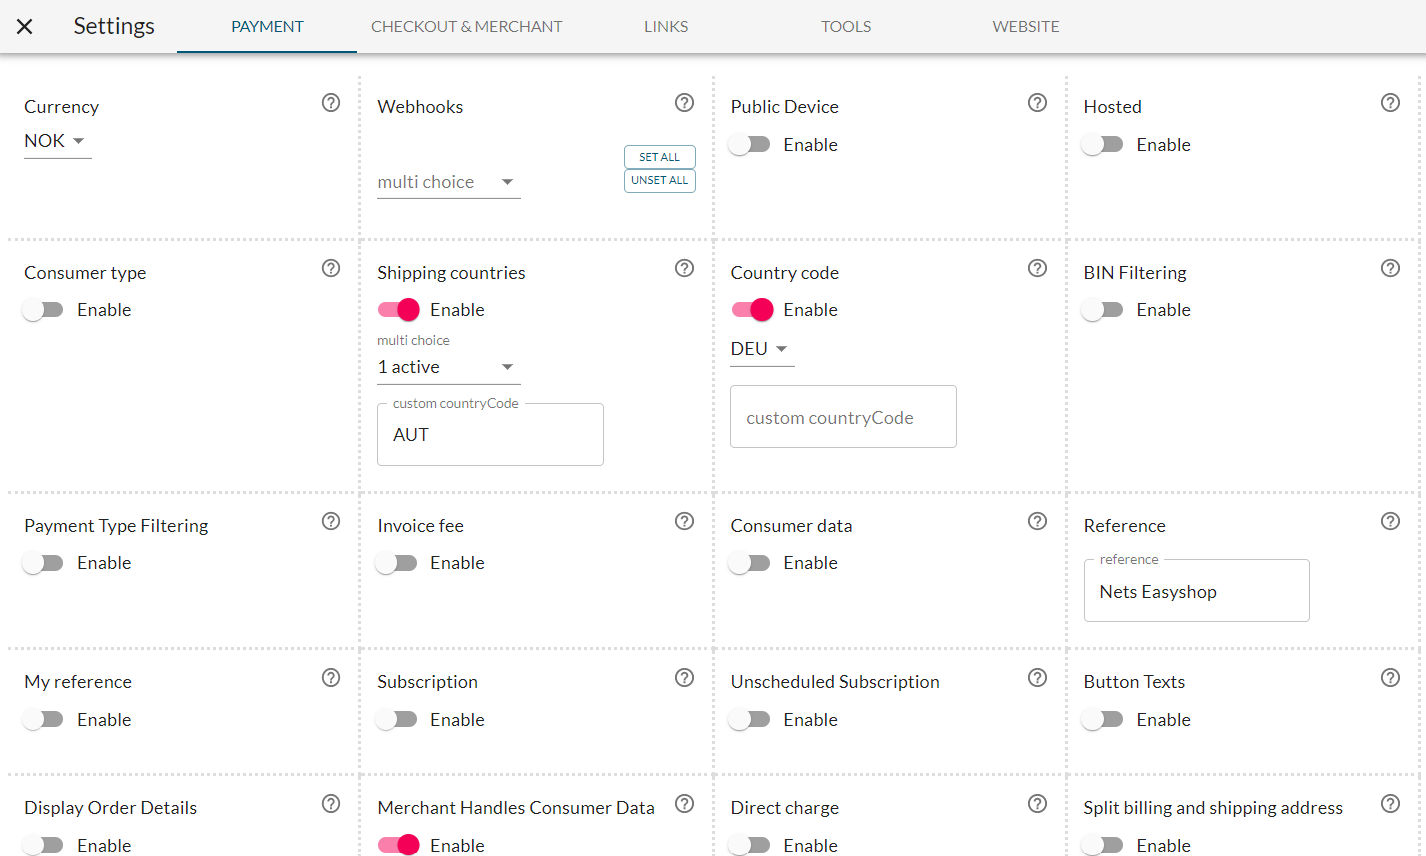
You have a webshop where you want to own the consumer data, to restrict the shipping countries and you only want to do business in EUR currency in some countries.
| Use case # | Setup |
|---|---|
| Use case #3 |
|
