Checkout for Shopware 1.x
This guide describes how to install, configure, and use Checkout webshop module for Shopware 6.5
Before you start
Important
Before you start, you need a Checkout Portal account. Please refer to the guide
Compatible with Shopware 6.4 and 6.5
Note: For Shopware 6.6.x and above, please use Shopware 2.x
Please be aware that there is no upgrade path from Shopware 1.x to Shopware 2.x.
Source
Download
Overview
Our Shopware plugin is the perfect extension to enable the Checkout checkout to its full potential for your Shopware store. Checkout supports most popular payment methods.
You can see below all the payment methods offered by Checkout. This list refers to all markets.
Depending on your country or region, the list may vary. If you are uncertain about a specific payment method and whether it is available in your country or region, please contact Support for more information.


Shop features
- A smart mix of payment methods to suit all preferences
Administration features
- Quick setup and flexible configuration.
- Intuitive order management with synchronized captures and refunds.
- Compatibility with discounts, tax (VAT), and shipping options.
- Automate various processes with the flow builder functionality


Installation
Installation
How to install the Checkout module for Shopware 6.
__ Using Github __
- Connect with an SSH client and navigate to the root directory of your Shopware 6 installation.
- Clone the repository by running the command: git clone Nets-eCom/shopware6-easy-checkout.git -- branch main -- single-branch custom/plugins/NetsNexiCheckout.
After cloning run those commands:
- bin/console plugin:refresh
- bin/console plugin:install -a NetsNexiCheckout
- bin/build-js.sh
The module is now installed and ready to be configured for your Checkout account.
__ Update from v2.0.4 to v2.1.0 __
The plugin technical name has changed to NetsNexiCheckout. The previous name NexiCheckout is deprecated. After updating, both names will appear in My extensions view, or when running bin/console plugin:list.
Update steps:
- bin/console plugin:refresh
- bin/console plugin:deactivate NexiCheckout
- bin/console plugin:install -a NetsNexiCheckout
- bin/build-js.sh
__ Configuration __
After installing the module, you need to do some basic configuration of the module in Shopware Admin:
- Navigate to Extensions > My extensions > NexiNets Checkout
- Locate the Nexi Group payment plugin and press the button with three dots (...) to access the configuration.
- Fill out the required fields, such as integration keys (secret keys and checkout keys), and Webhook Code.
- (Optional) Customize the module according to your needs using the additional settings on the configuration page.
Both integration keys can be found in Checkout Portal. See the following pages for more help:
- Where can I find my merchant number (merchant ID)?
- Access your integration keys
Integration Type: Embedded is not a valid option yet. Please use Hosted Payment.
Order Management
It's possible to manage orders directly in the Shopware administration:
- Navigate to Admin > Orders > Overview.
- Press on an order line to access order details.
- Go to the Details section, with the new Nexi order management component.
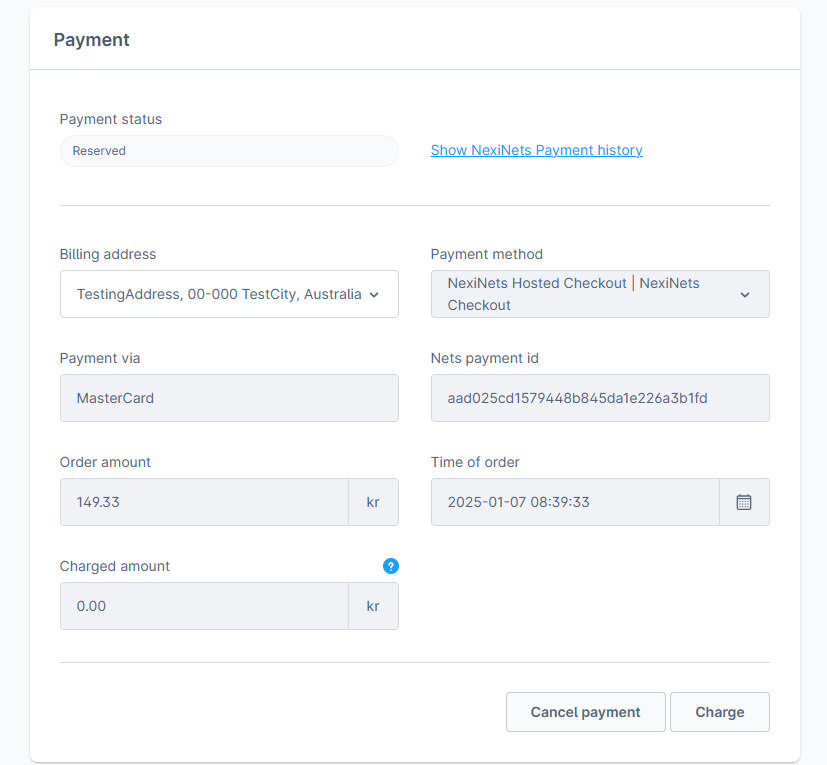
Now all the actions (Charge, Refund, Cancel) can be done via the new modal component.
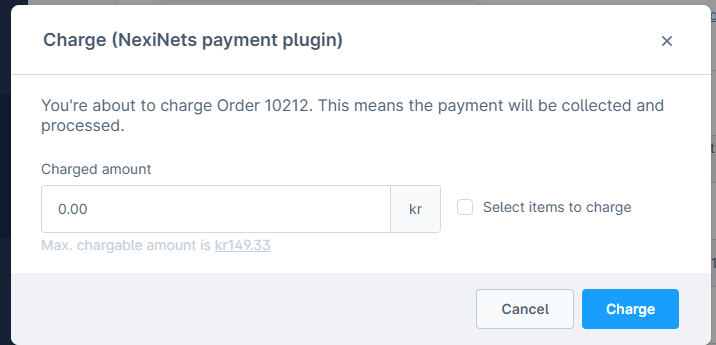
Clicking on Max. amount will automatically pass the maximum value to the amount field.
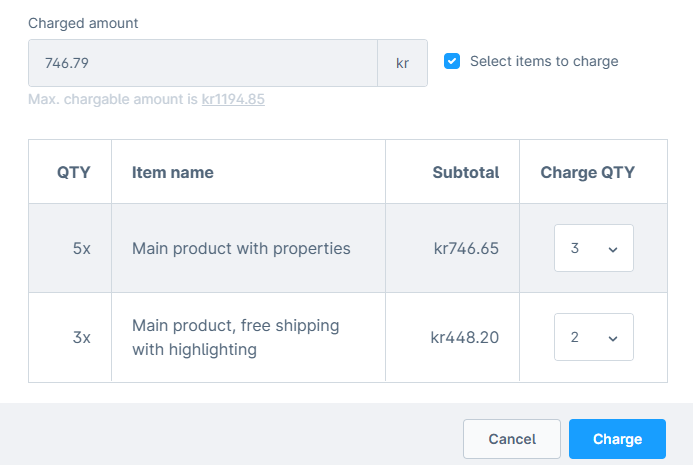
Partials Charge & Refund
The biggest change from the currently used component is that partial charge and refund will be able to be made by selecting the item from the order list rather than manually typing out the value into the field. The list can be accessed by the checkbox field.
All transactions performed by Nexi Group are accessible in Checkout Portal.
Flow Builder
With Shopware 6.7, our Nexi flow can be aligned with Shopware flow to automate various processes within the payment system. Getting Started with Flow Builder
Klarna
The payment method Klarna requires a phone number to function properly. To ensure that Klarna will appear as a payment option in the Nexi Group payment window, it is essential to configure the phone number field correctly. For more information, please refer to the Klarna guide.
To add the phone number field in Shopware 6, follow these steps:
- Navigate to Settings > Shop > Log-in & Sign-up.
- Check the box for Show phone number.
- Check the box for Phone number field required.
To learn more, visit Shopware 6's documentation.
We do not support third-party plugins that provide phone number functionality, and we cannot guarantee that their solution will be compatible with the Klarna payment method.
Apple Pay
Apple Pay configuration for Shopware plugin is described on the Apple Pay payment method page.
Troubleshooting
Below are some of the most common configuration errors, their cause, and steps that you can follow to solve them.
Nexi Group payment plugin is not visible as a payment method
- Ensure the Nexi Group module is available in the right Sales Channel in the plugin configuration.
- Under the Sales Channel section, select your Shop Name under General settings. Add the plugin in Payment methods.
- Temporarily switch to the Shopware 6 standard template. Custom templates might need additional changes to ensure correct display. Consult with your web designer or developer.
Nexi Group payment window is blank
- Ensure your integration keys in the Nexi Group plugin settings are correct and do not contain additional blank spaces.
- Temporarily deactivate third-party plugins that might affect the functionality of the plugin.
- Check if there are any temporary technical inconsistencies: Operational Status
Payments in live mode don't work
- Ensure you have an approved Live Checkout account for production.
- Ensure your Live Checkout account is approved for payments with the selected currency.
- Ensure payment method data is correct and supported by your Checkout agreement.
Go live checklist
For more information, refer to the section Go-live checklist.
See Also
- Create account
- Test environment
- Test card processing
- Test invoice & installment processing
- Suppor
Configuration
After installing the module, you need to do some basic configuration of the module in Shopware Admin:
- Navigate to Extensions > My Extensions inside the Shopware backend/admin panel.
- Locate the Nexi Group payment plugin and press the button with three dots (...) to access the configuration.
- Fill out the required fields, such as merchant ID and integration keys (secret keys and checkout keys).
- (Optional) Customize the module according to your needs using the additional settings on the configuration page.
Both the merchant ID and the integration keys can be found in Checkout Portal. See the following pages for more help:
The screenshot below shows the configuration page for the module:
The following table lists all the settings you can configure in the administration area for the Checkout module:
| Configuration setting | Description |
|---|---|
| Payment Environment | Toggles between live mode and test mode. Choose test mode if you want to make test purchases using the test environment. There are sample card numbers and invoice addresses for testing purposes. Live mode requires an approved account. |
| Live Secret key | Your live secret key from Checkout Portal. |
| Live Checkout key | Your live checkout key from Checkout Portal. |
| Test Secret key | Your secret key for test purchases from Checkout Portal. |
| Test Checkout key | Your checkout key for test purchases from Checkout Portal. |
| Terms Url | The URL to the terms and conditions of your webshop. |
| Merchant Terms Url | The URL to the privacy and cookie settings of your webshop. |
| Checkout Flow | Select between Hosted and Embedded. Hosted loads a new payment page whereas embedded inserts the payment window directly on the checkout page. |
| Enable Auto-capture | Allows you to instantly charge a payment straight after the order is placed. Important! Capturing a payment before shipment of the order might be liable to restrictions based upon legislations set in your country. Misuse can result in your Checkout account being forfeit. |
Congratulations!
You've now installed and configured the Checkout webshop module. If you have further questions, please see the troubleshooting section below or reach out to our support.
Order management
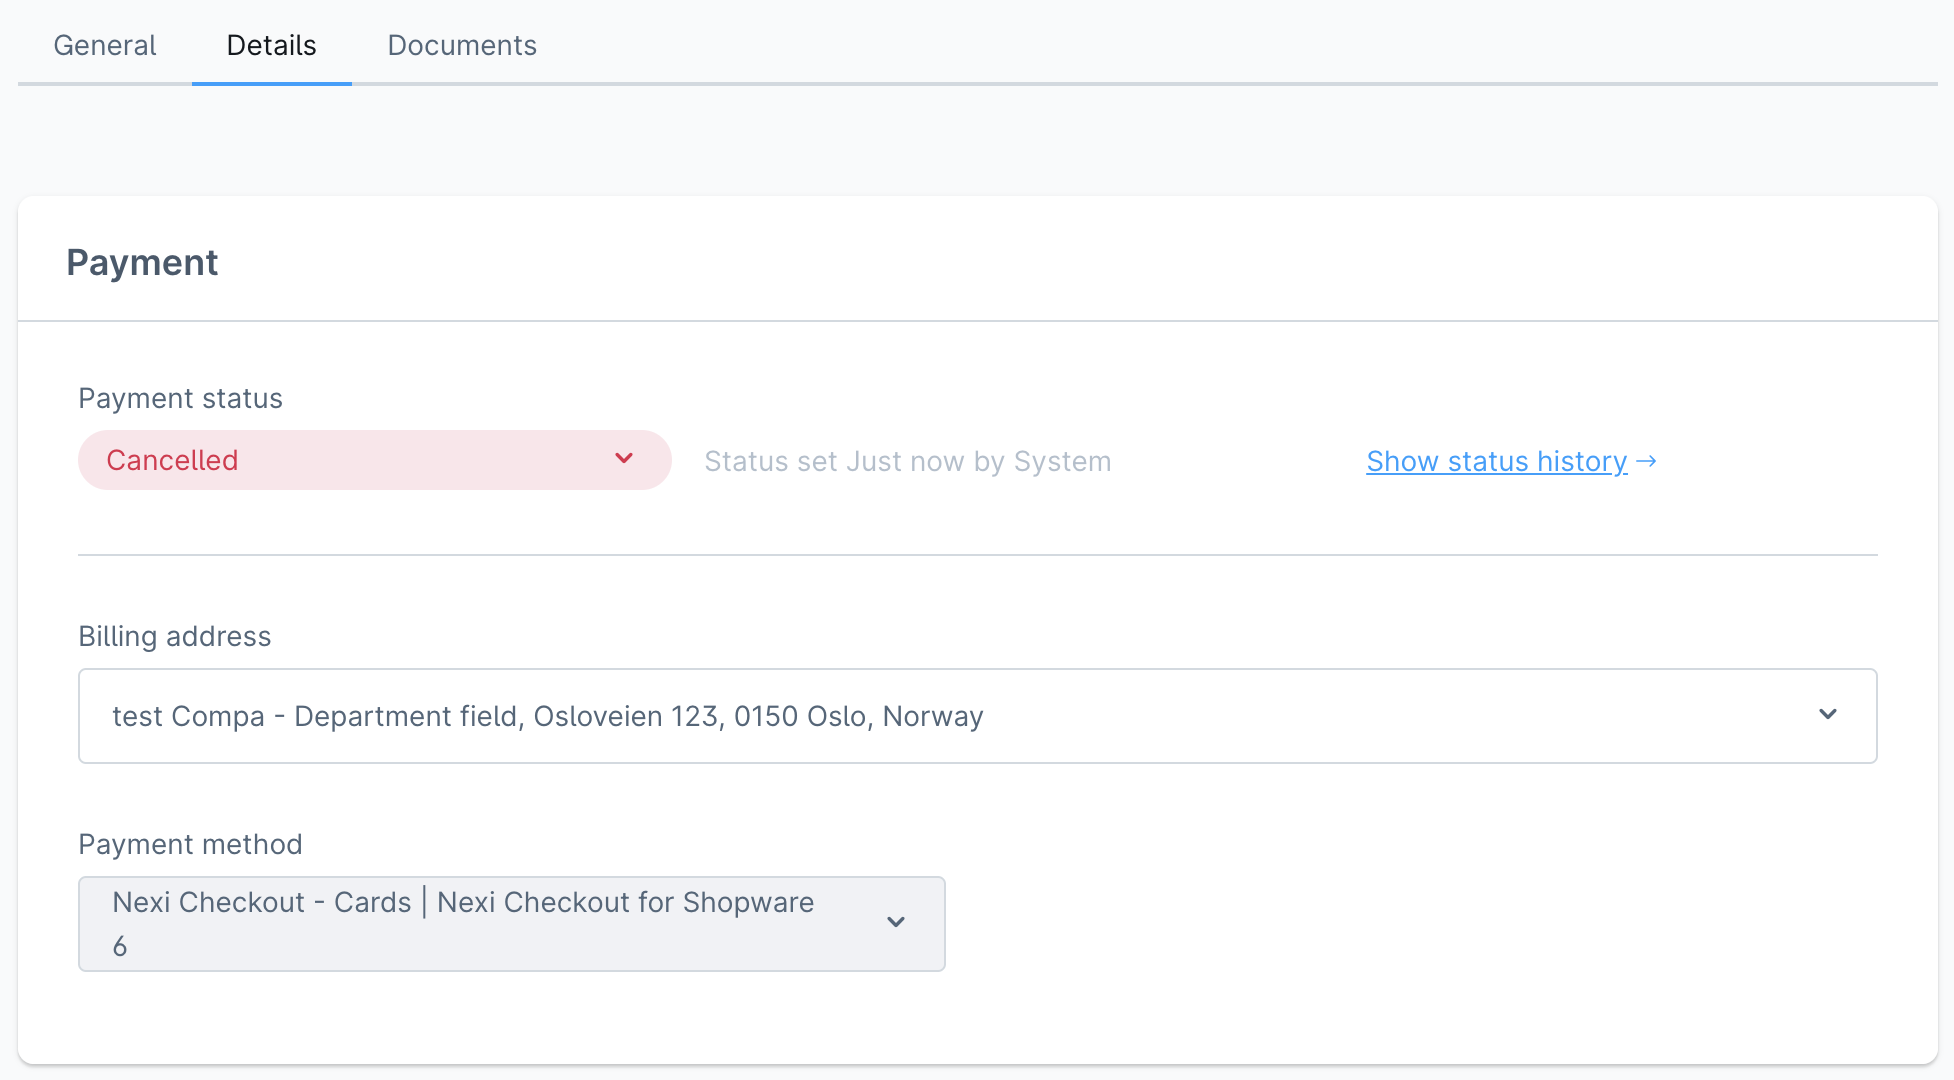
View Order Details
- Go to Orders → Select an Order.
- Under the Details tab, scroll to the bottom to view Nexi-related information.
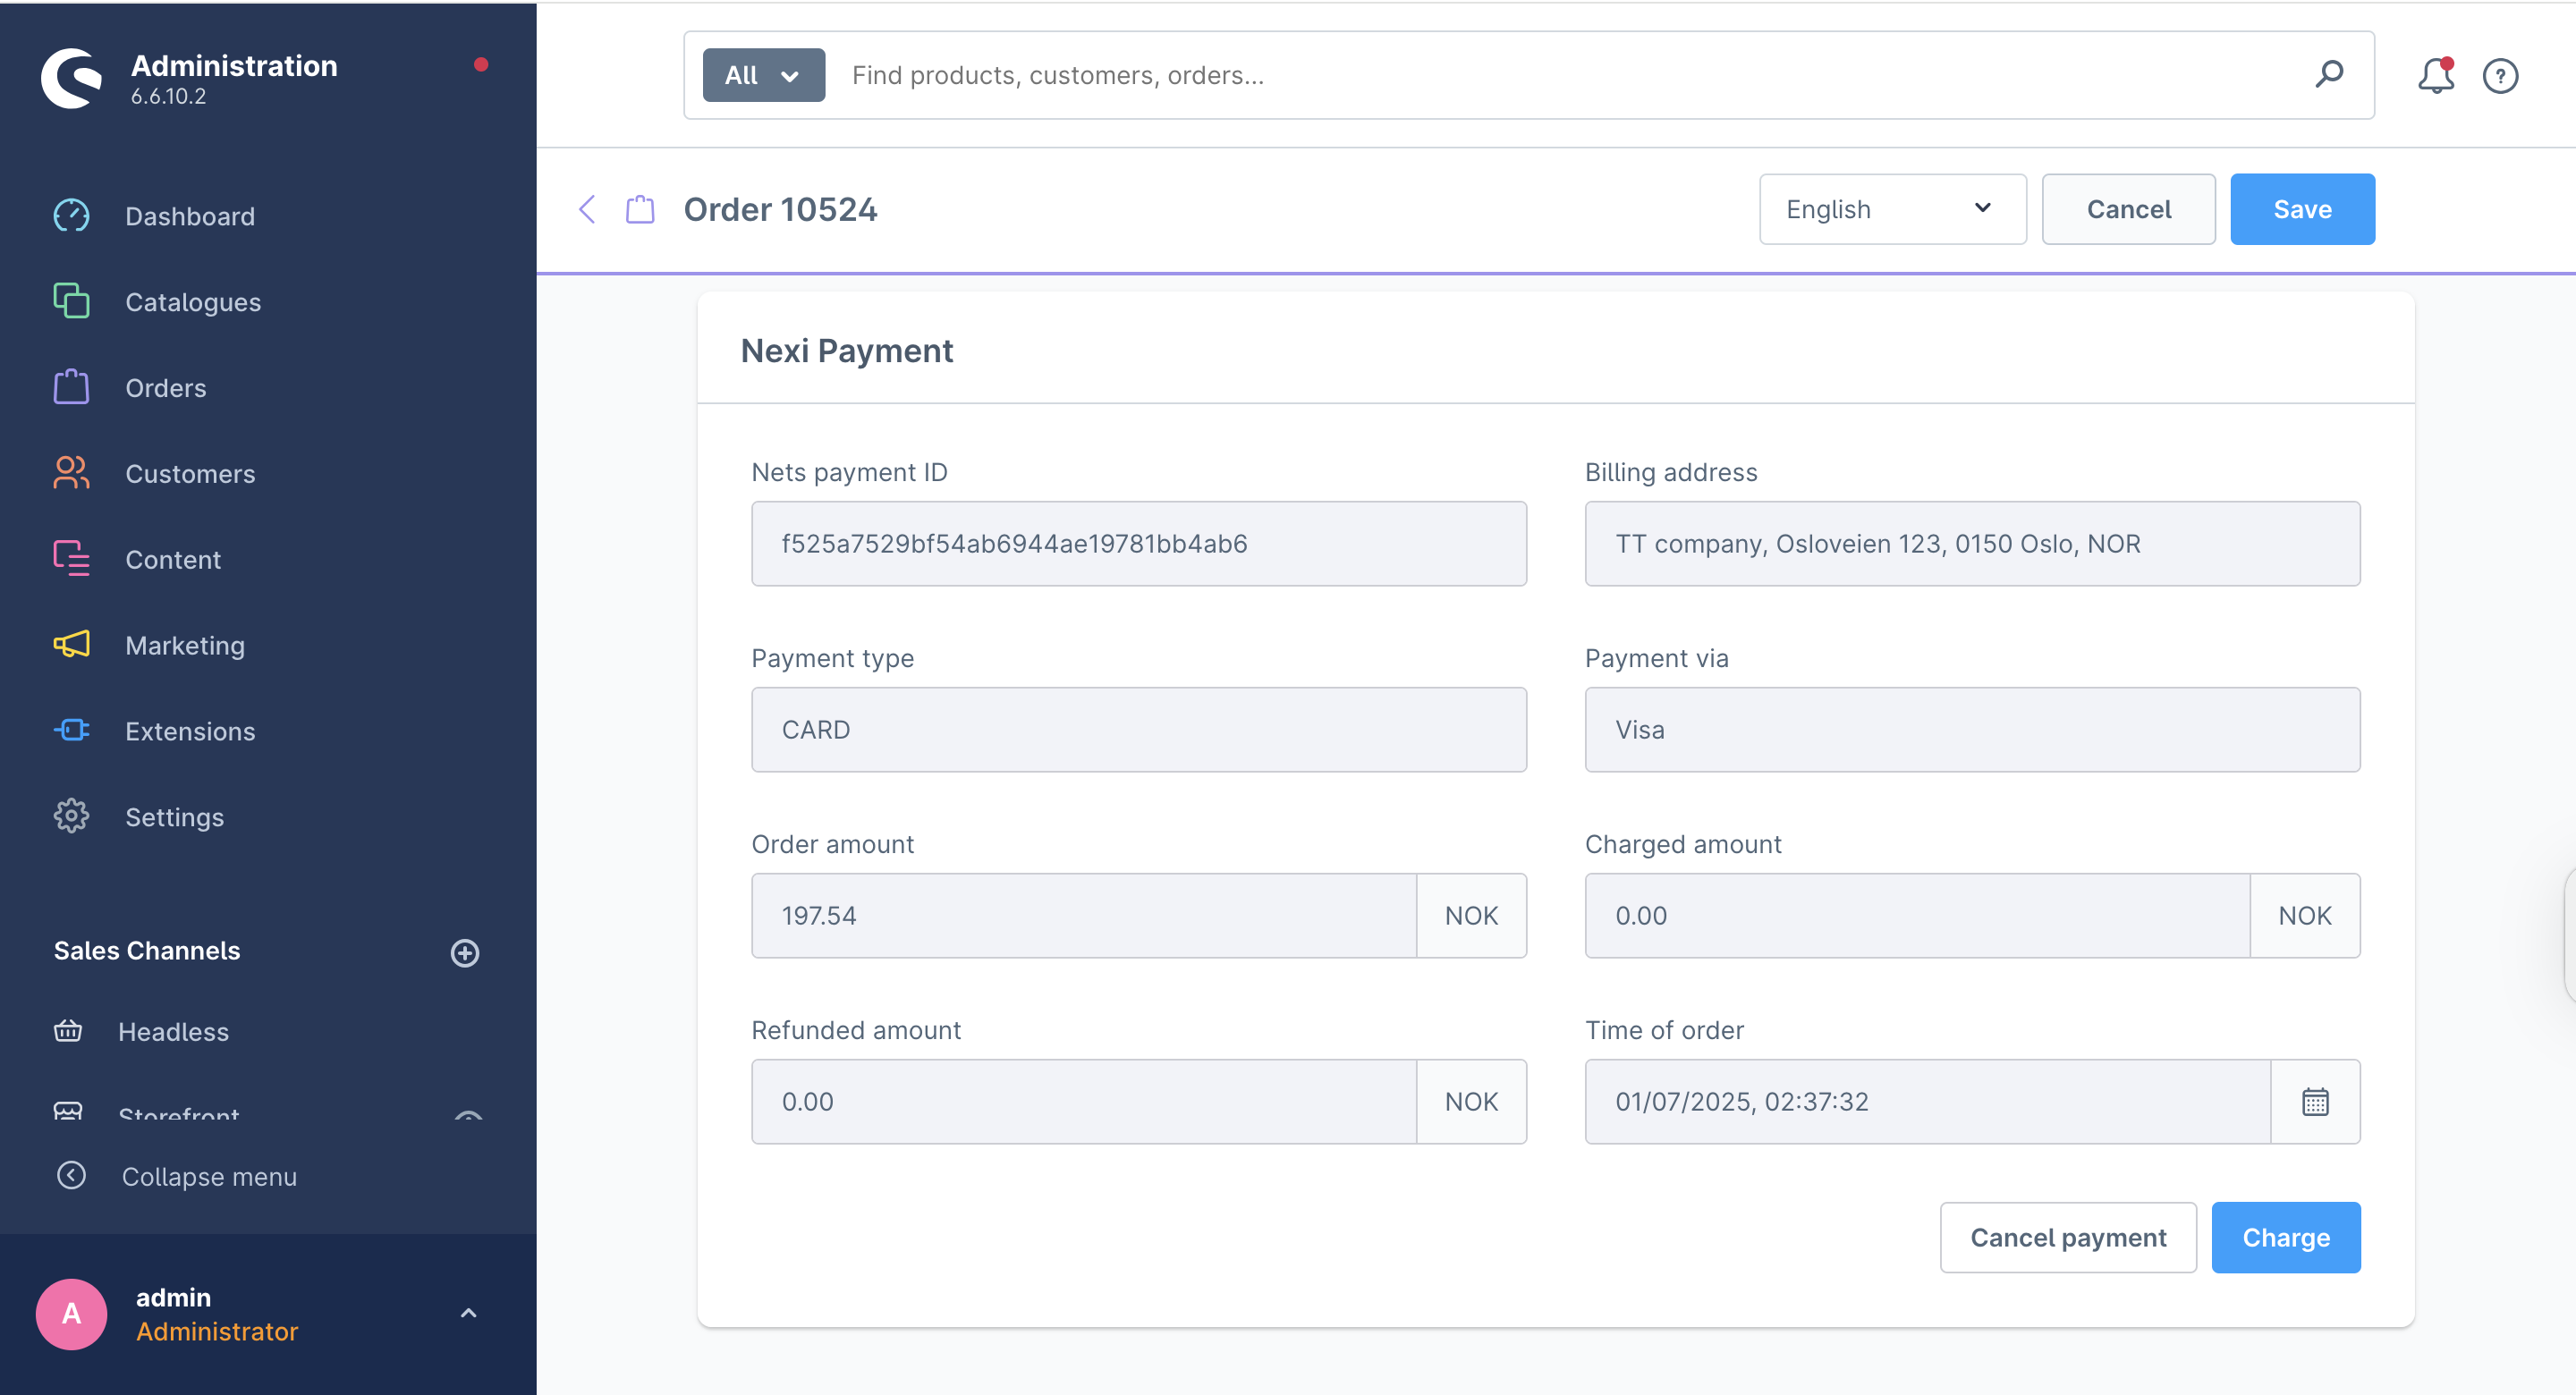
Cancel Payment
- Click Cancel Payment (available if the payment hasn't been charged).
- Confirm the action via the popup.
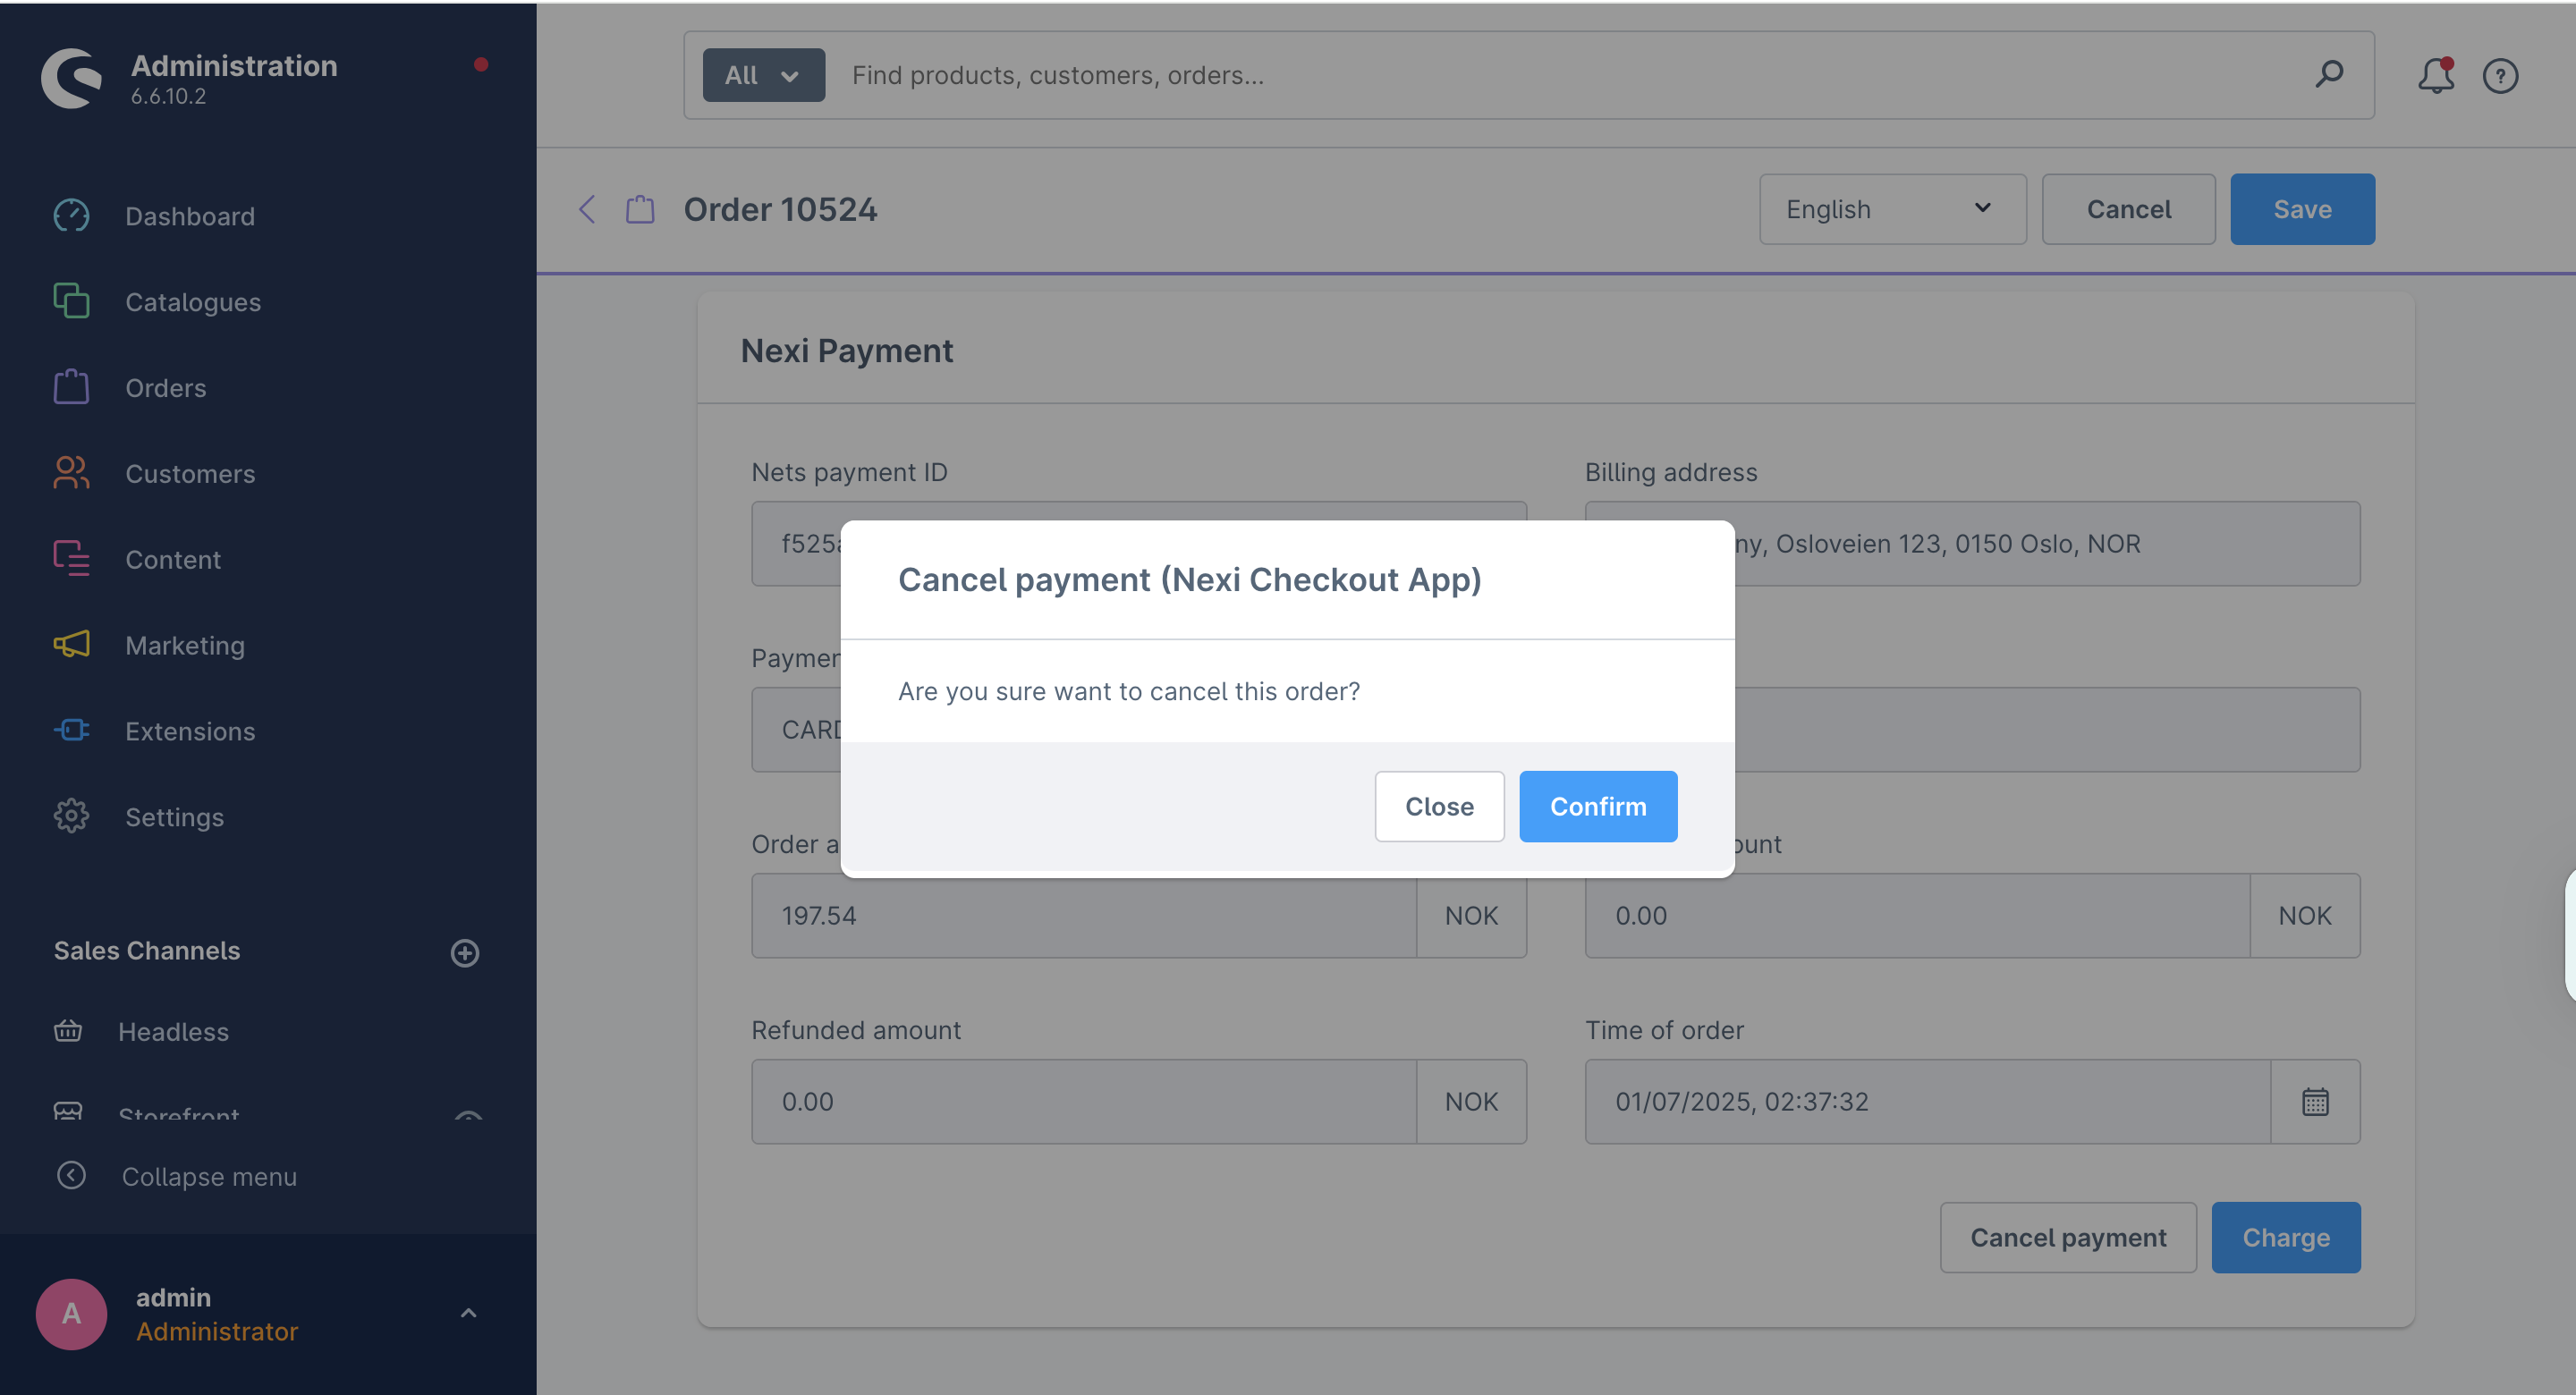
- Order status changes to Cancelled.
- Charging is disabled once cancelled.

All transactions performed by Nexi Group are accessible in Checkout Portal.
The following screenshot shows the list of orders in Shopware administration:


Payment methods
Klarna
The payment method Klarna requires a phone number to function properly. To ensure that Klarna will appear as a payment option in the Nexi Group payment window, it is essential to configure the phone number field correctly. For more information, please refer to the Klarna guide.
To add the phone number field in Shopware 6, follow these steps:
- Navigate to Settings > Shop > Log-in & Sign-up.
- Check the box for Show phone number.
- Check the box for Phone number field required.
To learn more, visit Shopware 6's documentation.


Important Note
We do not support third-party plugins that provide phone number functionality, and we cannot guarantee that their solution will be compatible with the Klarna payment method.
Payment method logos
Troubleshooting
Below are some of the most common configuration errors, their cause and steps that you can follow to solve them.
Nexi Group payment app is not visible as a payment method
- Ensure the Nexi Group app is available in the right Sales Channel in the app configuration.
- Under the Sales Channel section, select your Shop Name under General settings. Add desired payment methods from the Nexi app.
- Temporarily switch to the Shopware 6 standard template. Custom templates might need additional changes to ensure correct display. Consult with your web designer or developer.
Nexi Group payment window is blank
- Ensure your integration keys in the Nexi Group app settings are correct and do not contain additional blank spaces.
- Temporarily deactivate third party plugins that might affect the functionality of the app.
- Check if there are any temporary technical inconsistencies: https://easy-status.developers.nets.eu/
Payments in live mode don't work
- Ensure you have an approved Live Checkout account for production.
- Ensure your Live Checkout account is approved for payments with the selected currency.
- Ensure payment method data is correct and supported by your Checkout agreement.