Checkout for Shopware App
This guide describes how to install, configure, and use Checkout webshop module for the Shopware app
Before you start
Important
Before you start, you need a Checkout Portal account. Please refer to the guide
Requirements:
Shopware Version: Compatible with Shopware 6.5x and above.
New Features for Shopware App
Shop Features
- Seamless checkout experience with multiple payment options
- Payment method splitting
- Nexi Nets Easy fast checkout with "remember me" functionality.
- Embedded checkout for an optimized user experience. Users are not redirected outside Shopware store.
- Compatibility with discounts, tax (VAT), and shipping options.
- Compatible with multi-store setups.
- Smart mix of payment methods to suit all preferences.
- Multiple checkout languages and currencies for selling in your domestic market and abroad.
- Our app also supports subscriptions through the Shopware commercial extention:
[https://docs.shopware.com/en/shopware-6-en/extensions/shopware-commercial]
Administration Features
- Quick setup and flexible configuration
- Intuitive order management with synchronized payment status via webhooks
- Refund and capture capabilities with item-level control
- Flow Builder integration for automated payment processes
Installation
- Install the Nexi Checkout app via Shopware Extension Store.
- After successful installation:
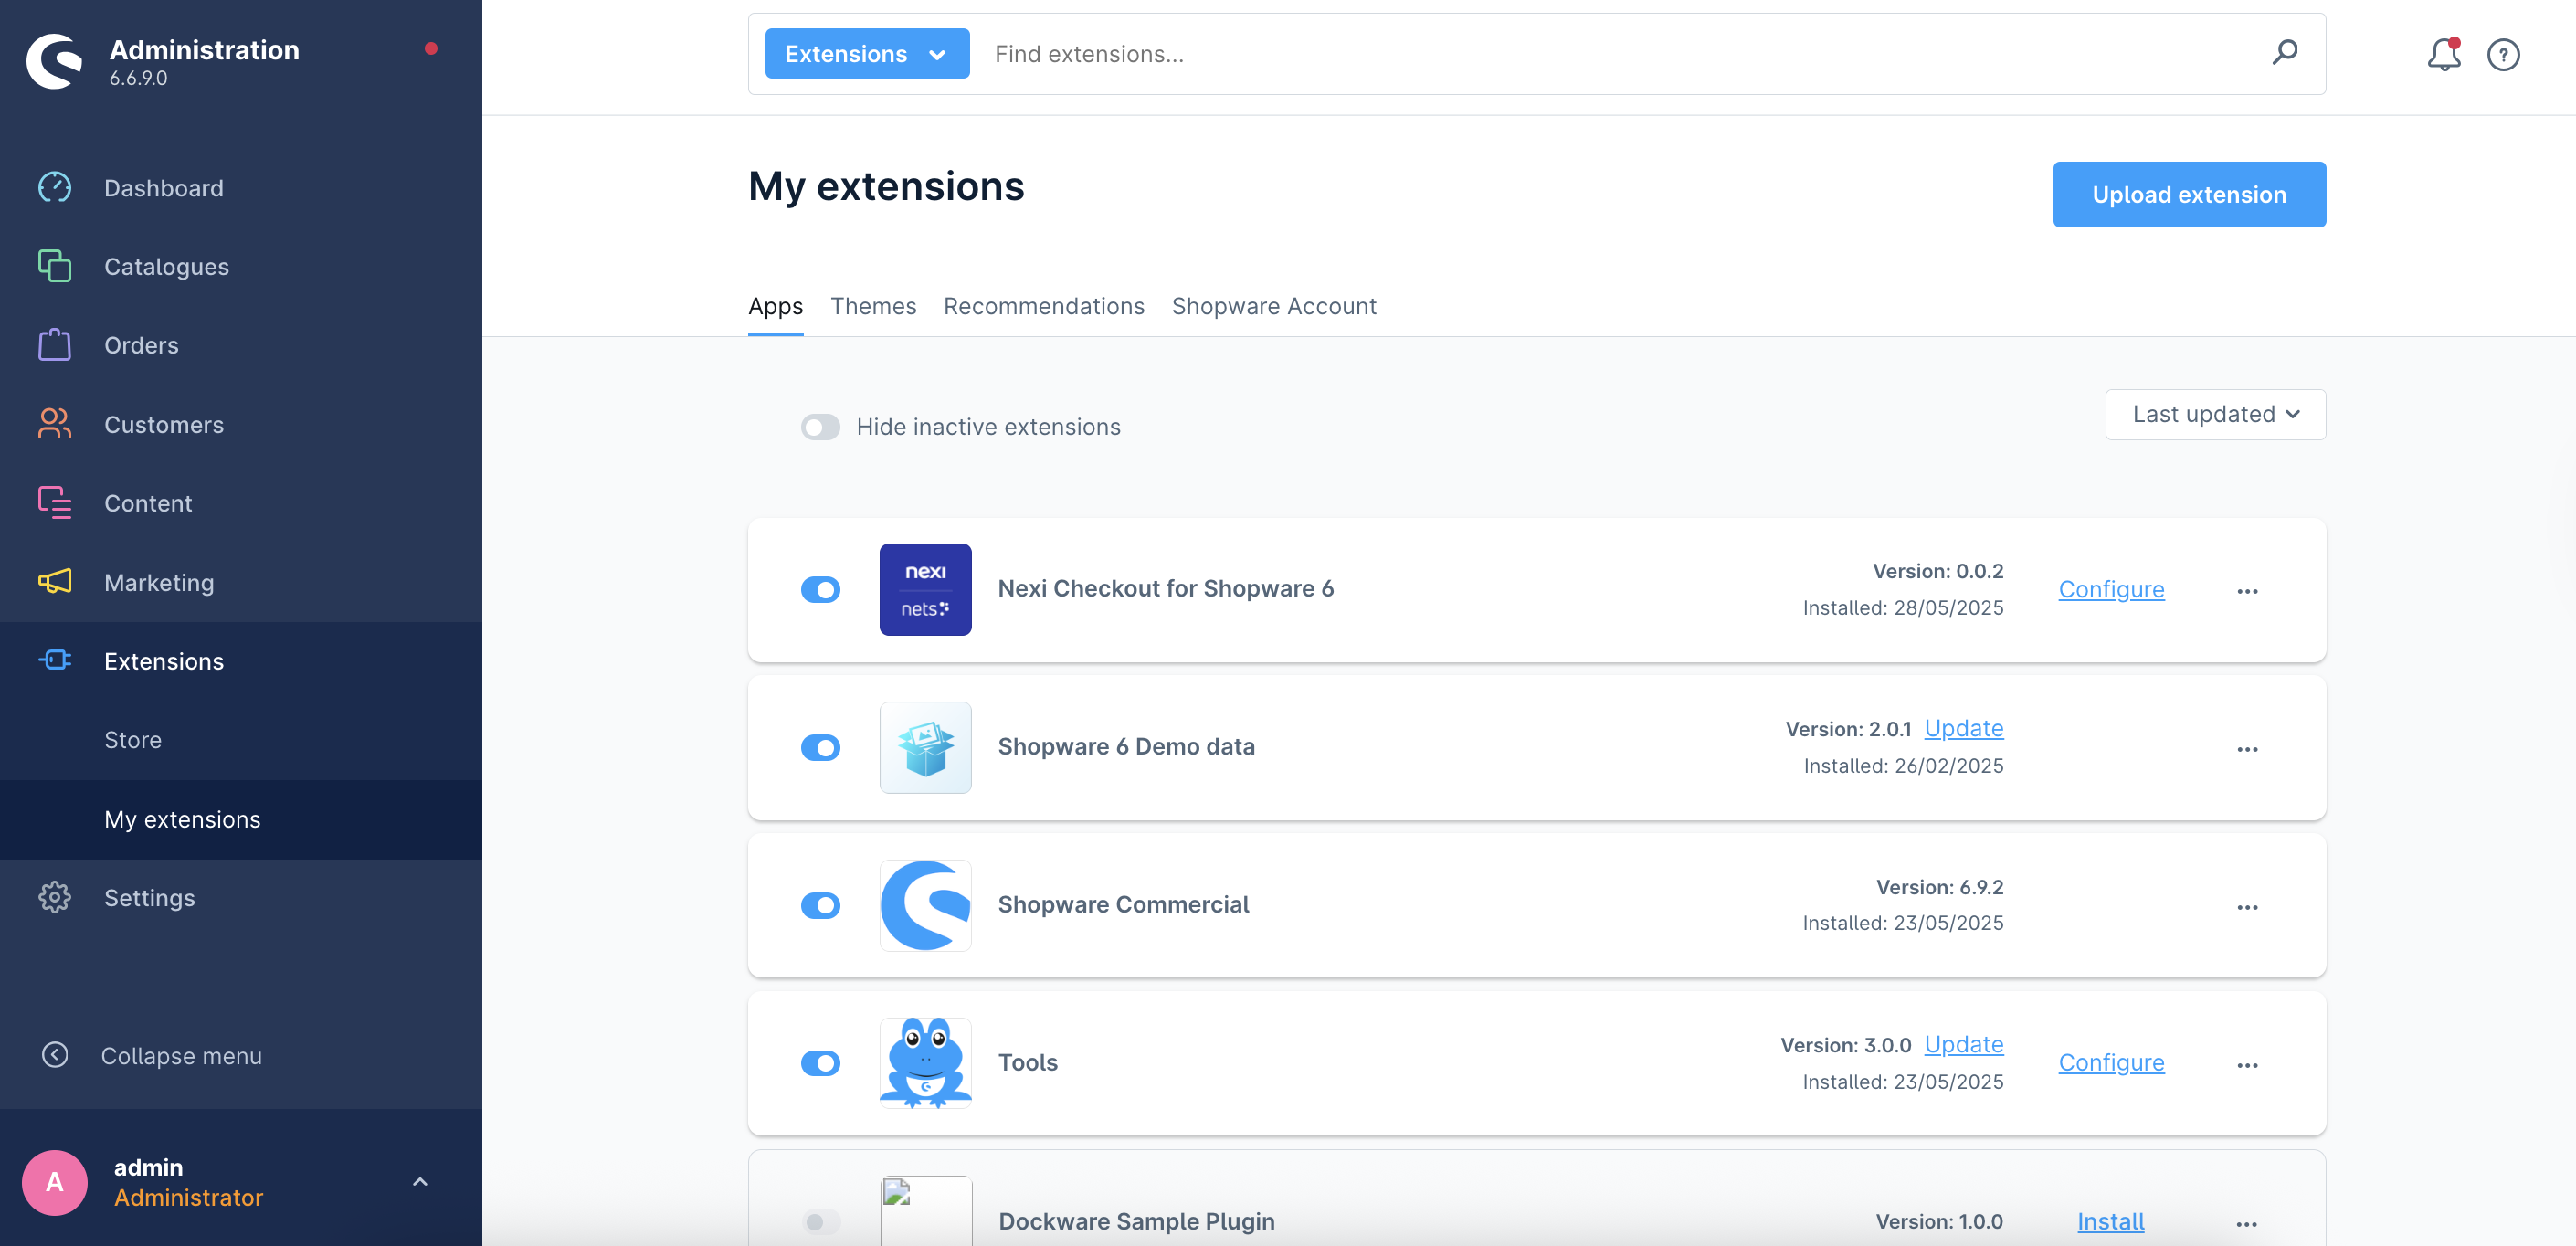
- Navigate to My Extensions to see the app.
- Use the toggle to Activate/Deactivate the app.
- Click the Configuration button to set up the app.
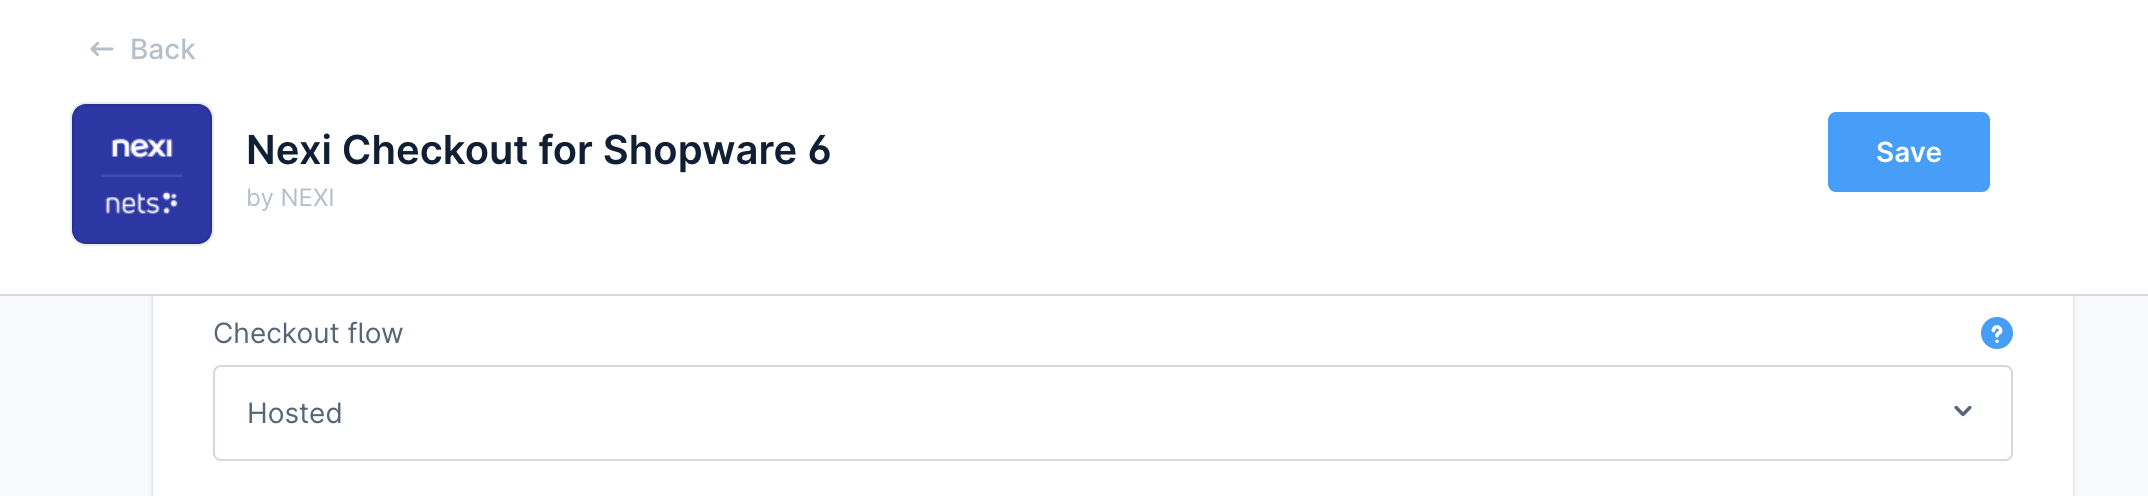
Configuration
Access the Configuration page to set up the Nexi Checkout integration:
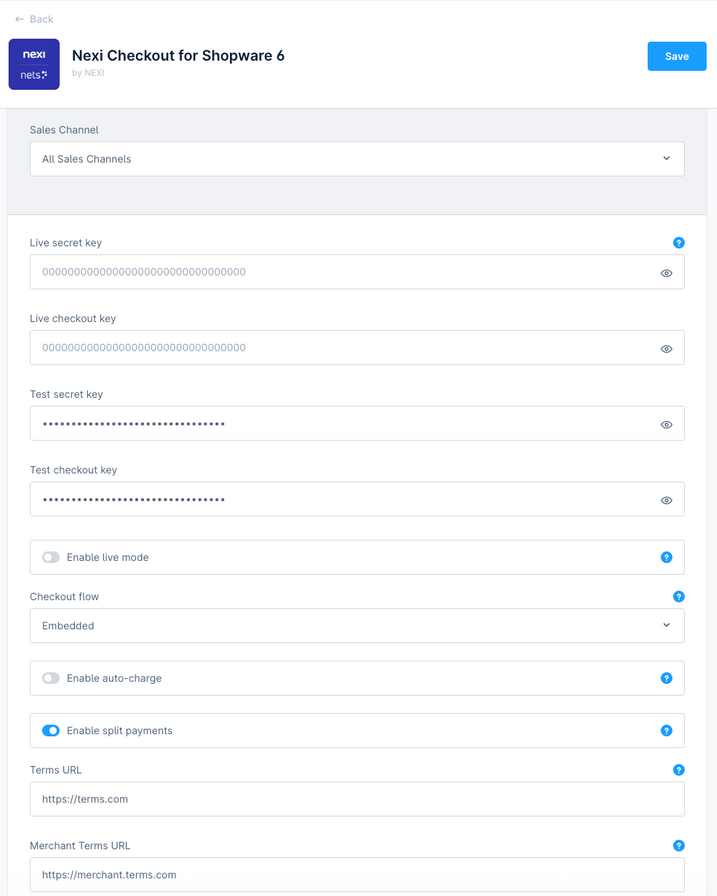
Key Settings:
- Live/Test Keys: Enter your Nexi integration keys.
- Live Mode: Toggle ON to enable production environment.
- Checkout Flow:
- Hosted: Opens payment in a separate page.
- Embedded: Payment occurs within your checkout page.
- Auto-Charge: Automatically charge the customer upon successful payment (for compliant products/services only).
- Split Payment Method:
- ON: Users select specific payment methods (e.g., Klarna, PayPal).
- OFF: Only "Nexi Checkout" is displayed.
- Terms & Conditions URL: Provide a full link to your policy page Click Save to apply the settings to the selected sales channel.
Sales Channel settings
Assign Nexi Checkout to your desired sales channel:
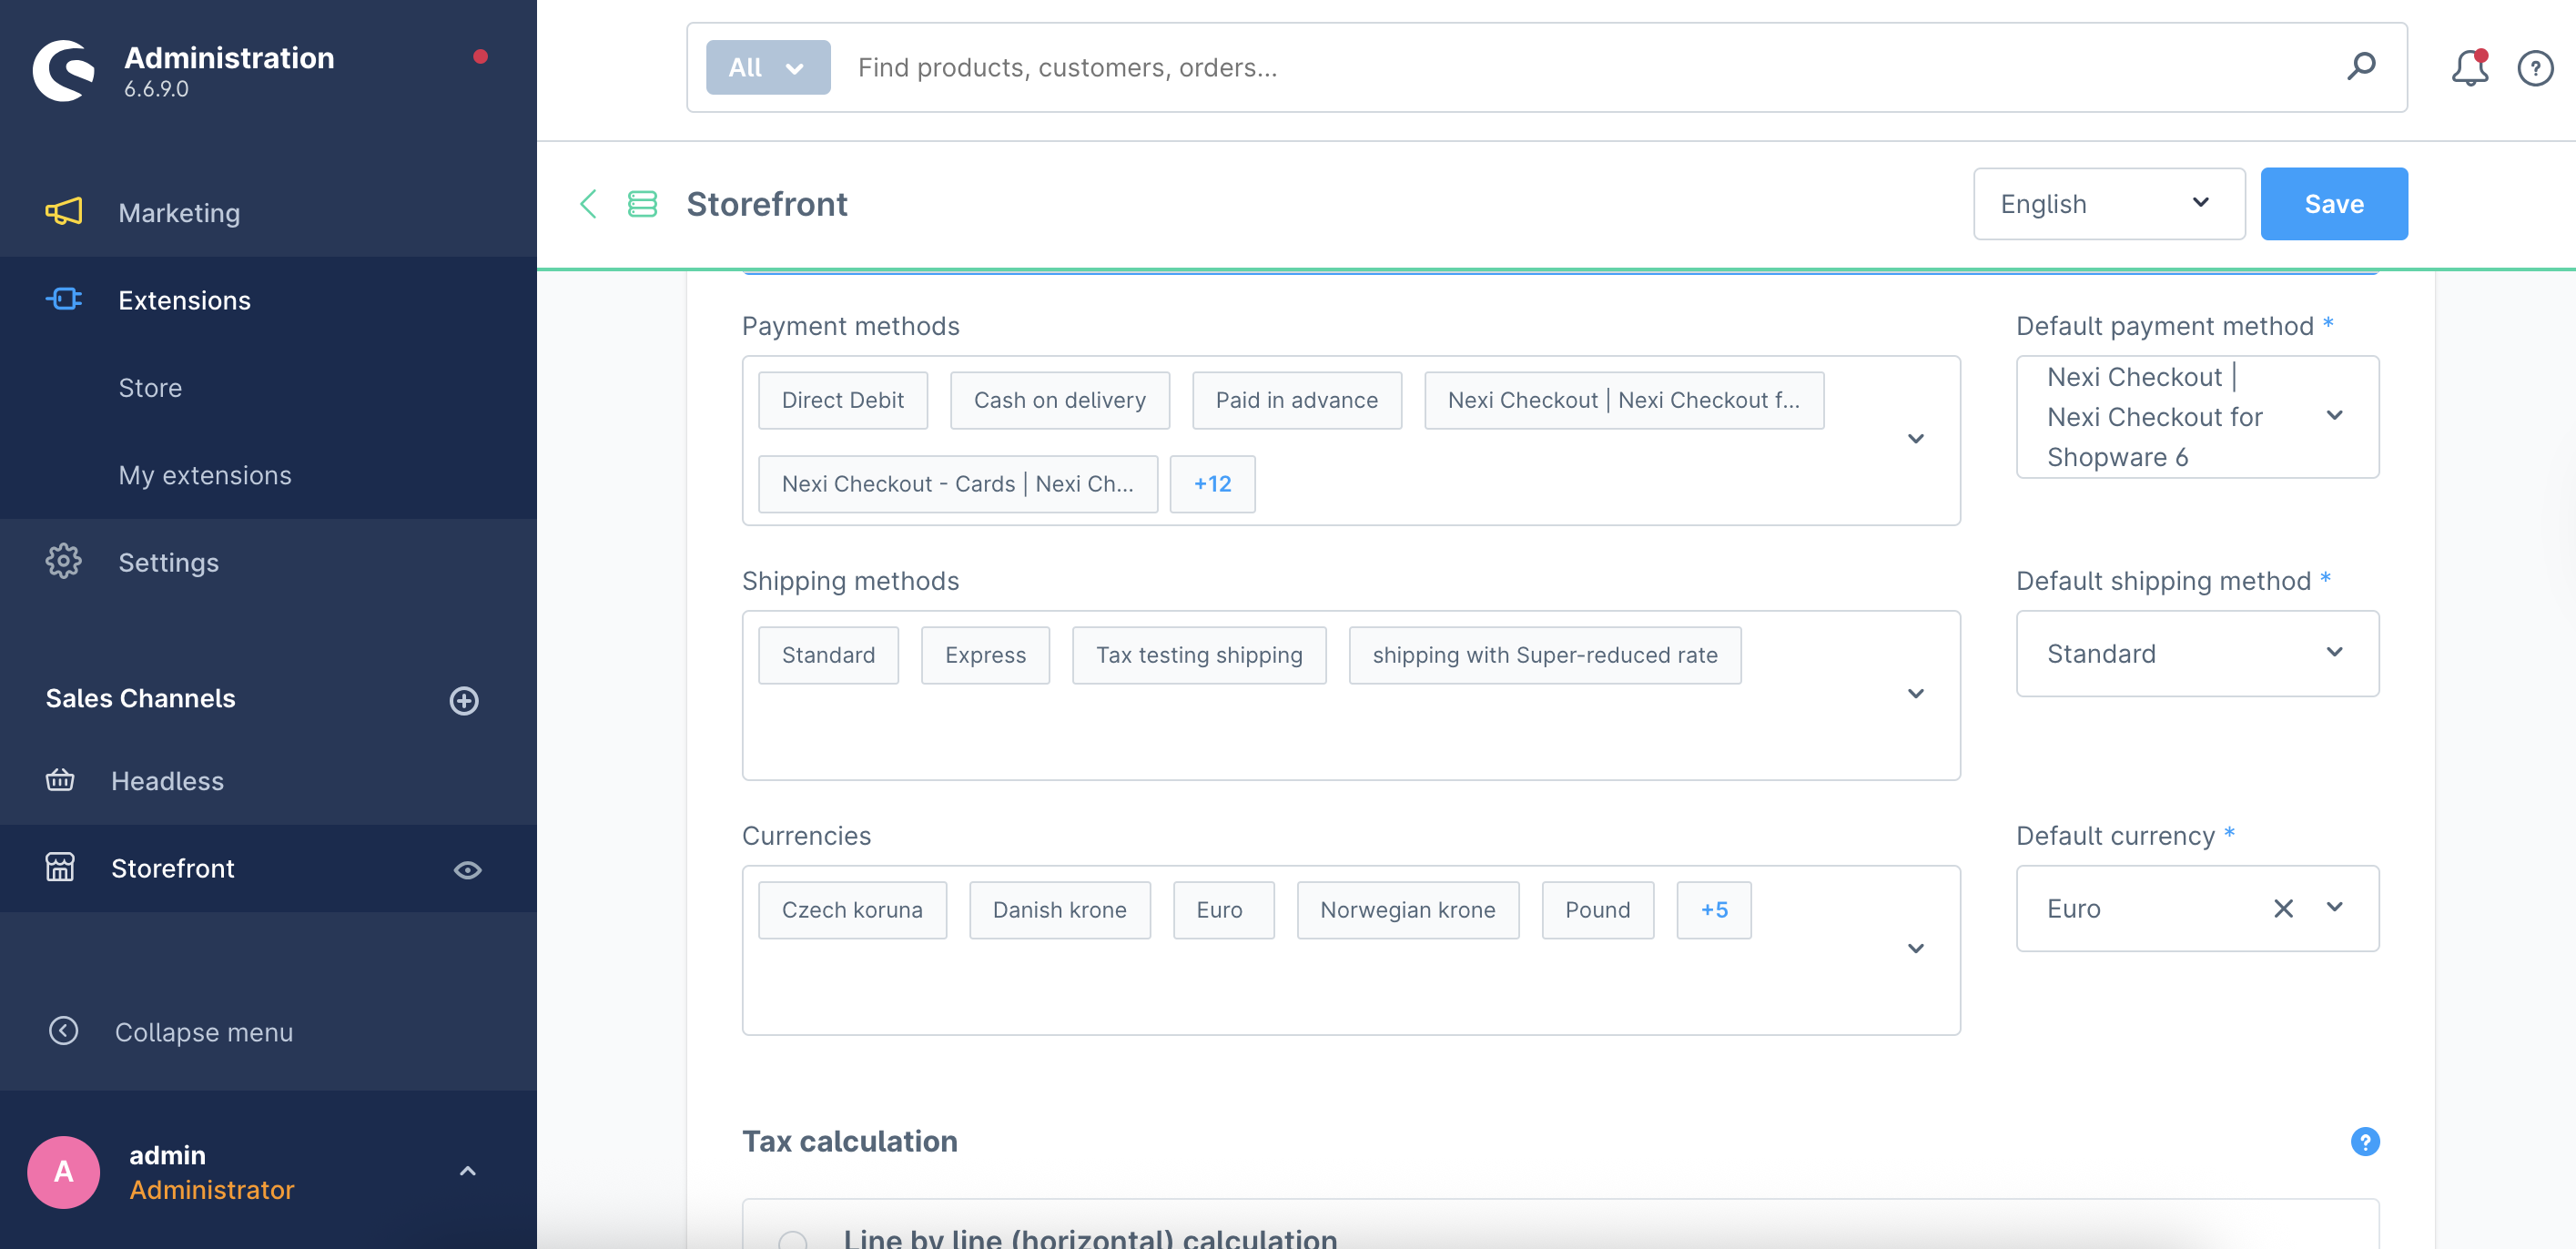
- Go to Sales Channel settings.
- Scroll to Payment and Shipping.
- Assign Nexi Checkout to the Payment Methods field.
- Set it as the default payment method.
Payment methods settings
Access all Nexi-supported payment methods:
- Go to Settings → Payment Methods.
- Modify or toggle ON/OFF any supported methods:
- Sofort
- Klarna
- Google Pay
- Applepay
- Vipps
- Paypal
- Mobilepay
- Trustly
- Swish
- SEPA Direct Debit
- Installment
- Invoice
- Nexi Checkout - Cards
- Nexi Checkout Displayed if Split Payment is OFF
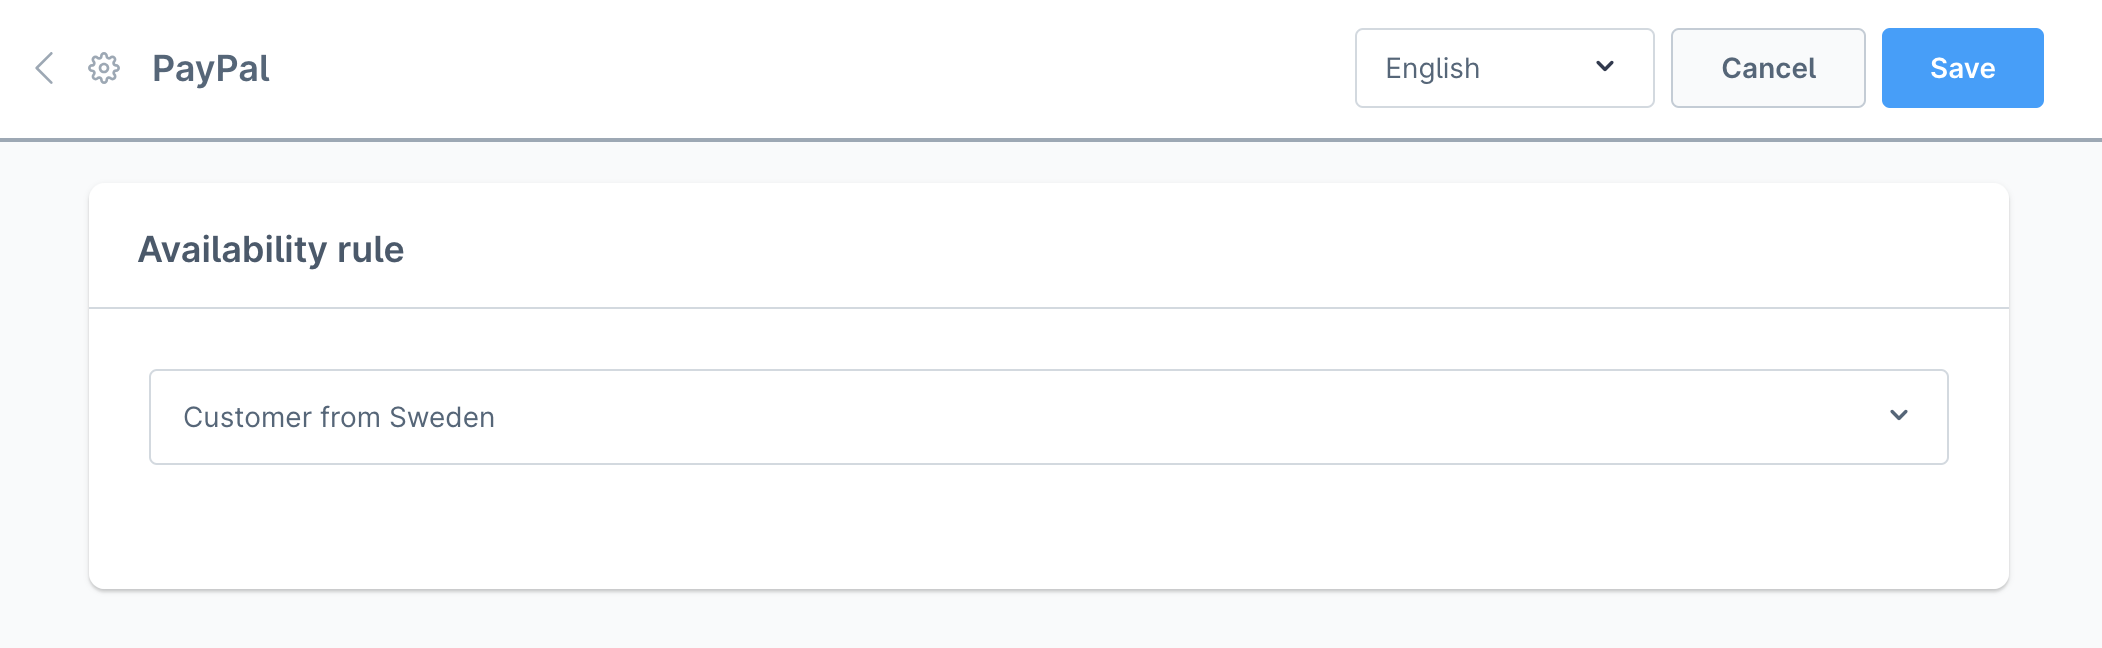
Availability Rule
Default availability rule of each payment method is following global rule at Nexi - Payment methods.
Any additional rule must be setup at Availability Rule section for each payment method.
Example: To make PayPal available only for Swedish customers:
- Click Edit Details under PayPal
- Scroll to Availability Rule
- Create/select a rule for Sweden-based billing addresses
- Save changes
Split Payment
Split Payment affects how payment methods are shown to the user at checkout.
Setup:
Go to Configuration → Toggle Split Payment ON or OFF → Click__ Save.__
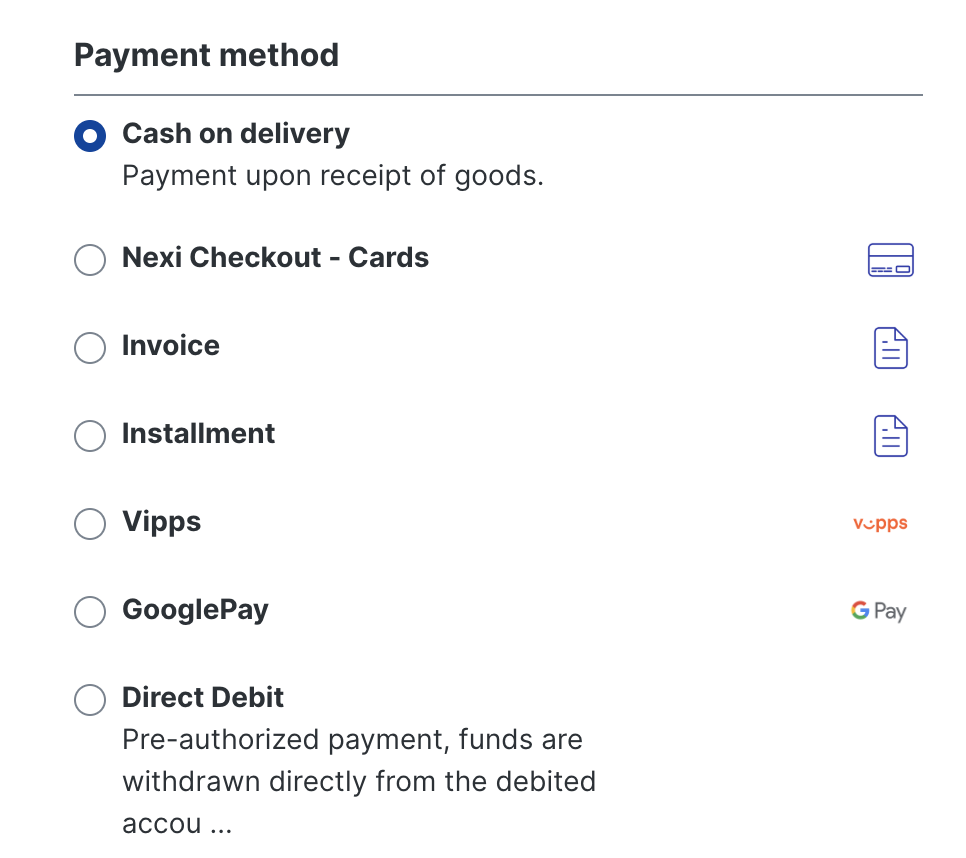
Split Payment OFF
- A single option, Nexi Checkout, is displayed
- The customer proceeds to select their preferred method within the Nexi interface
Split Payment ON
- Users will see individual Nexi-supported payment methods (e.g., Klarna, PayPal, Swish)
- Each method is selectable directly on the Shopware checkout page.
Split Payment Method affects how payment methods are shown to the user at checkout.
Setup:
Go to Configuration → Toggle Split Payment Method ON or OFF → Click Save.
Split Payment Method OFF
A single option, Nexi Checkout, is displayed. The customer proceeds to select their preferred method within the Nexi interface.
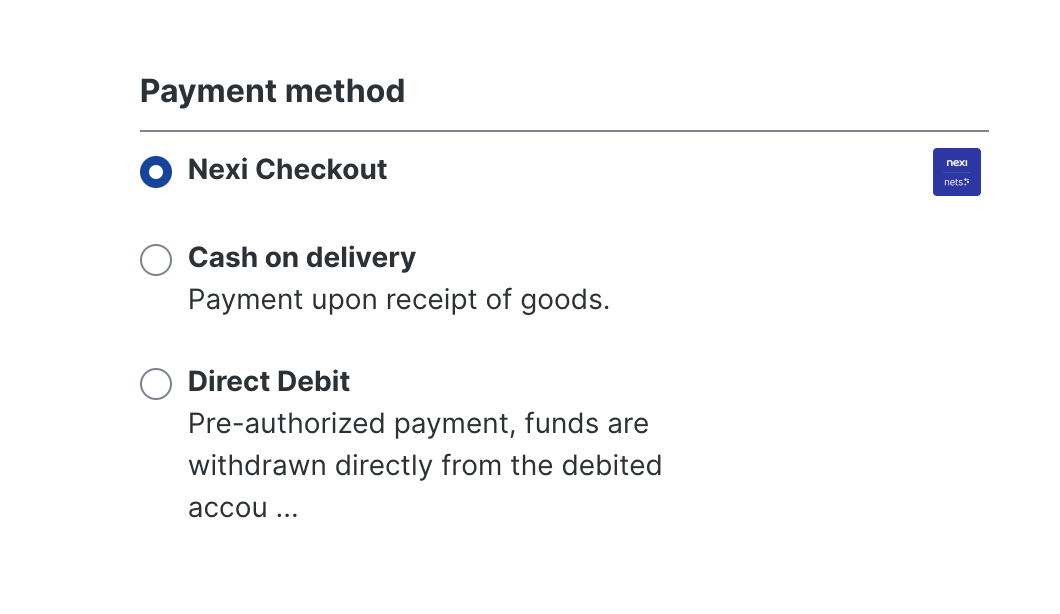
Split Payment Method ON
Users will see individual Nexi-supported payment methods (e.g., Klarna, PayPal, Swish). Each method is selectable directly on the Shopware checkout page.

Checkout Flow: Hosted & Embedded
Setup:
Go to Configuration → Select Hosted or Embedded under Checkout Flow → Click Save.
Hosted checkout
Users are redirected to a separate Nexi page after clicking Submit order.
After payment is completed, they are redirected to the Thank You Page with Nets ID.

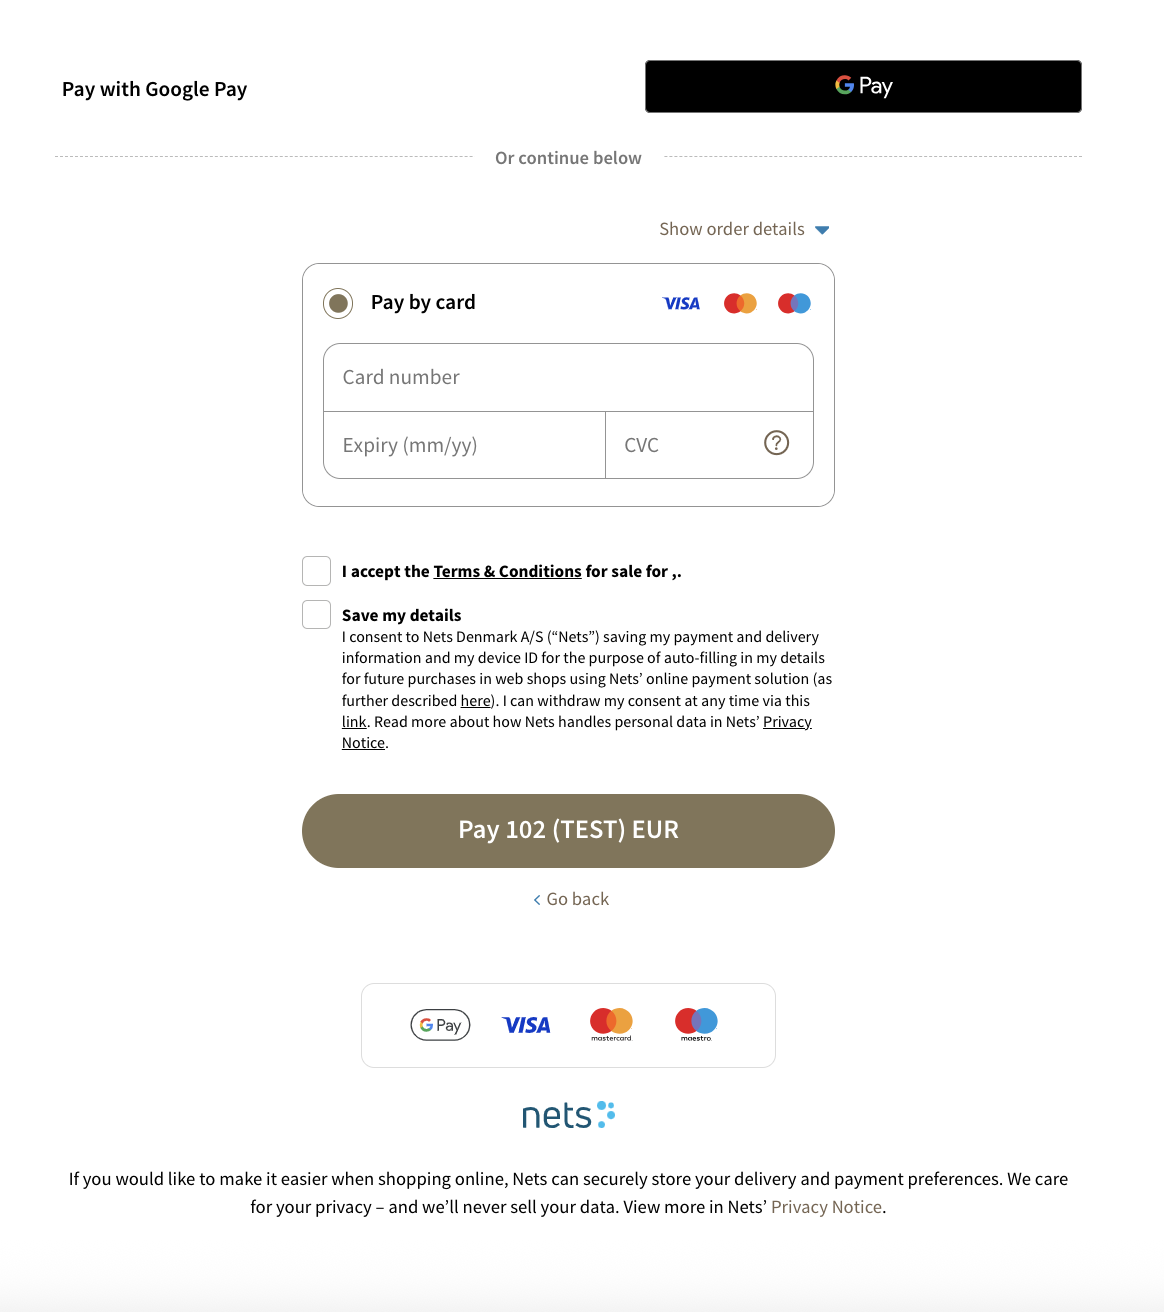
Embedded checkout
Payment iframe appears directly on your checkout page after clicking Submit order
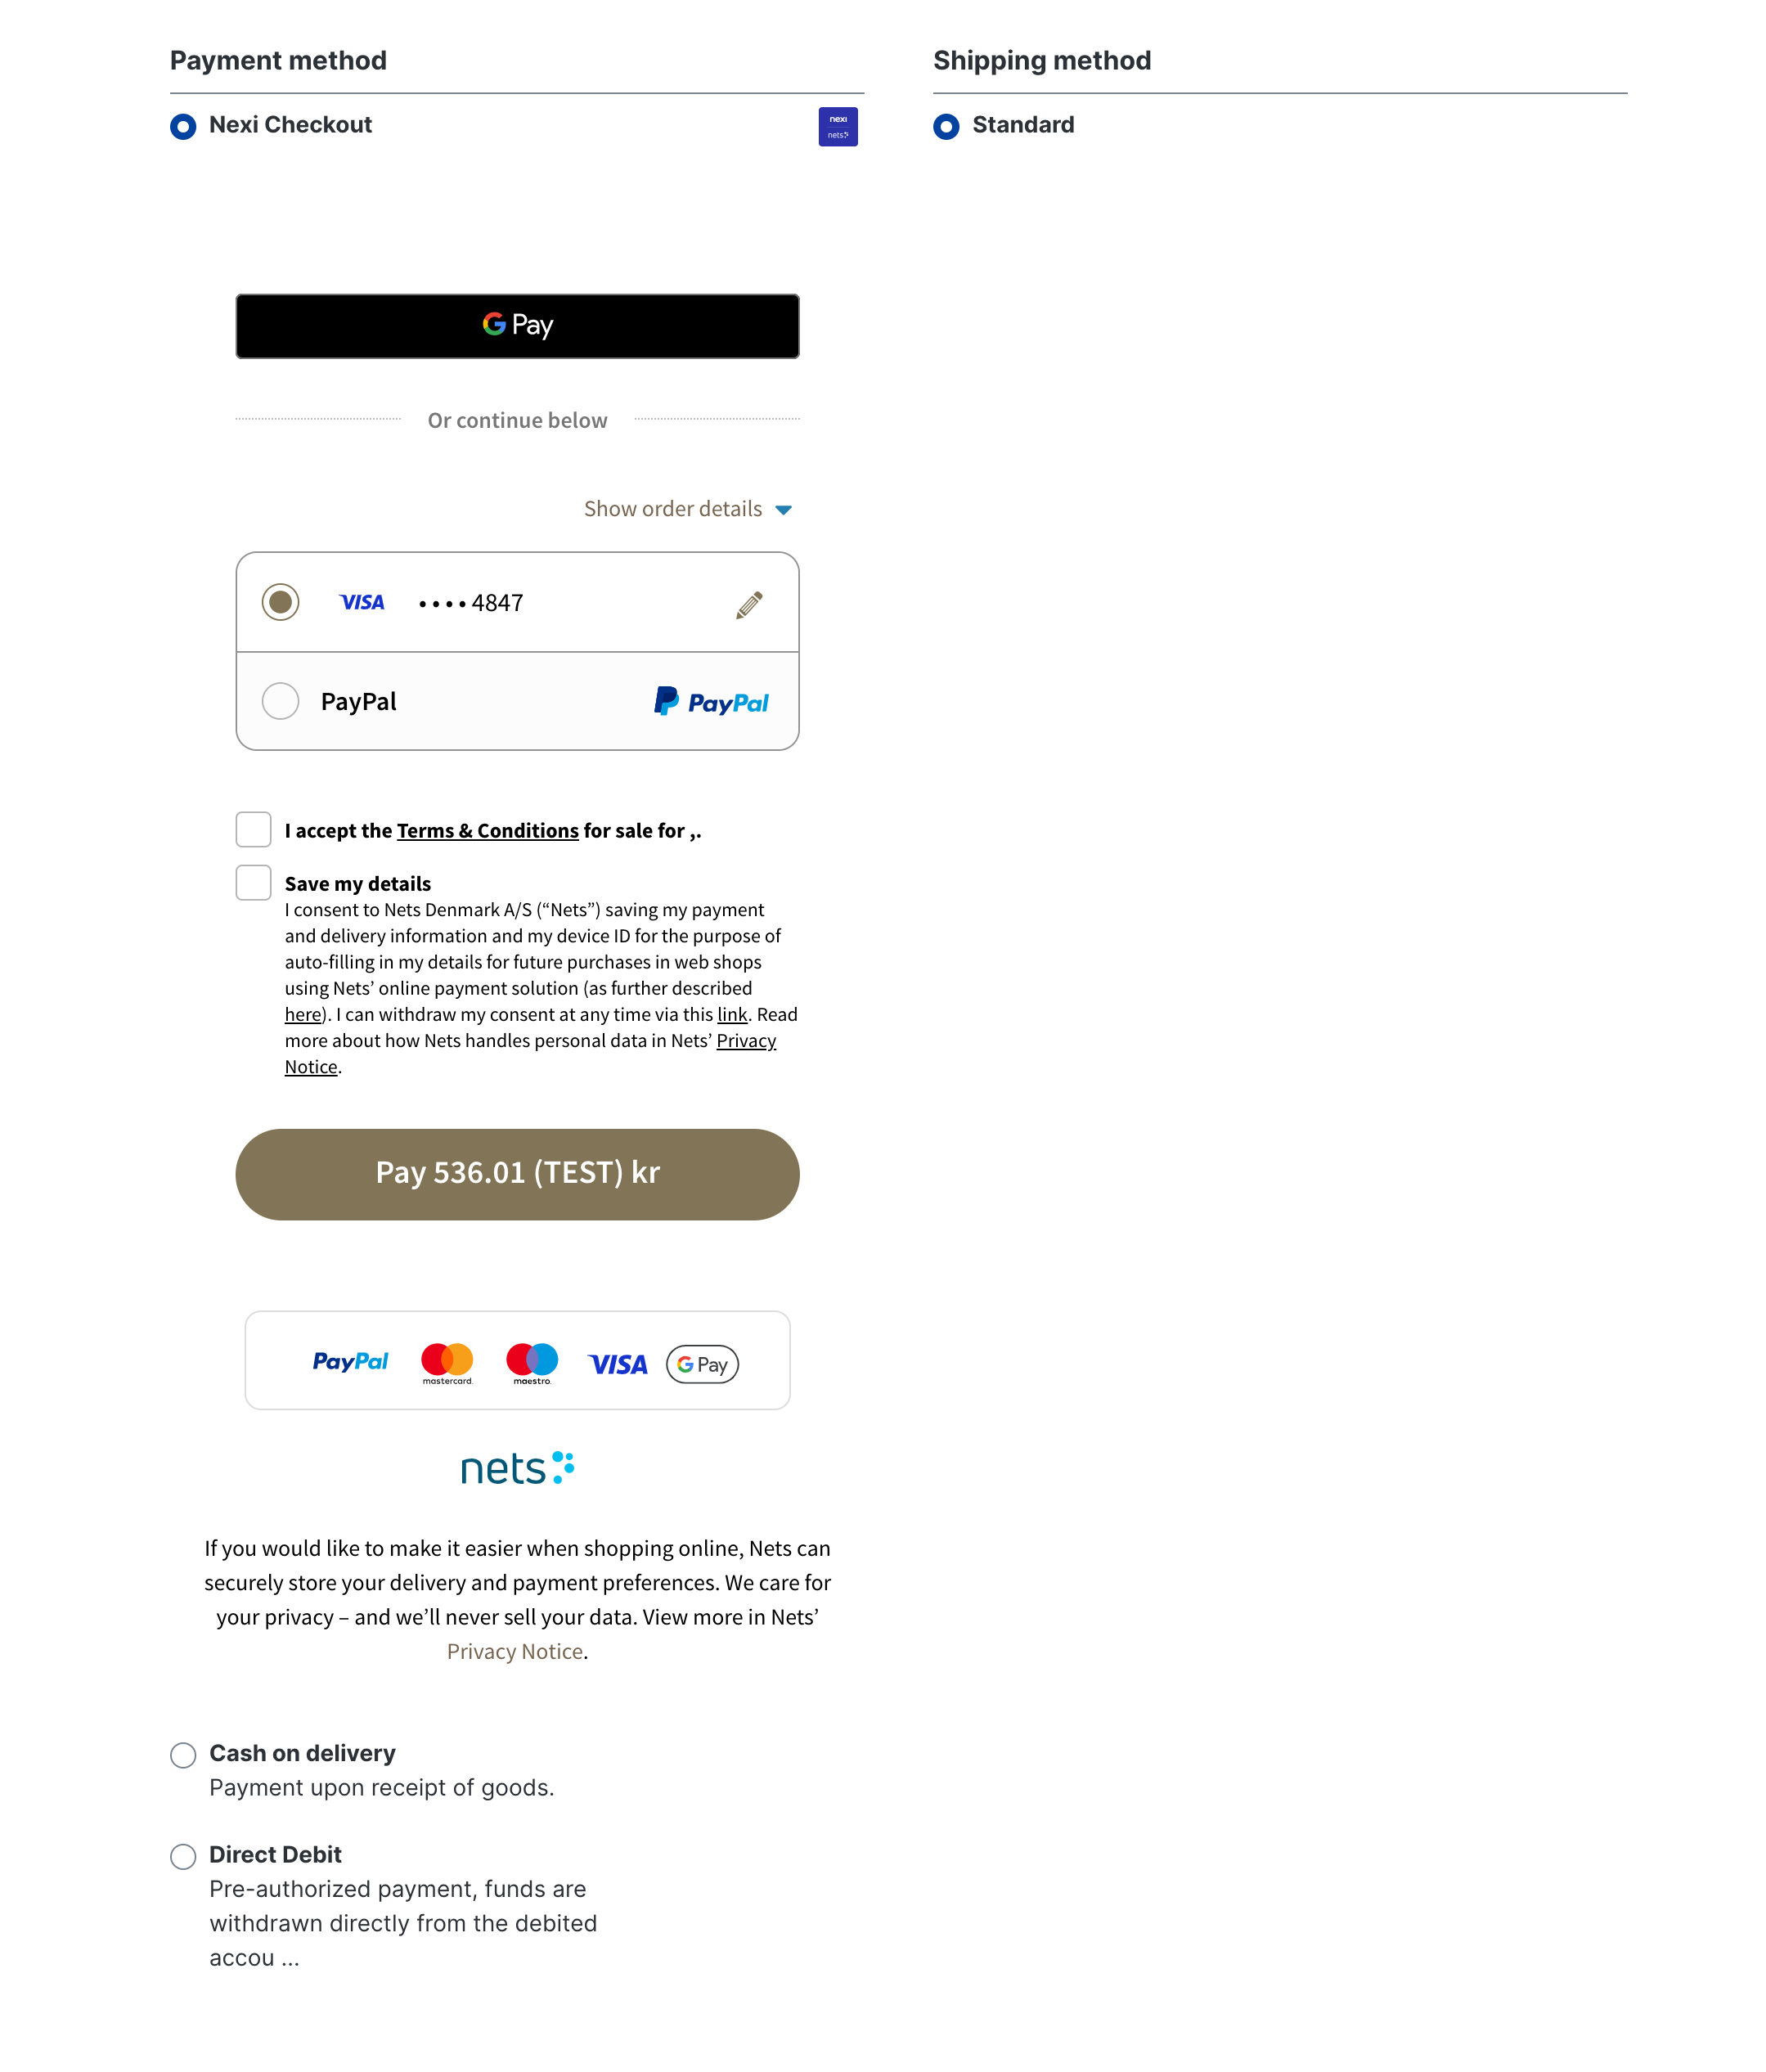
After payment is completed, they are directed to the Thank You Page with Nets ID.
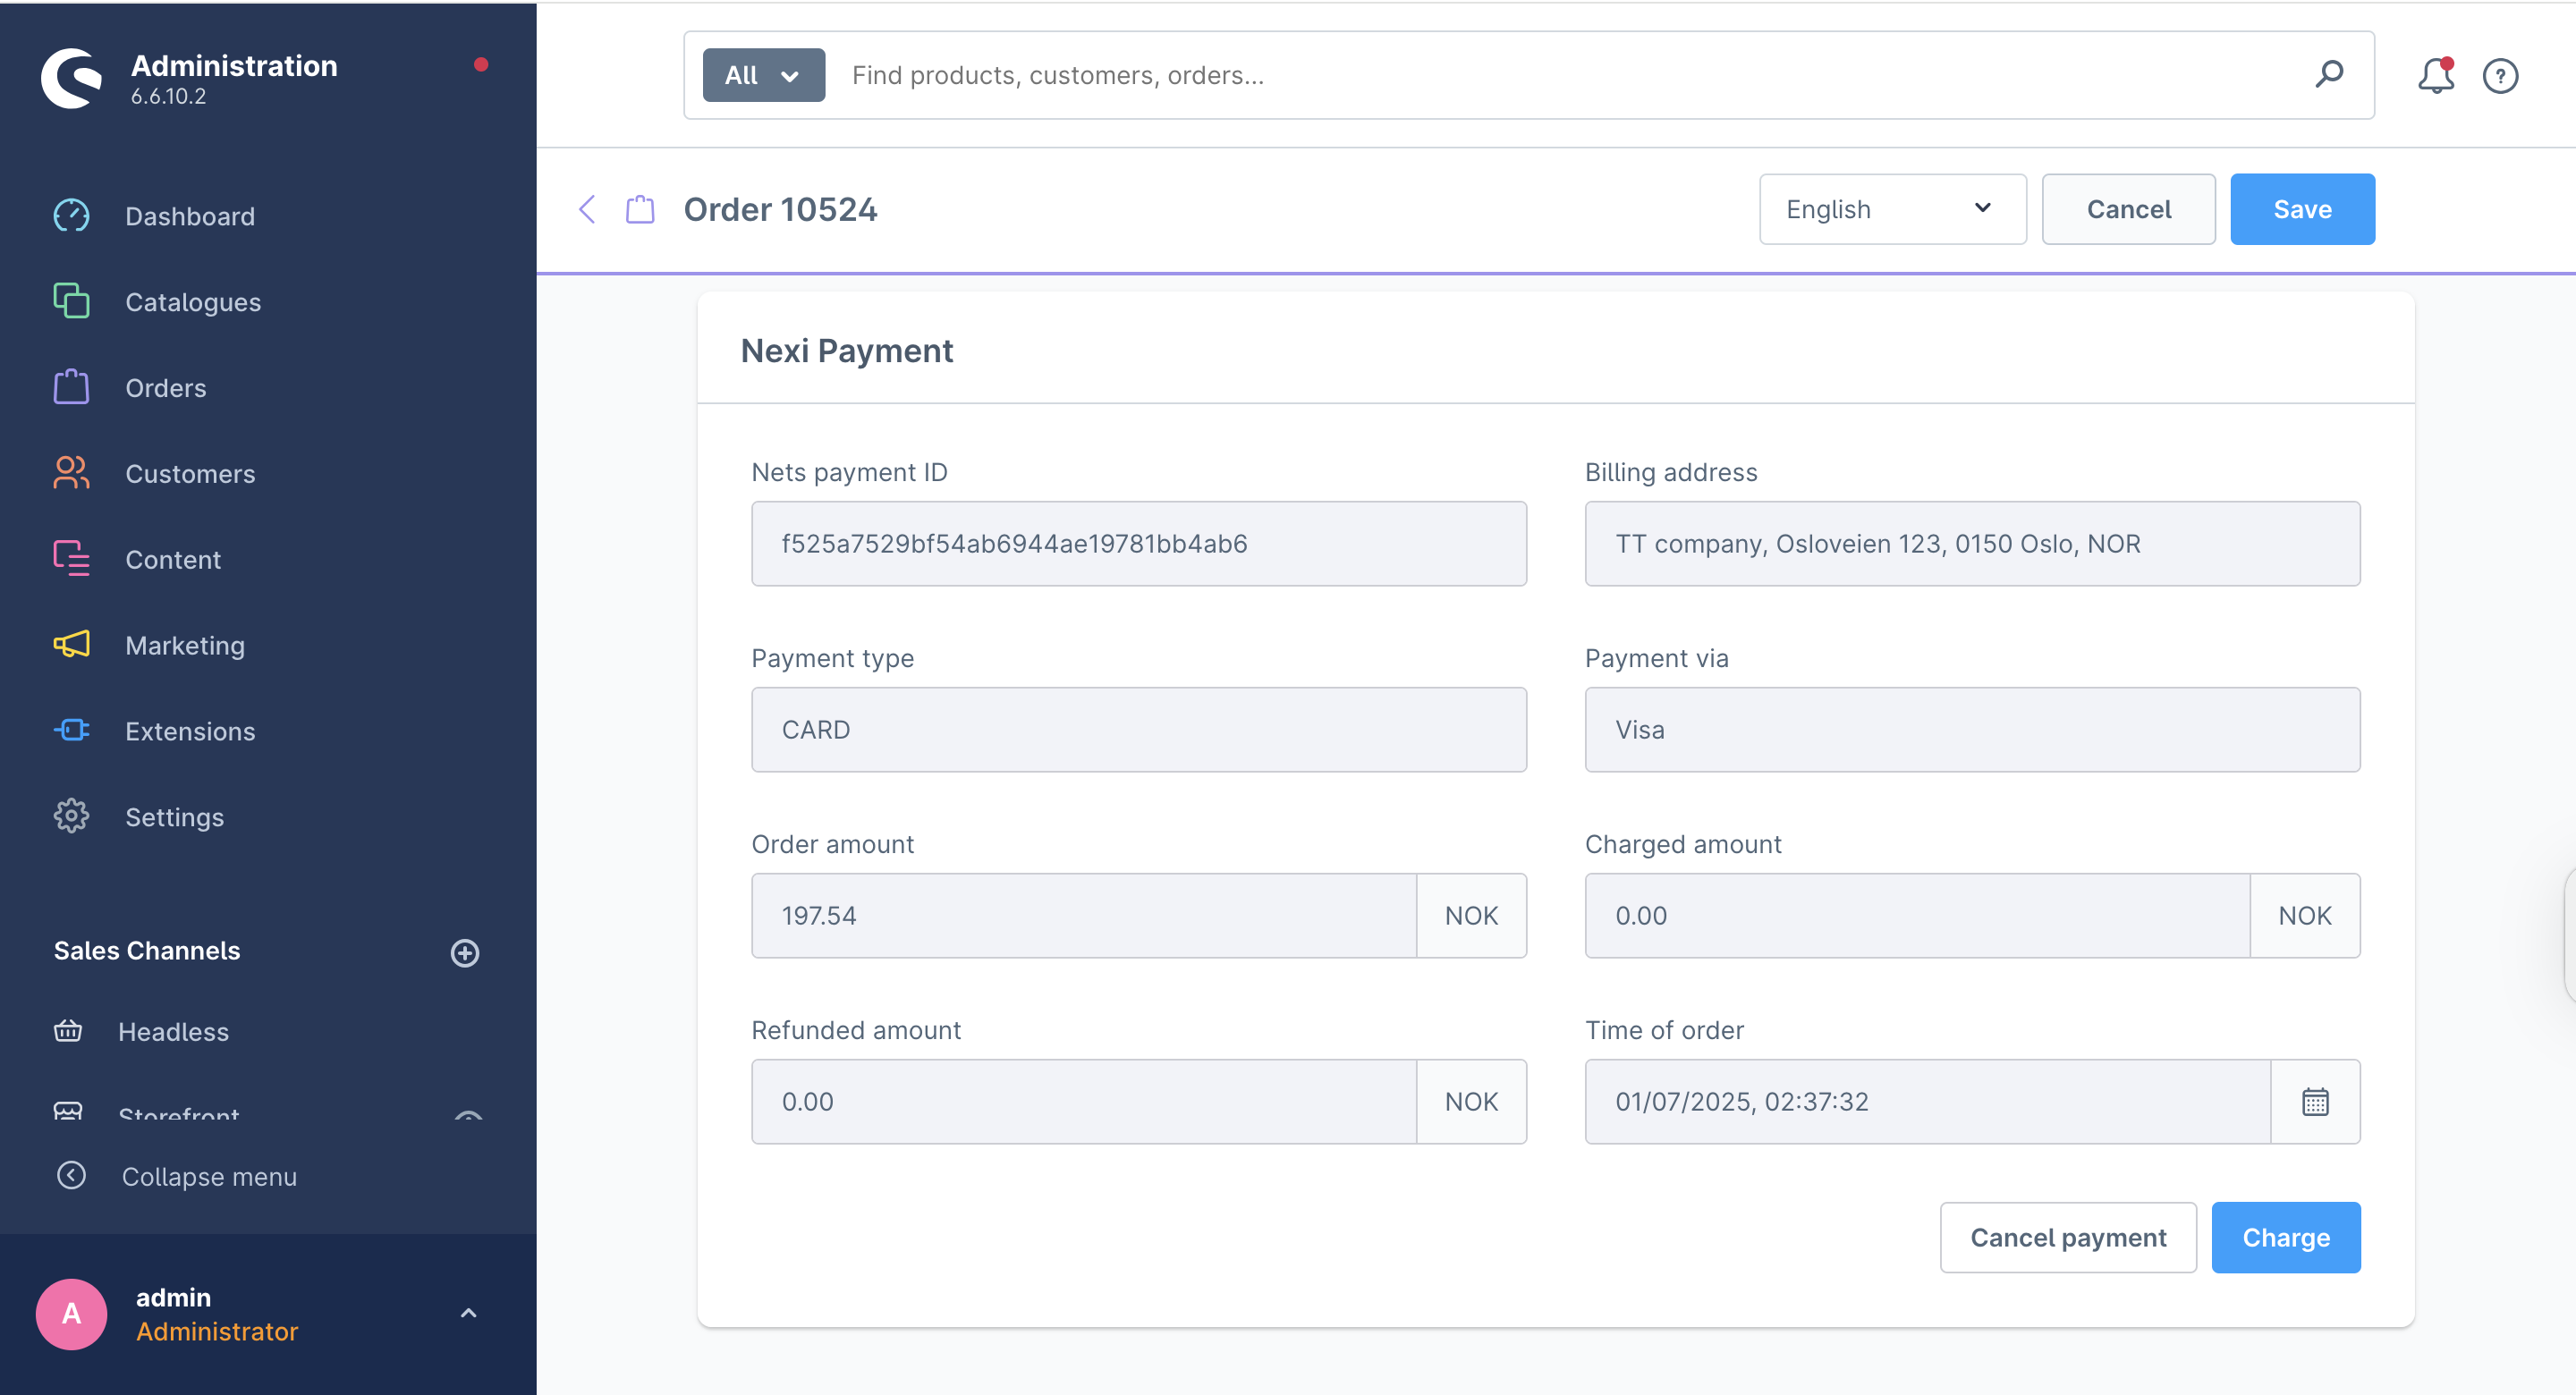
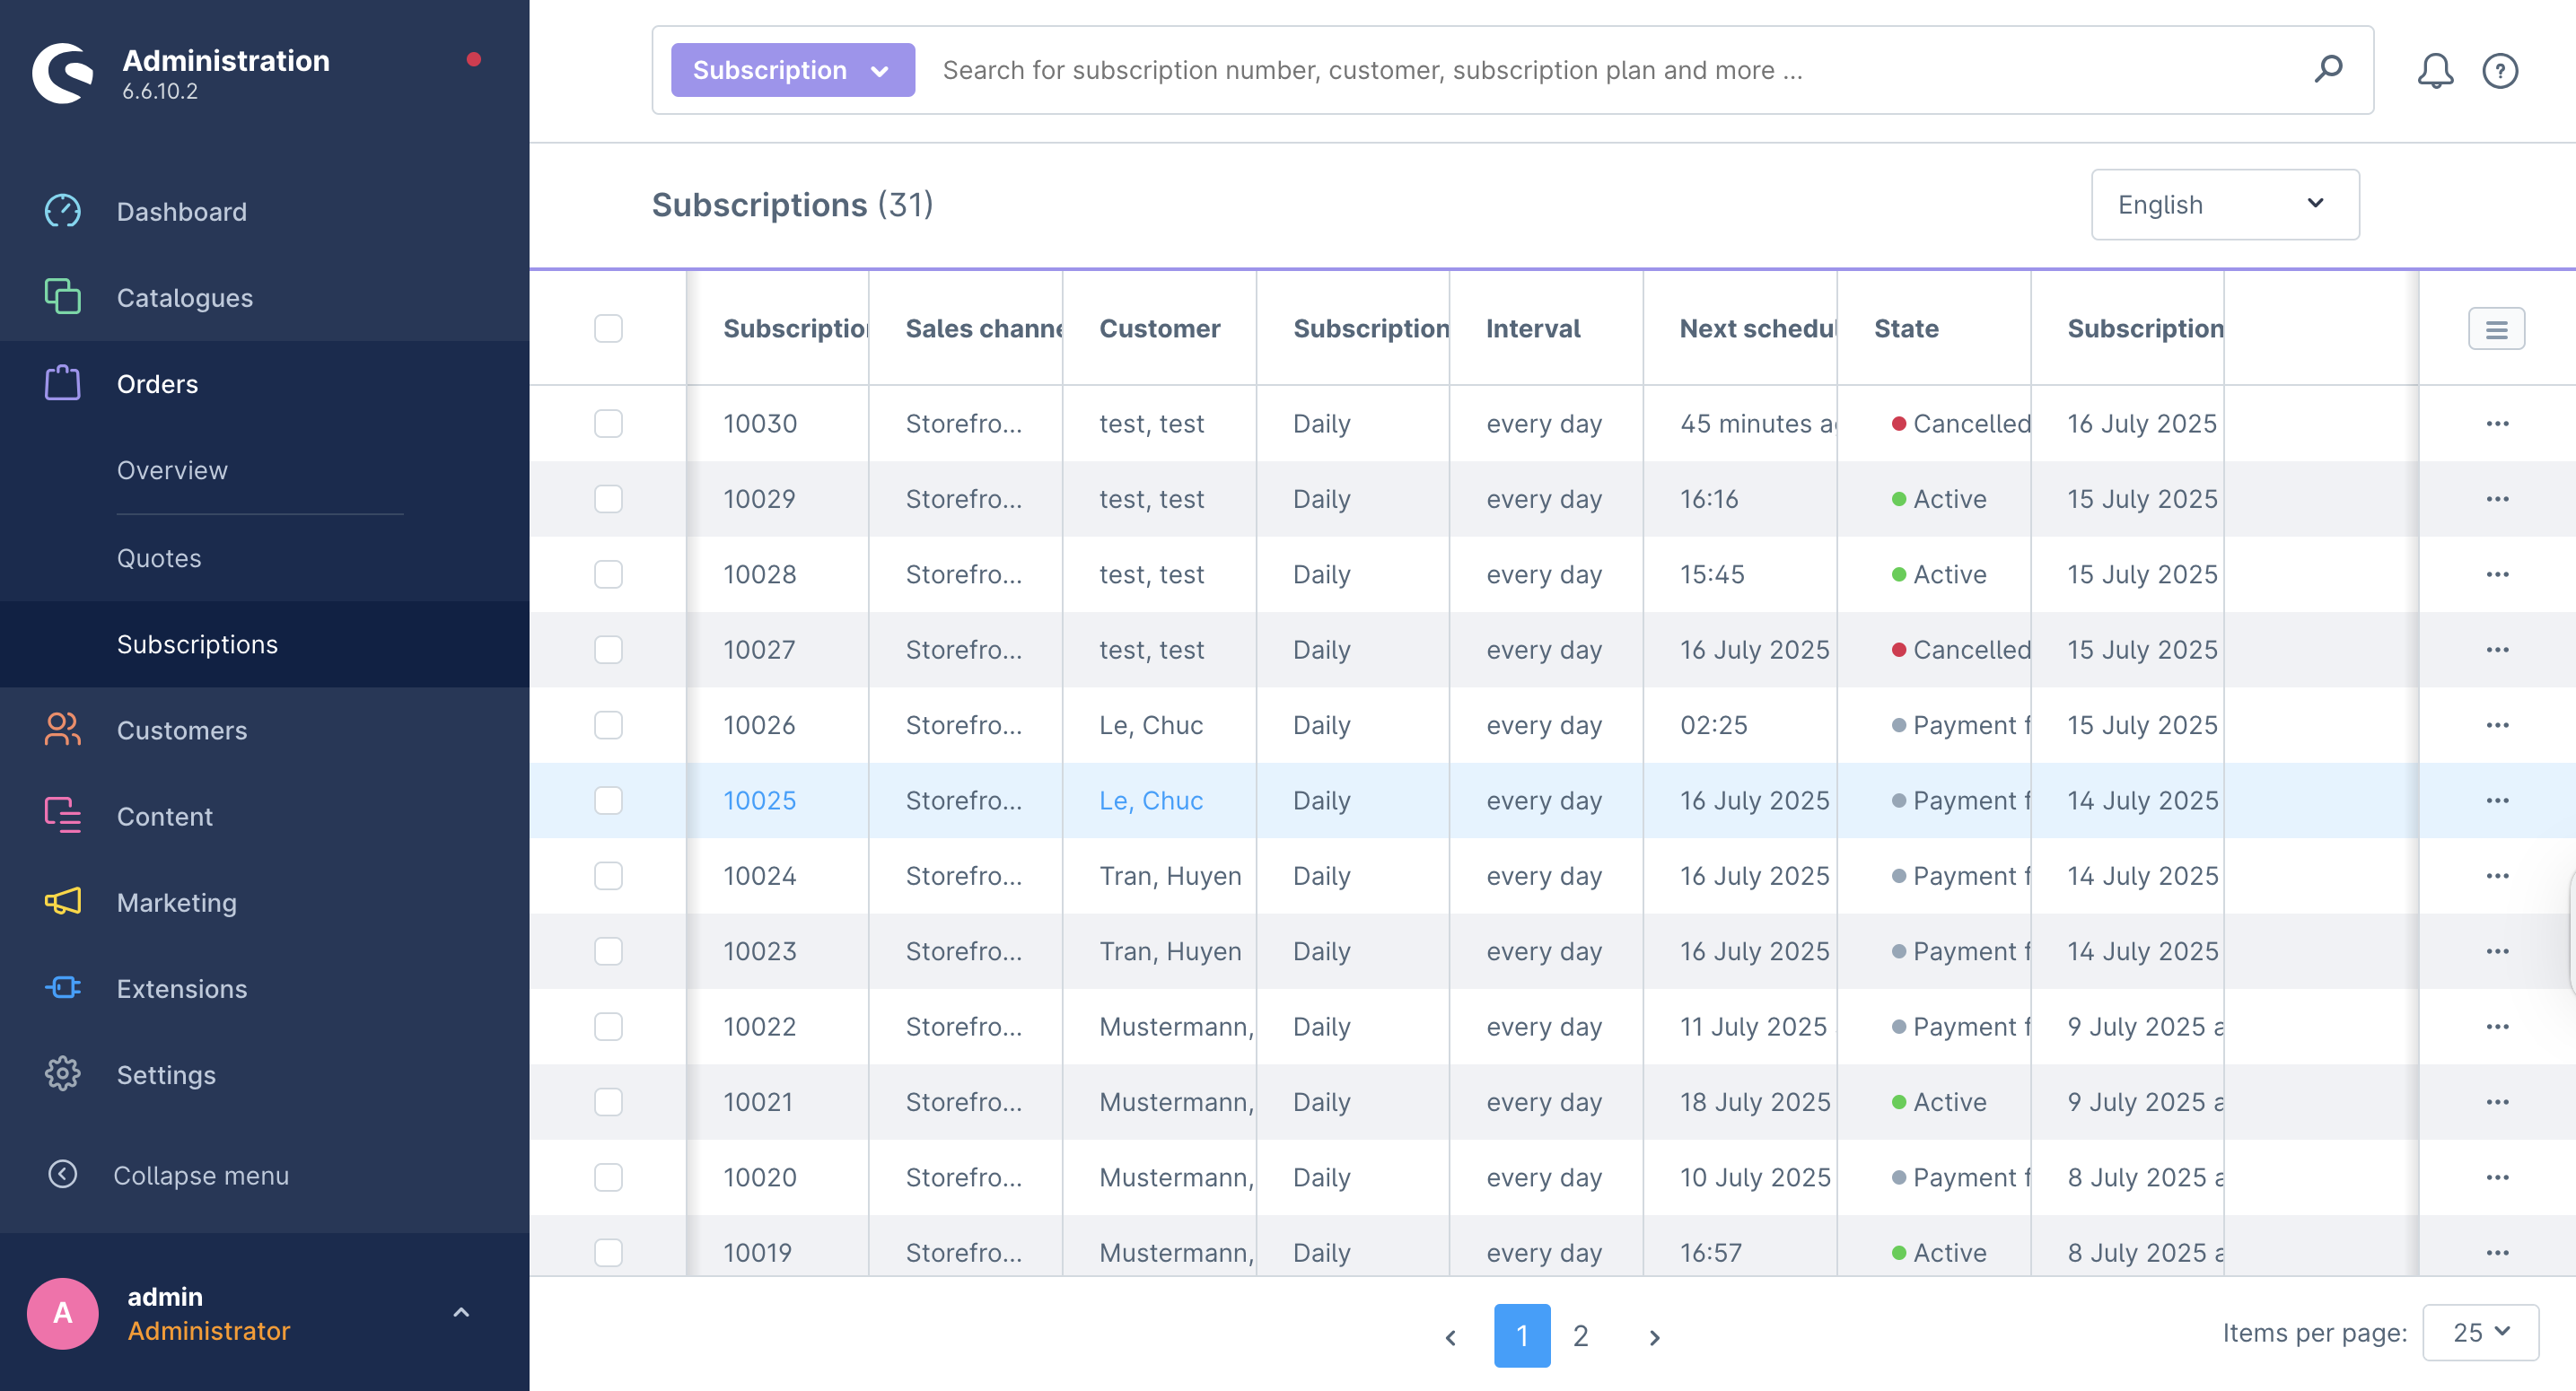
Order management
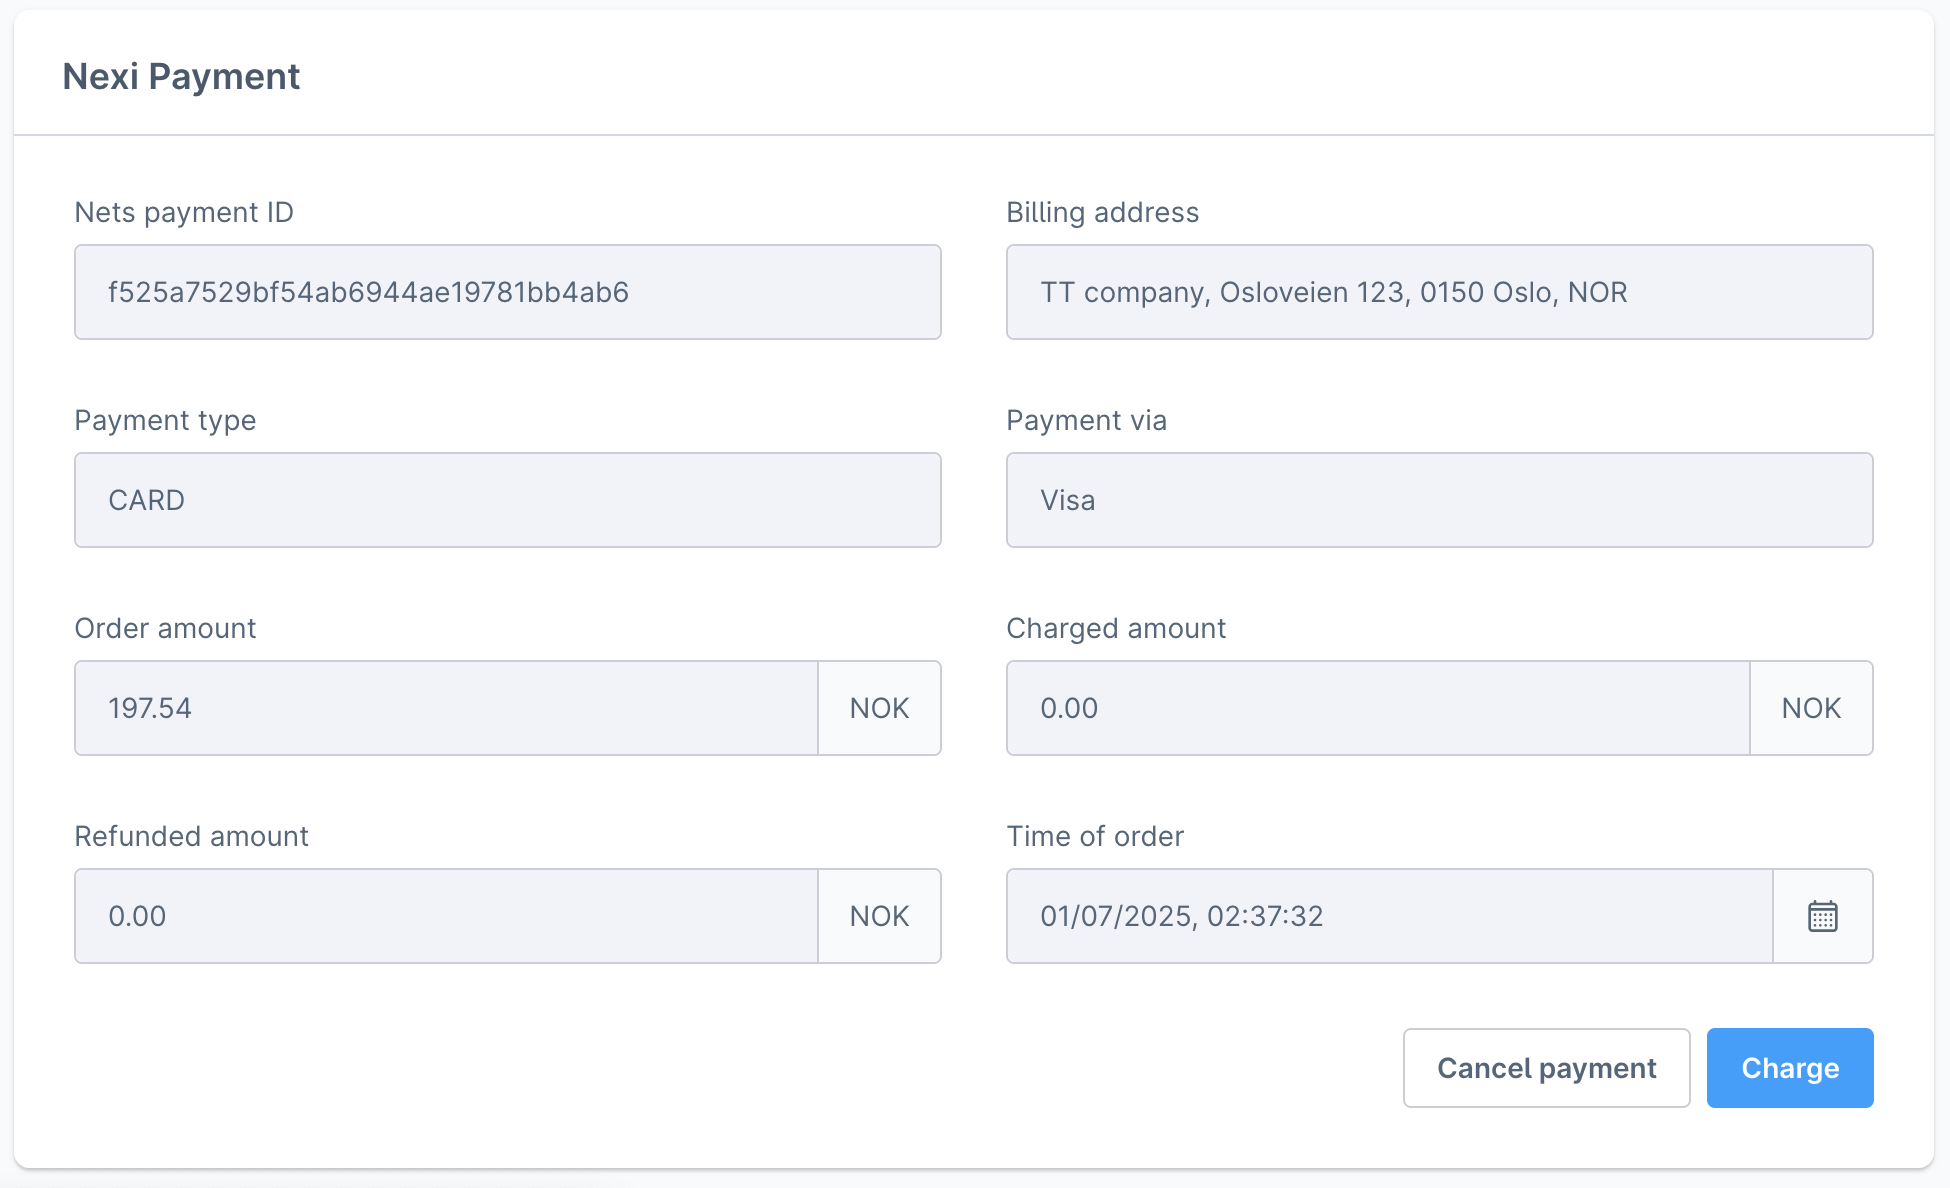
View Order Details
- Go to Orders → Select an Order.
- Under the Details tab, scroll to the bottom to view Nexi-related information.
Cancel Payment
- Click Cancel Payment (available if the payment hasn't been charged).
- Confirm the action via the popup.
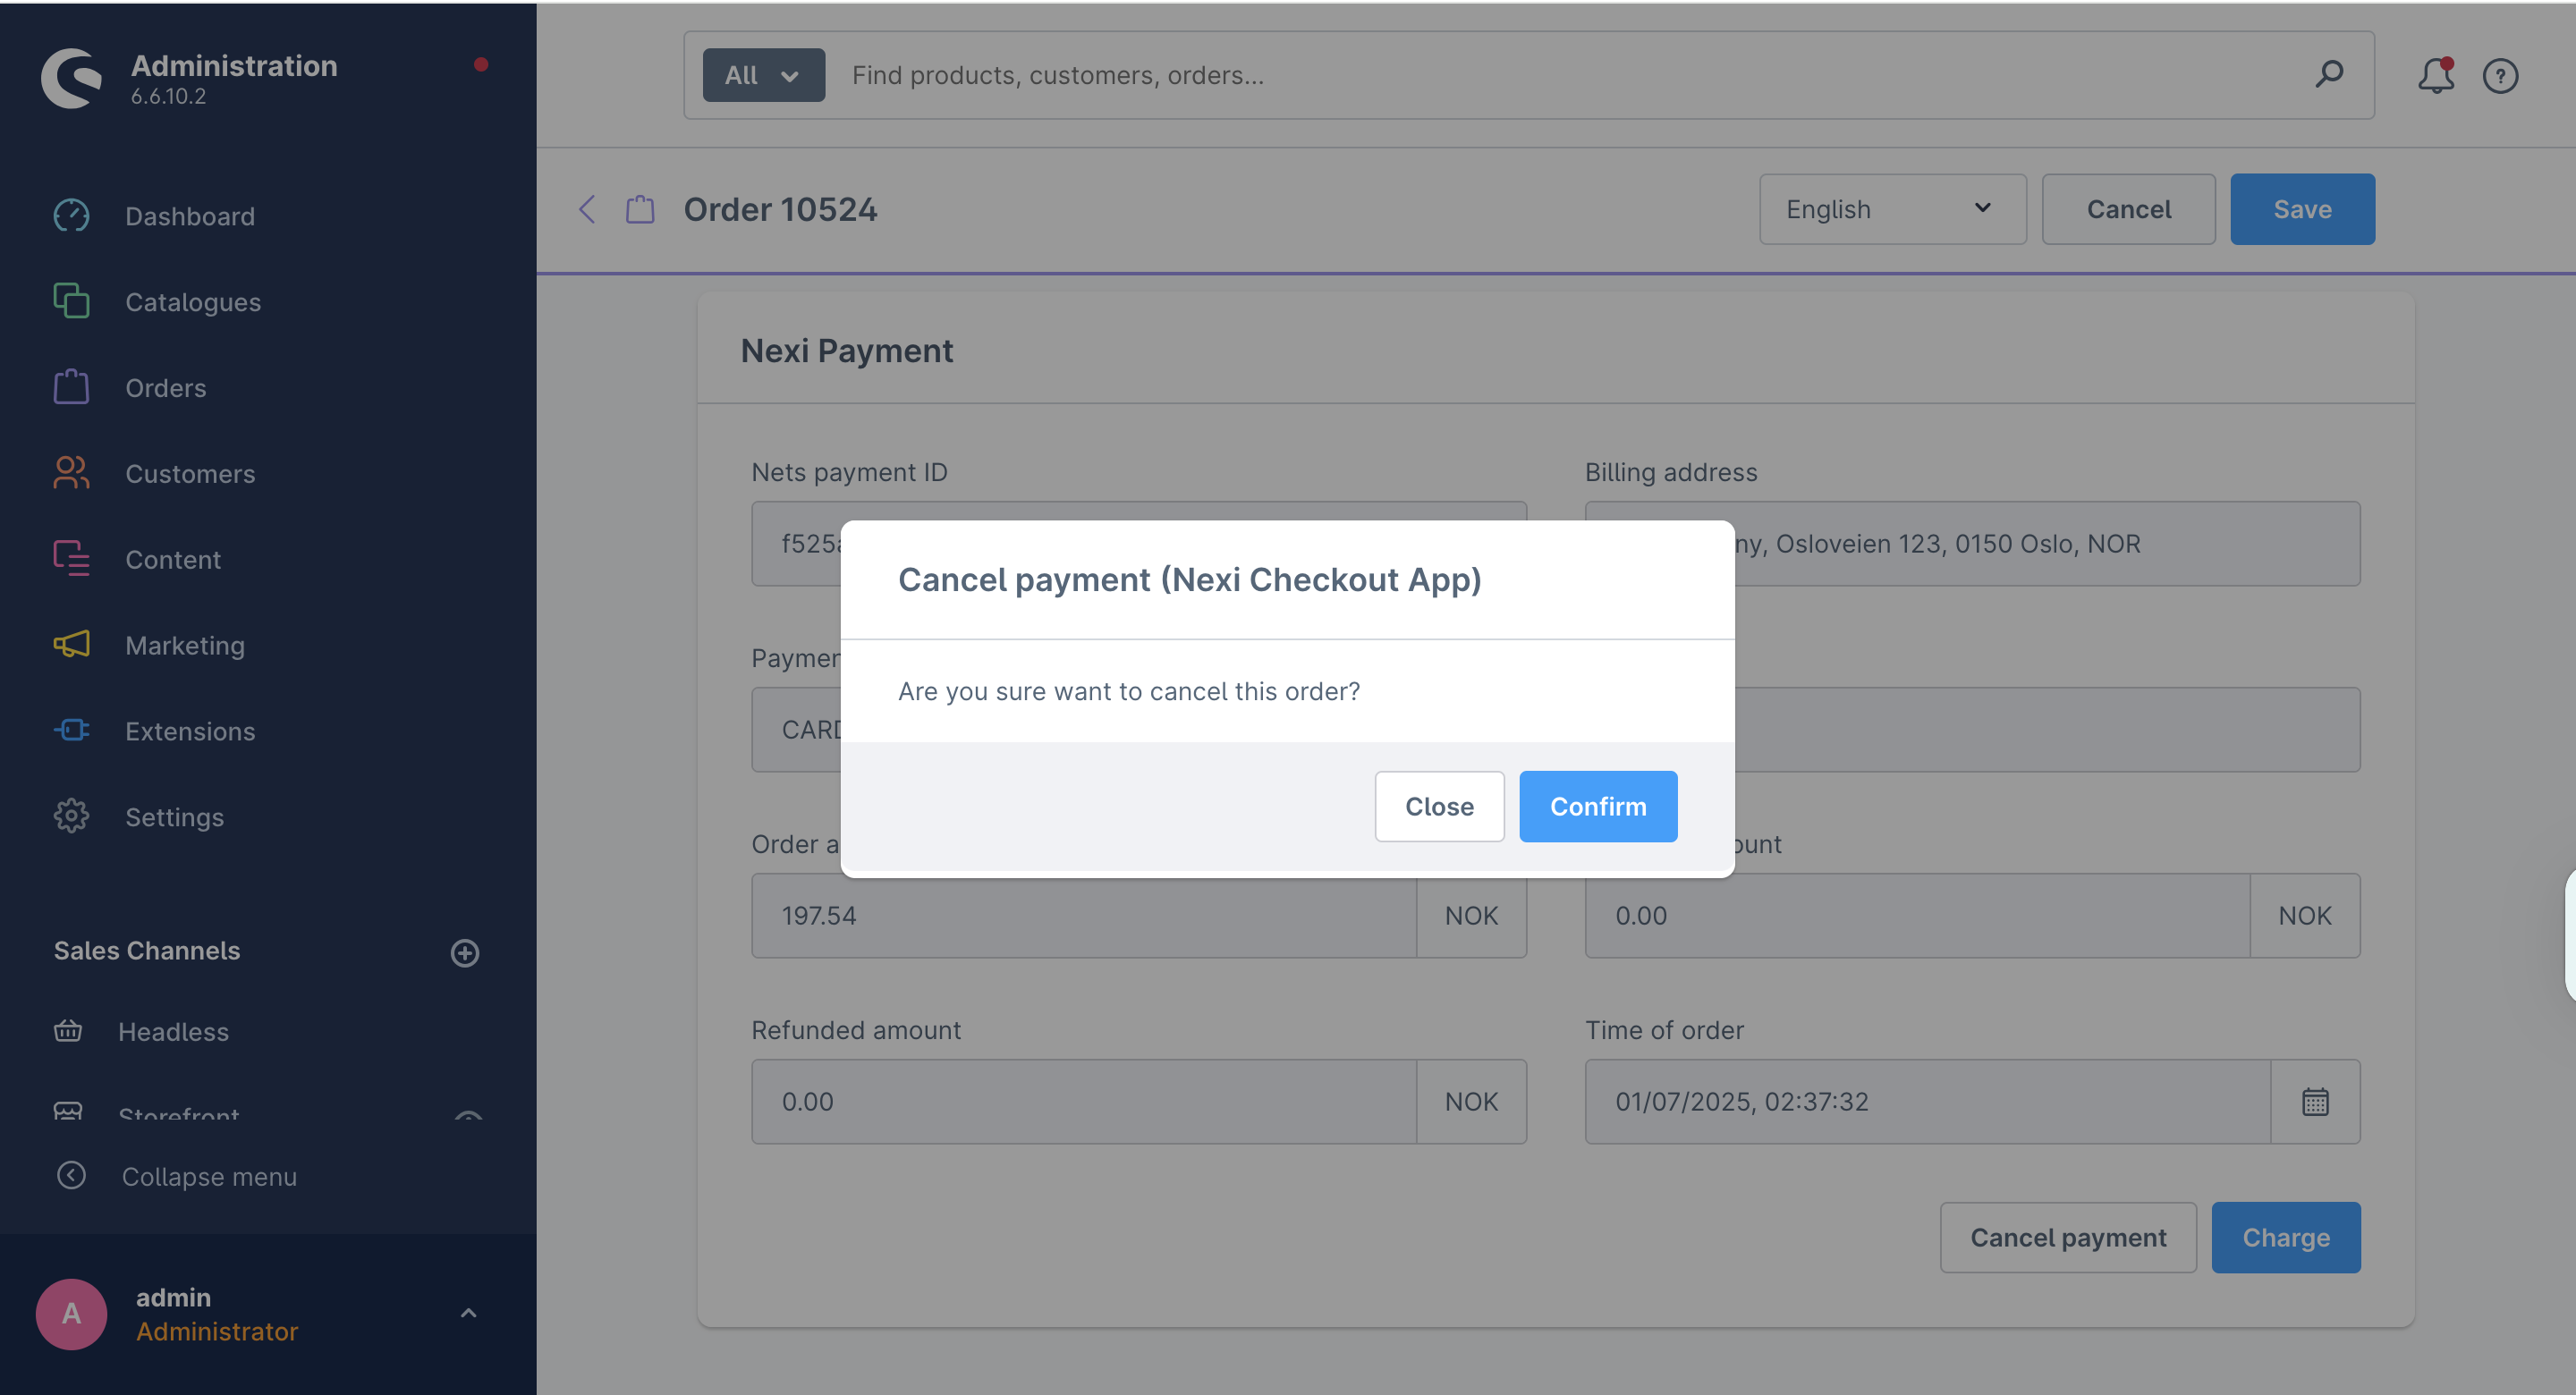
- Order status changes to Cancelled.
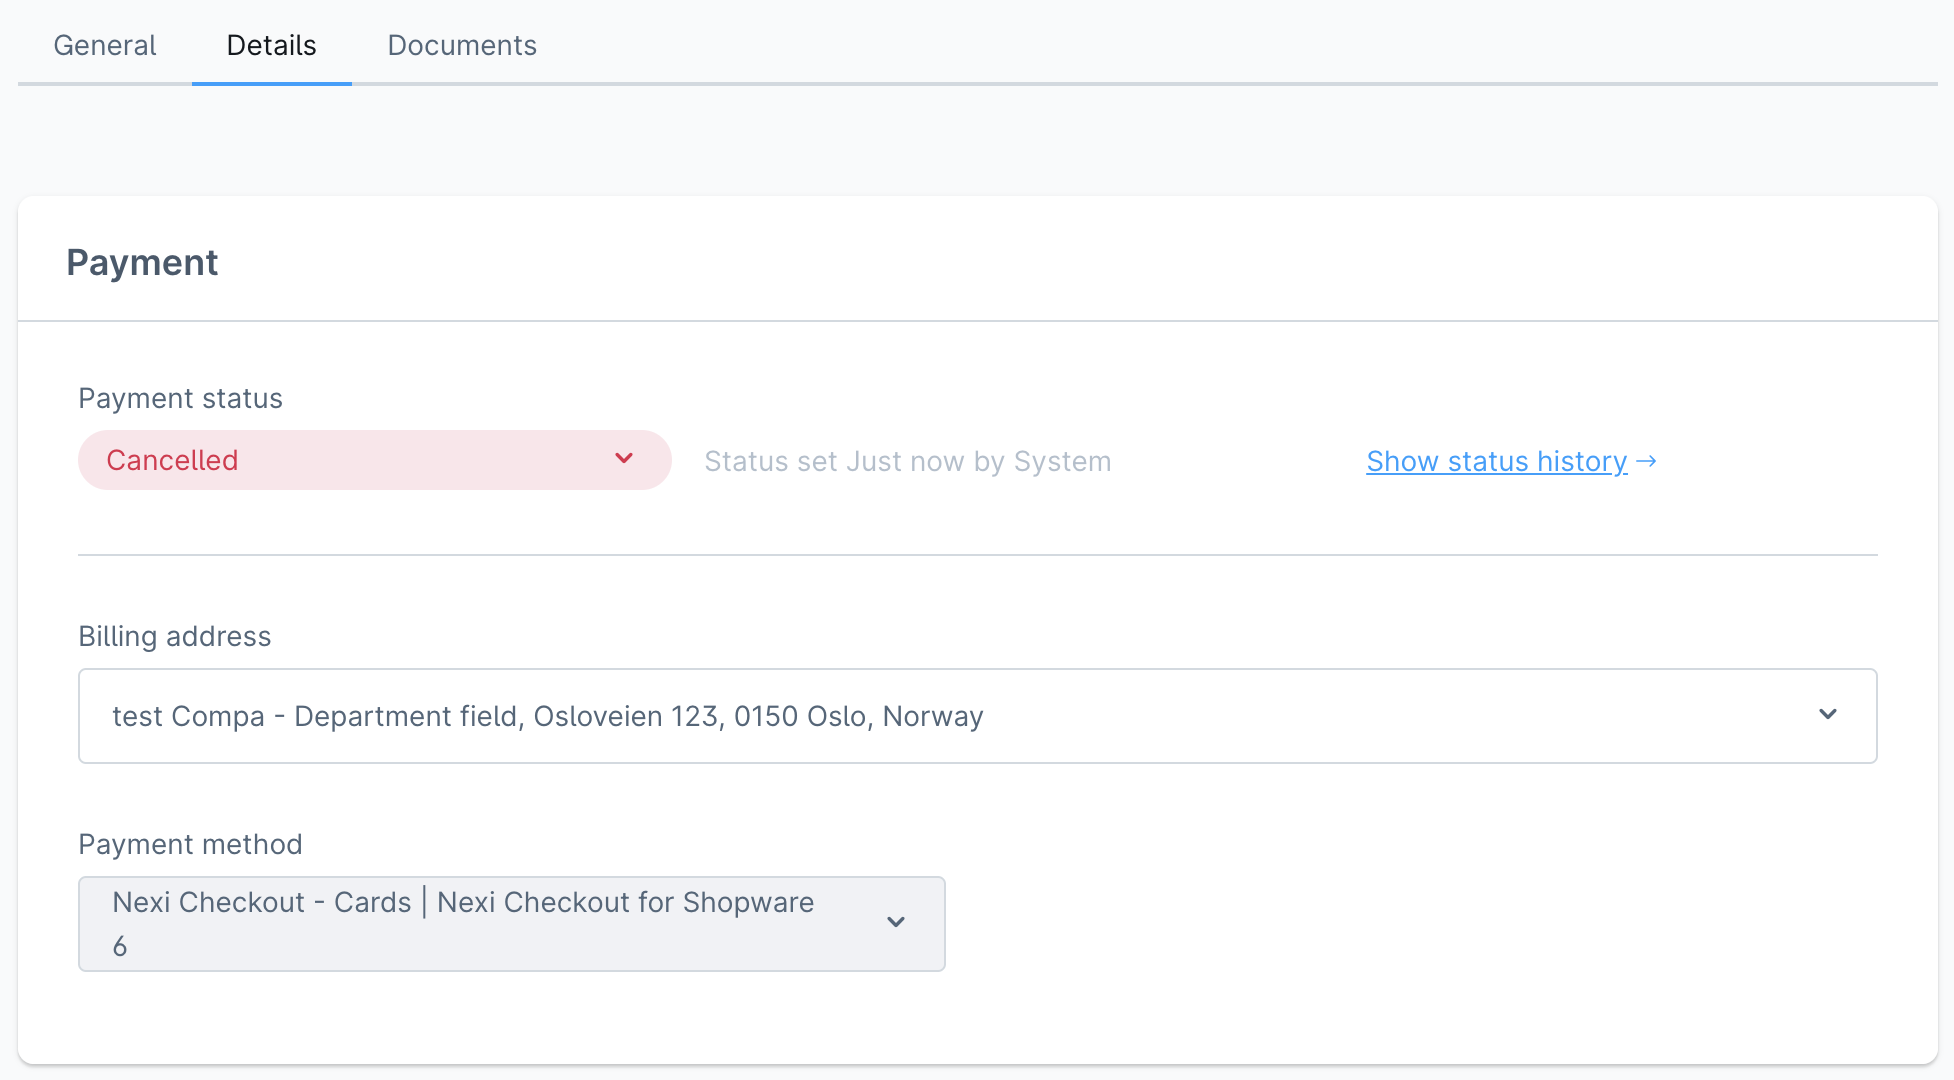
- Charging is disabled once cancelled.

All transactions performed by Nexi Group are accessible in Checkout Portal.
The following screenshot shows the list of orders in Shopware administration:


Manual & Auto Charging
Auto Charge
- Automatically charges customer after successful payment
- Admin cannot cancel or manually charge

Manual Charge (Auto-Charge OFF) Admin can manually charge by themselves.
- Charged button is activated and Admin have to charge order manual
Charge by amount
- Click Charge → Uncheck Select items to charge checkbox → Enter full or partial amount → Click Charge.
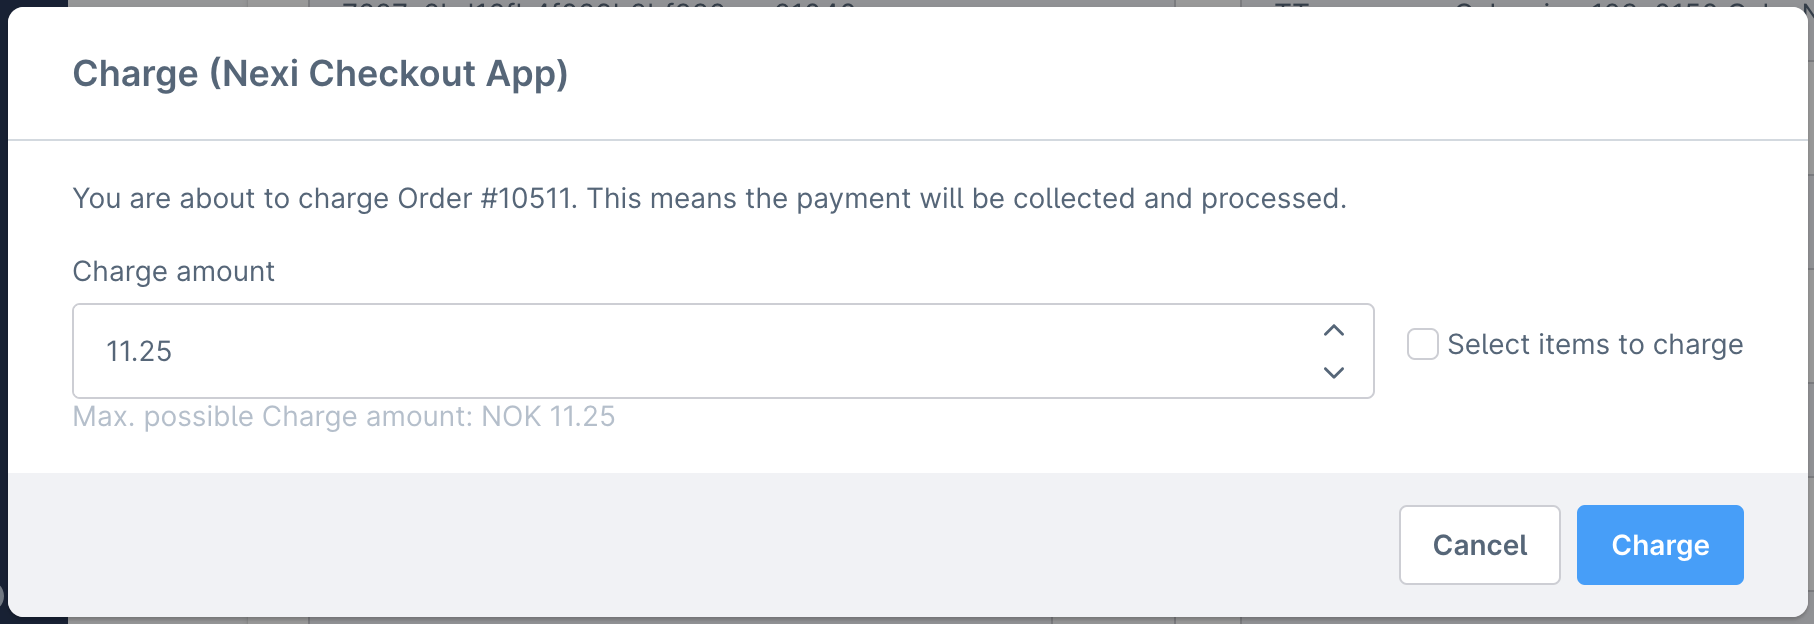
** Note: Amount must be greater than 0.
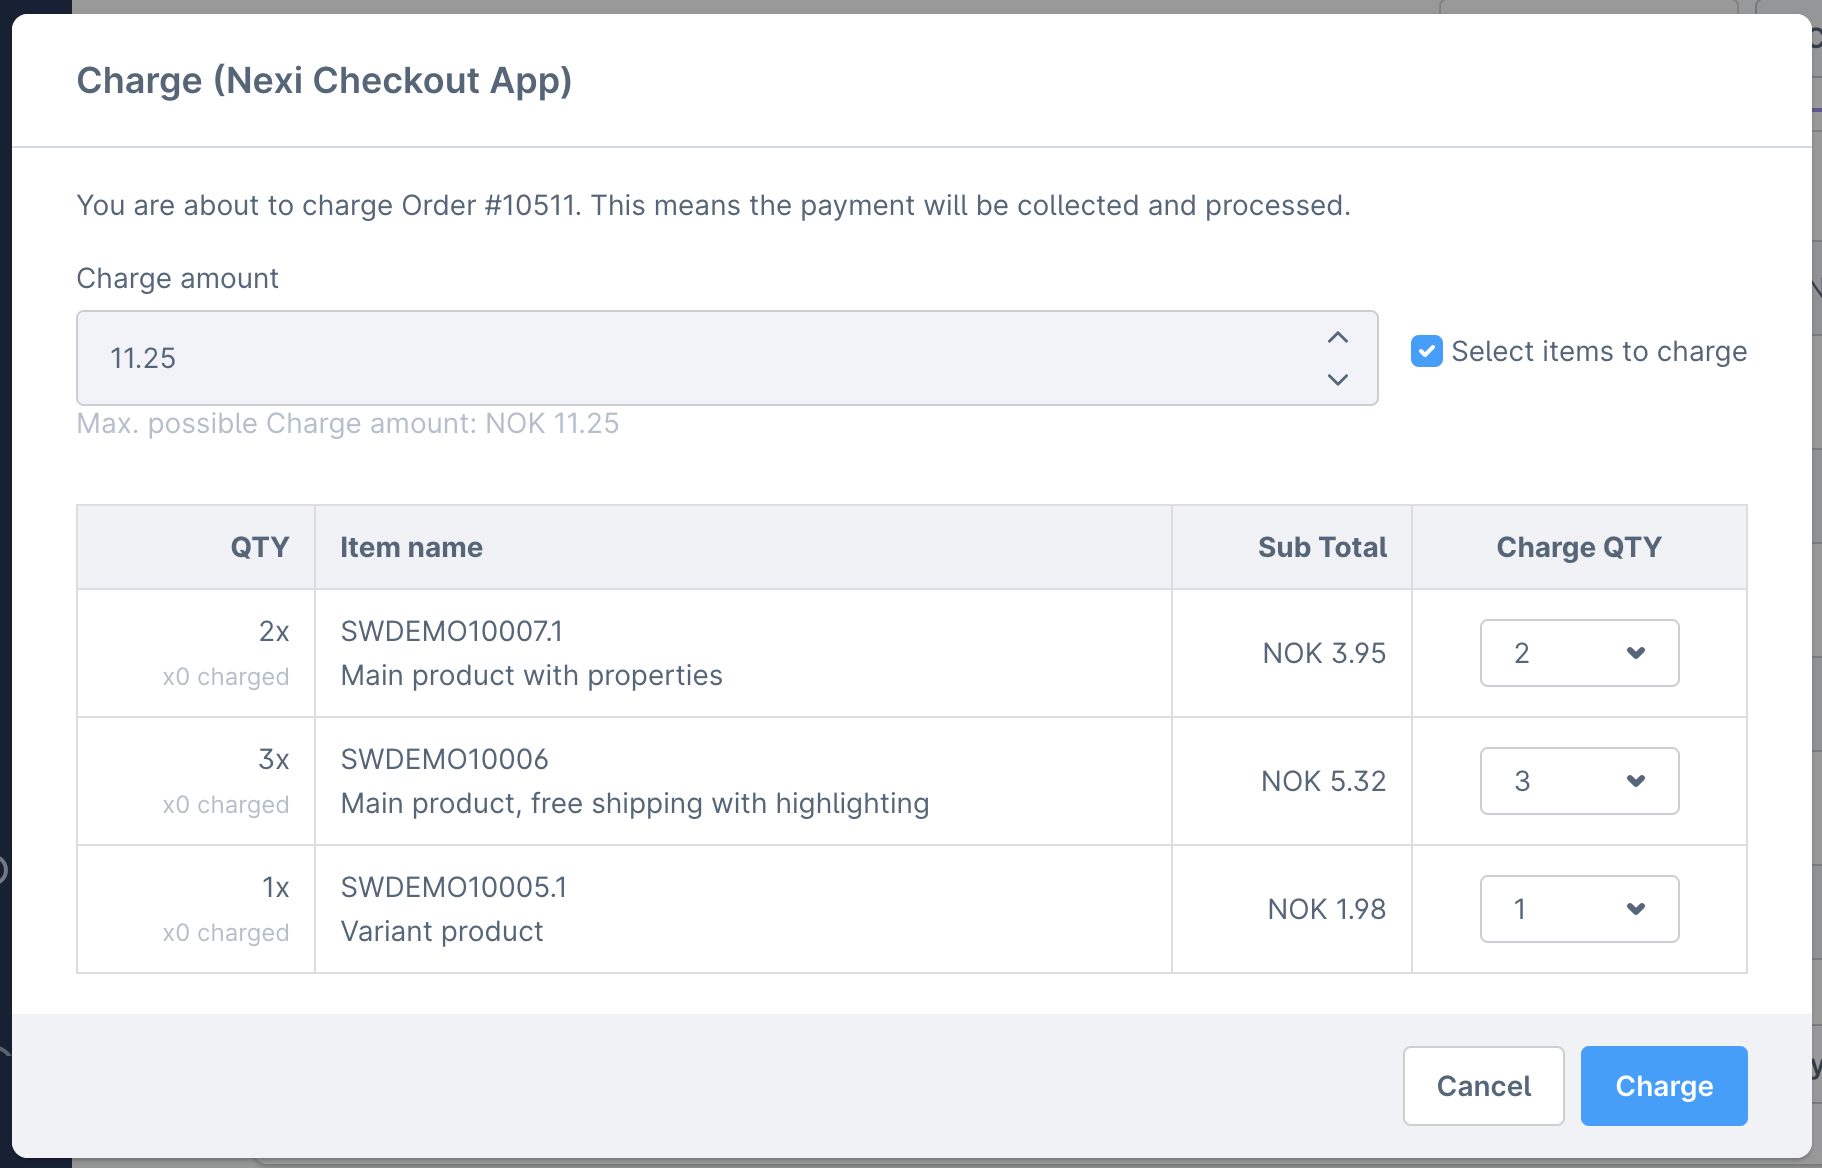
Charge by items
- Select number of items from the list
- Click Charge to process selected items
Transaction details Transaction details is default expanded, hide the transaction logs by clicking Hide transaction logs.
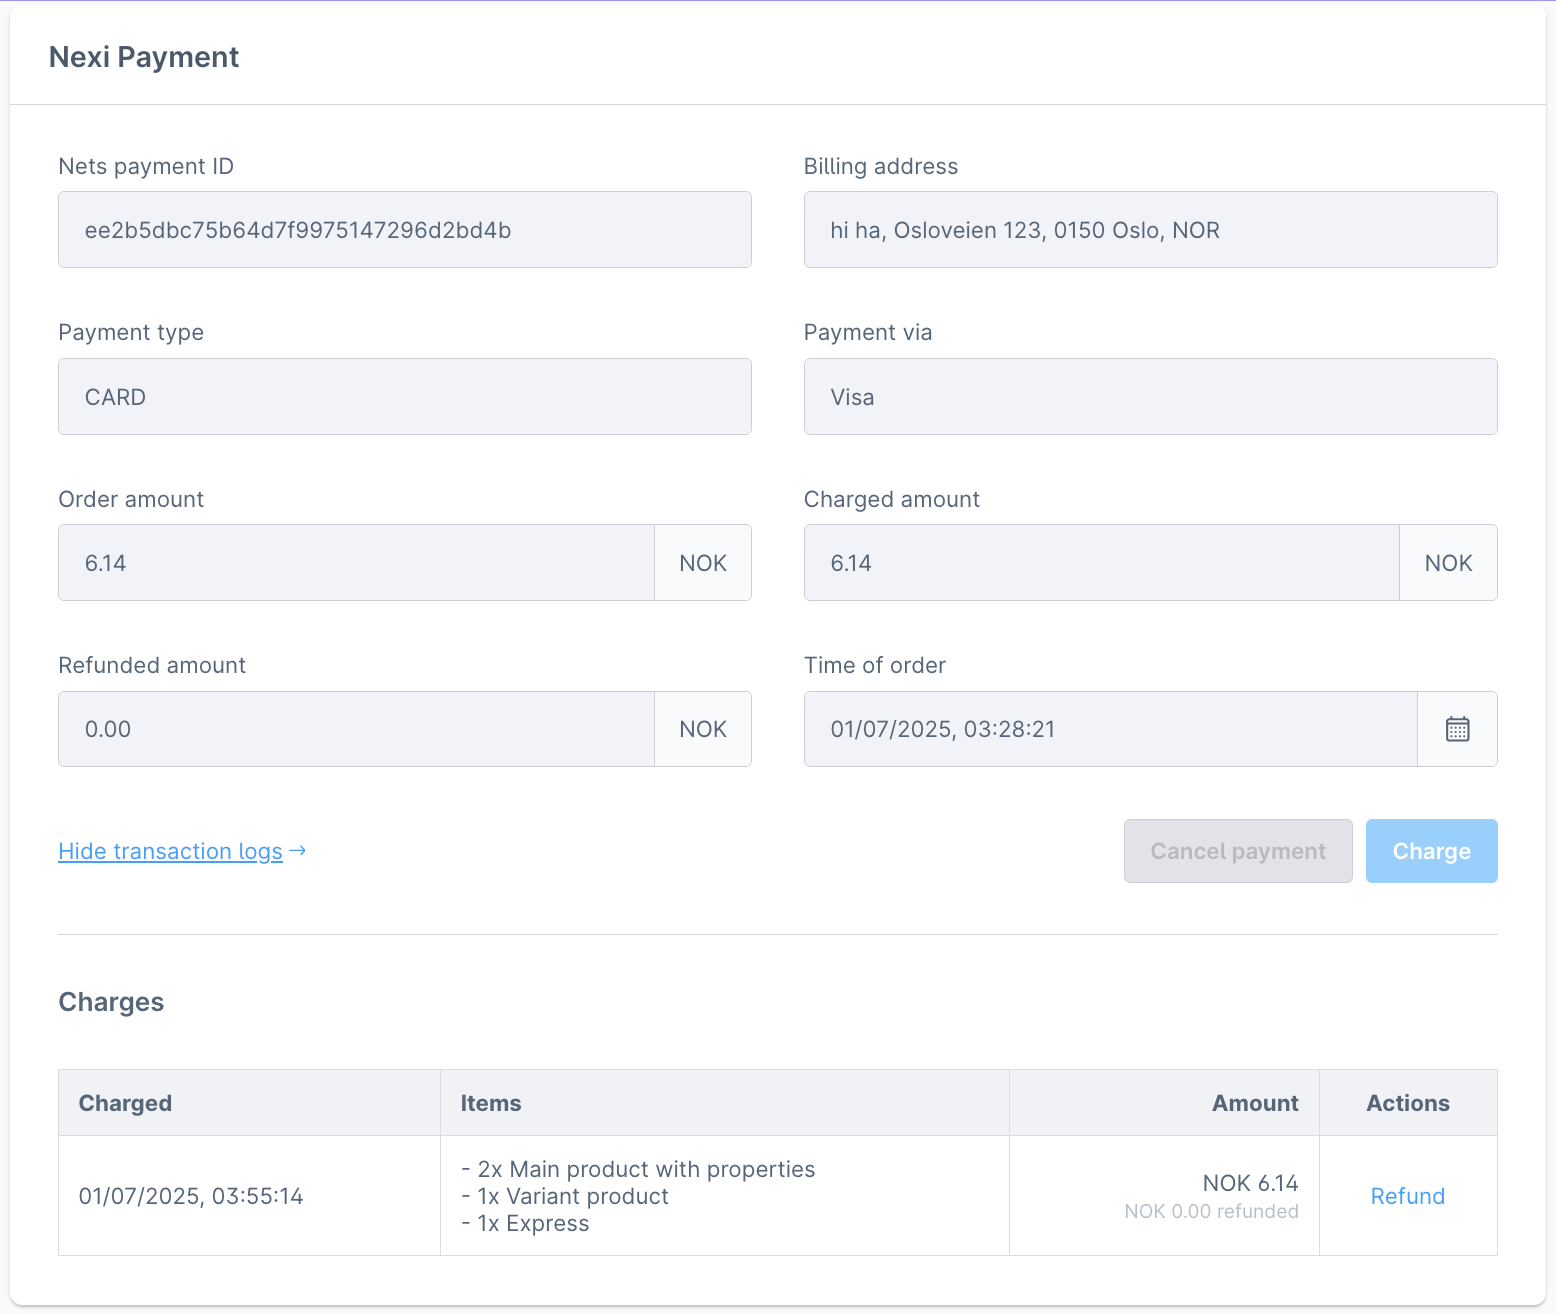
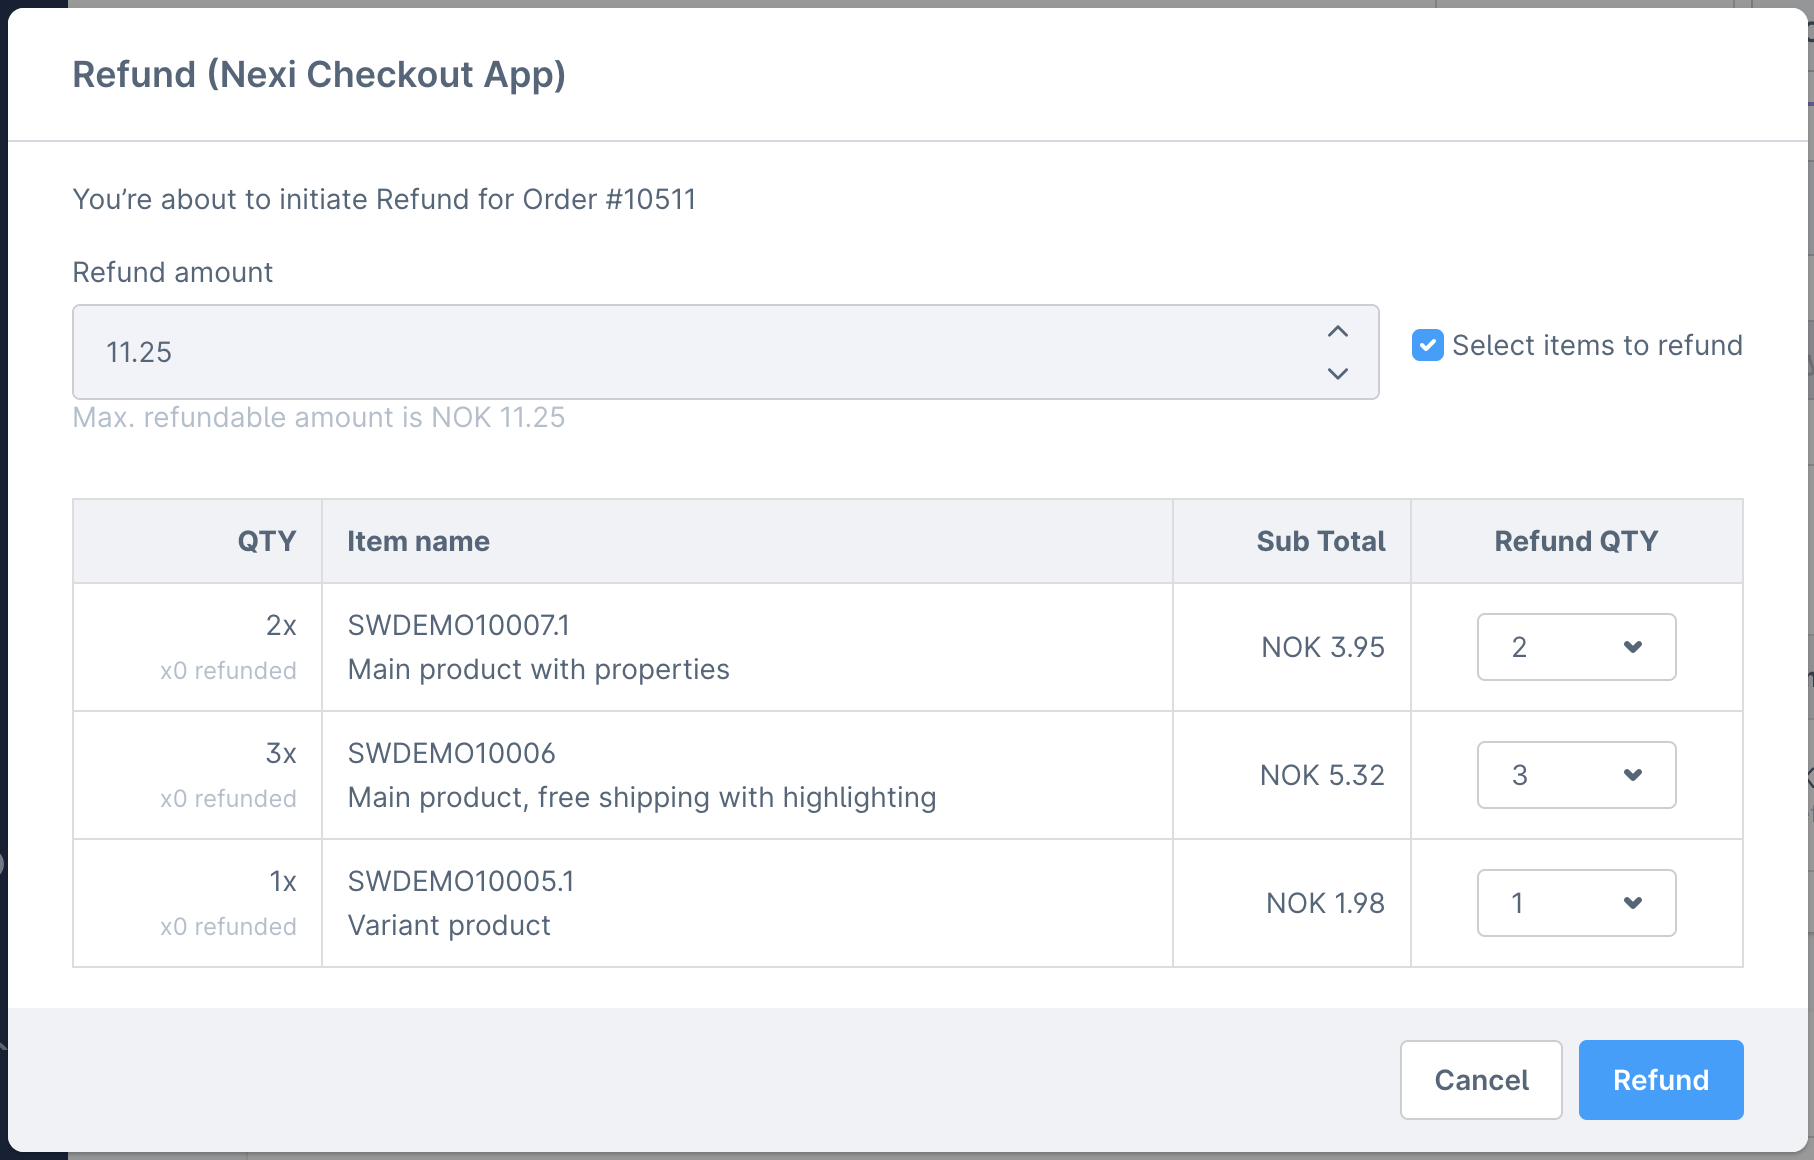
Refund
- Click Refund in the charge log
Refund by amount
- Uncheck Select items to refund checkbox → Enter full or partial amount → Click Refund
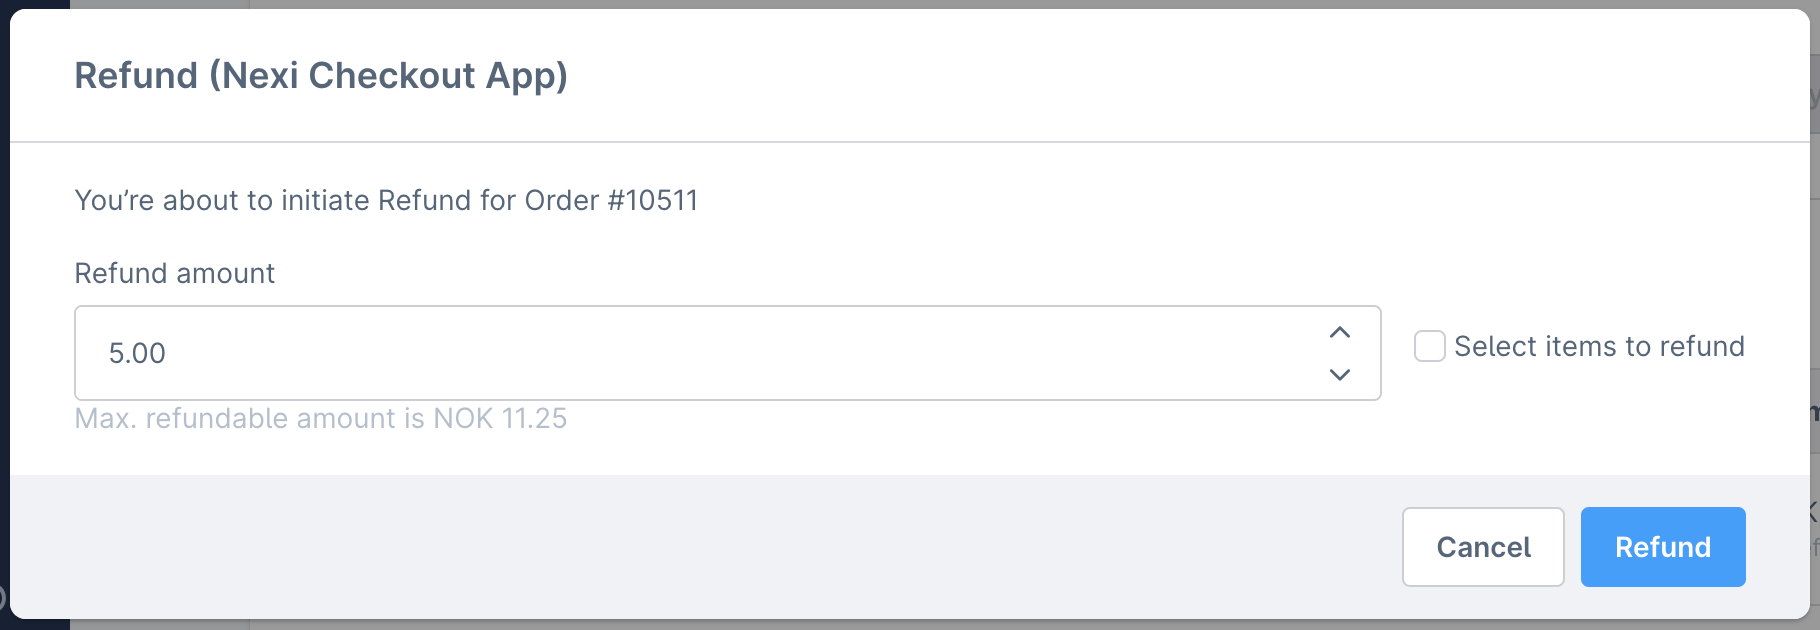
Note: Amount must be greater than 0
Refund by items
- Select number of items → Click Refund to submit
Subscriptions
Subscription order Merchants can follow Shopware’s guidelines to set up subscriptions: Shopware 6 - Settings - Subscriptions and install the extension provided by Shopware.
[https://docs.shopware.com/en/shopware-6-en/extensions/shopware-commercial]
Only Nexi Checkout - Cards (when Split Payment is ON) or Nexi Checkout (when Split Payment is OFF) is available for Subscription orders.
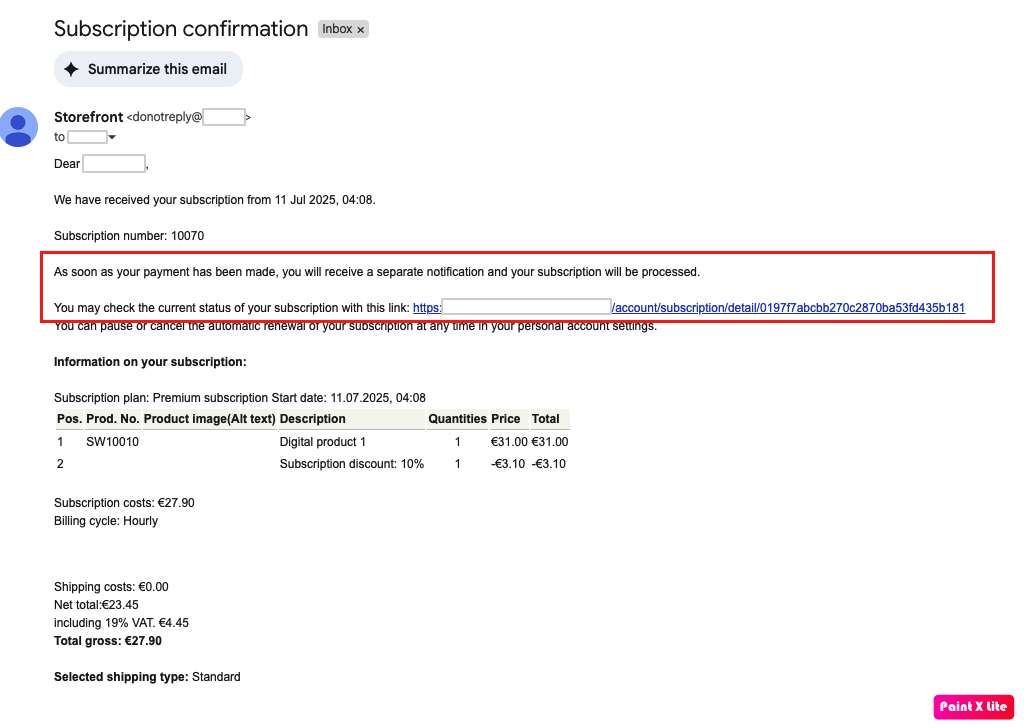
Subscription order behavior A subscription will always be created and shown in the Subscriptions list with the status Active, whether the initial payment is successful or not.
Here’s how the system handles payments:
-
✅ If the payment is successful: A sub-order will be generated based on the subscription’s defined interval. The payment for this sub-order will be automatically charged.
-
❌ If the payment fails: An order is still created, but its assets (e.g., downloads, content, etc.) will be inaccessible to the buyer. The subscription status will change depending on the next scheduled payment:
-
First failed payment: The subscription remains Active, and the system will try again on the next scheduled payment date.
-
Second (or subsequent) failed payment: The subscription status changes to Payment failed, and no more sub-orders will be created
Troubleshooting
Below are some of the most common configuration errors, their cause and steps that you can follow to solve them.
Nexi Group payment app is not visible as a payment method
- Ensure the Nexi Group app is available in the right Sales Channel in the app configuration.
- Under the Sales Channel section, select your Shop Name under General settings. Add desired payment methods from the Nexi app.
- Temporarily switch to the Shopware 6 standard template. Custom templates might need additional changes to ensure correct display. Consult with your web designer or developer.
Nexi Group payment window is blank
- Ensure your integration keys in the Nexi Group app settings are correct and do not contain additional blank spaces.
- Temporarily deactivate third party plugins that might affect the functionality of the app.
- Check if there are any temporary technical inconsistencies: https://easy-status.developers.nets.eu/
Payments in live mode don't work
- Ensure you have an approved Live Checkout account for production.
- Ensure your Live Checkout account is approved for payments with the selected currency.
- Ensure payment method data is correct and supported by your Checkout agreement.
Klarna
The payment method Klarna requires a phone number to function properly. To ensure that Klarna will appear as a payment option in the Nexi Group payment window, it is essential to configure the phone number field correctly. For more information, please refer to the Klarna guide.
To add the phone number field in Shopware 6, follow these steps:
- Navigate to Settings > Shop > Log-in & Sign-up.
- Check the box for Show phone number.
- Check the box for Phone number field required.
To learn more, visit Shopware 6's documentation.


Important Note
We do not support third-party plugins that provide phone number functionality, and we cannot guarantee that their solution will be compatible with the Klarna payment method.