Checkout for Shopware 2.x
This guide describes how to install, configure, and use Checkout webshop modules for Shopware 6.7
Before you start
Important
Before you start, you need an Checkout Portal account. Please refer to the guide:
- How to create a test account for Checkout..
Requirements
Shopware Version: Compatible with Shopware 6.6.x and above.
Note: For Shopware versions 6.4.x and 6.5.x (e.g., 6.4.1, 6.5.2), please use Shopware 1.x
If you are using Shopware 1.x, you will need to run Shopware 2.x in parallel until the orders are completed.
Overview
Our Shopware plugin is the perfect extension to unlock the full potential of Checkout for your Shopware store. Checkout supports the most popular payment methods. With version 2, we have introduced a set of powerful new features:
- Payment method splitting
- Split Embedded and Hosted flows into two separate payment options
- Full webhook support
- Charge handling (including workflow integration – e.g. charge action in workflow)
- Compatibility with Shopware 6.7
- Integration with our SDK (nexi-checkout/php-payment-sdk)
- Support for PHP 8.4
- Layout improvements for a smoother checkout experience
You can see below all the payment methods offered by Nexi Checkout. This list refers to all markets.
Depending on your country or region, the list may vary. If you are uncertain about a specific payment method and whether it is available in your country or region, please contact Support for more information.


Shop features
- Seamless checkout experience with multiple payment options
- Embedded checkout for an optimised user experience. Users are not redirected outside Shopware.


Administration features
- Quick setup and flexible configuration.
- Intuitive order management with synchronized captures and refunds
- Compatible with multi-shop setups


Installation
How to install the Checkout module for Shopware 6 from github:
-
Connect with an SSH client and navigate to the root directory of your Shopware 6 installation.
-
Clone the repository by running the command: git clone git@github.com:Nets-eCom/shopware6-easy-checkout.git --branch main-1.5 --single-branch custom/plugins/NexiCheckout
After cloning run these commands:
- bin/console plugin:refresh
- bin/console plugin:install NexiCheckout
- bin/console plugin:activate NexiCheckout
- bin/build-js.sh
The module is now installed and ready to be configured for your Checkout account.
Configuration
After installing the module, you need to do some basic configuration of the module in Shopware Admin:
- Navigate to Extensions > My extensions > NexiNets Checkout
- Locate the Nexi Group payment plugin and press the button with three dots (...) to access the configuration.
- Fill out the required fields, such as integration keys (secret keys and checkout keys), and Webhook Code.
- (Optional) Customize the module according to your needs using the additional settings on the configuration page.
Both integration keys can be found in Checkout Portal. See the following pages for more help:
Where can I find my merchant number (merchant ID)? - Access your integration keys
Embedded vs Hosted
To configure Embedded installation for the Shopware 6.7 plugin, please go to the Storefront configuration page under Sales Channels:
Go to Payment methods and using the dropdown, select either Nexi Checkout Embedded or Nexi Checkout Hosted.
Click on Save your changes.
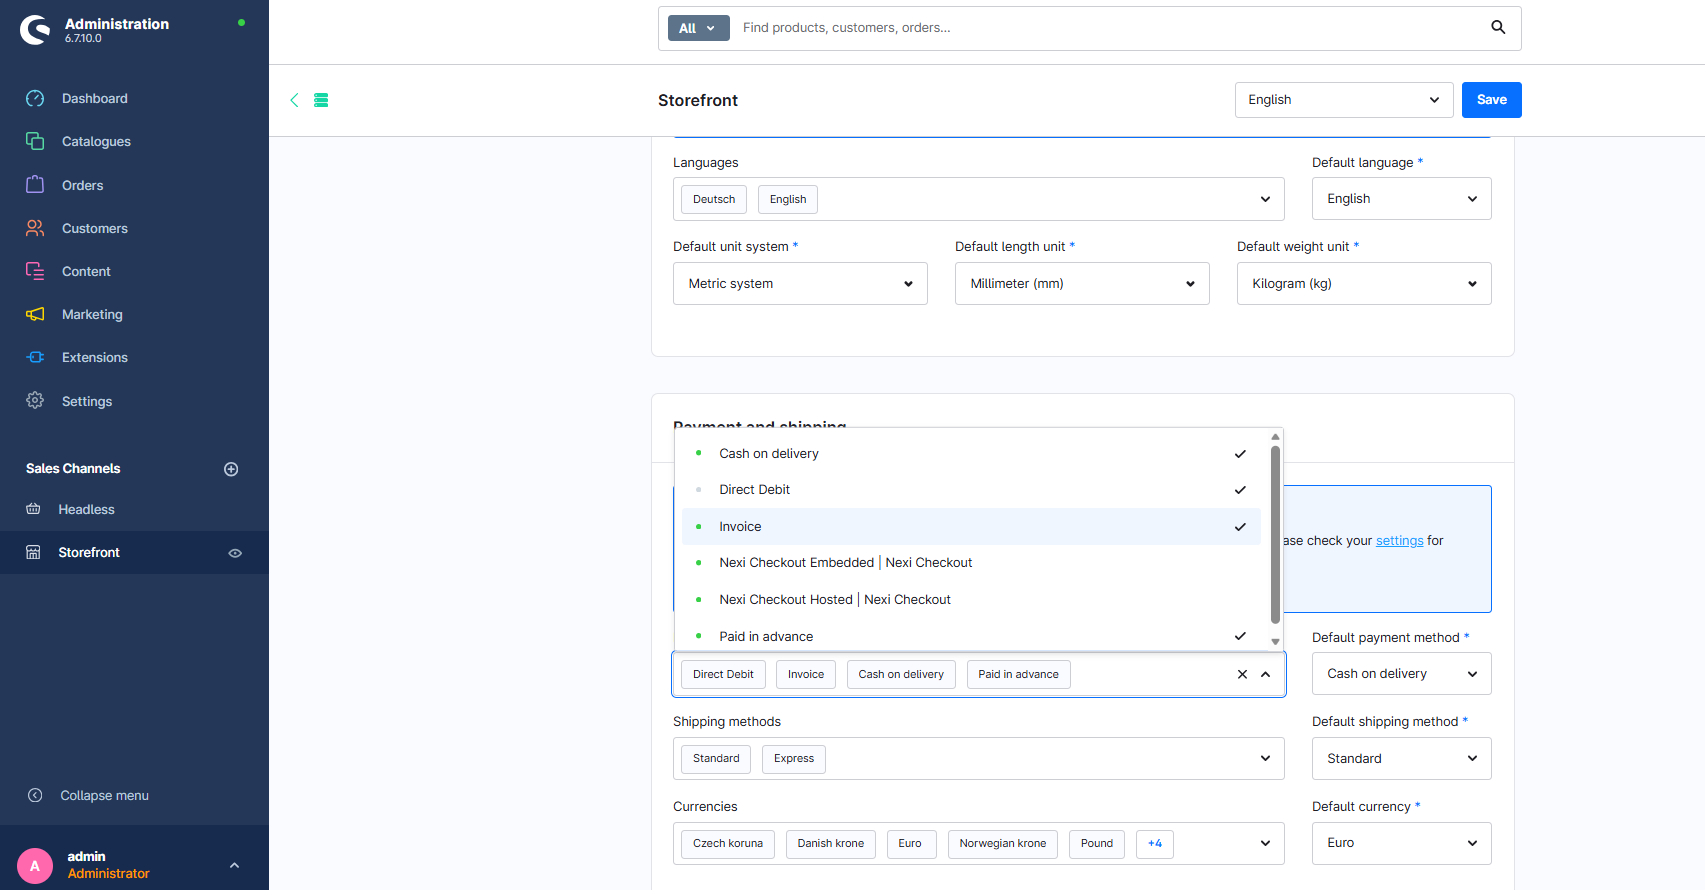
Payment Method Splitting:
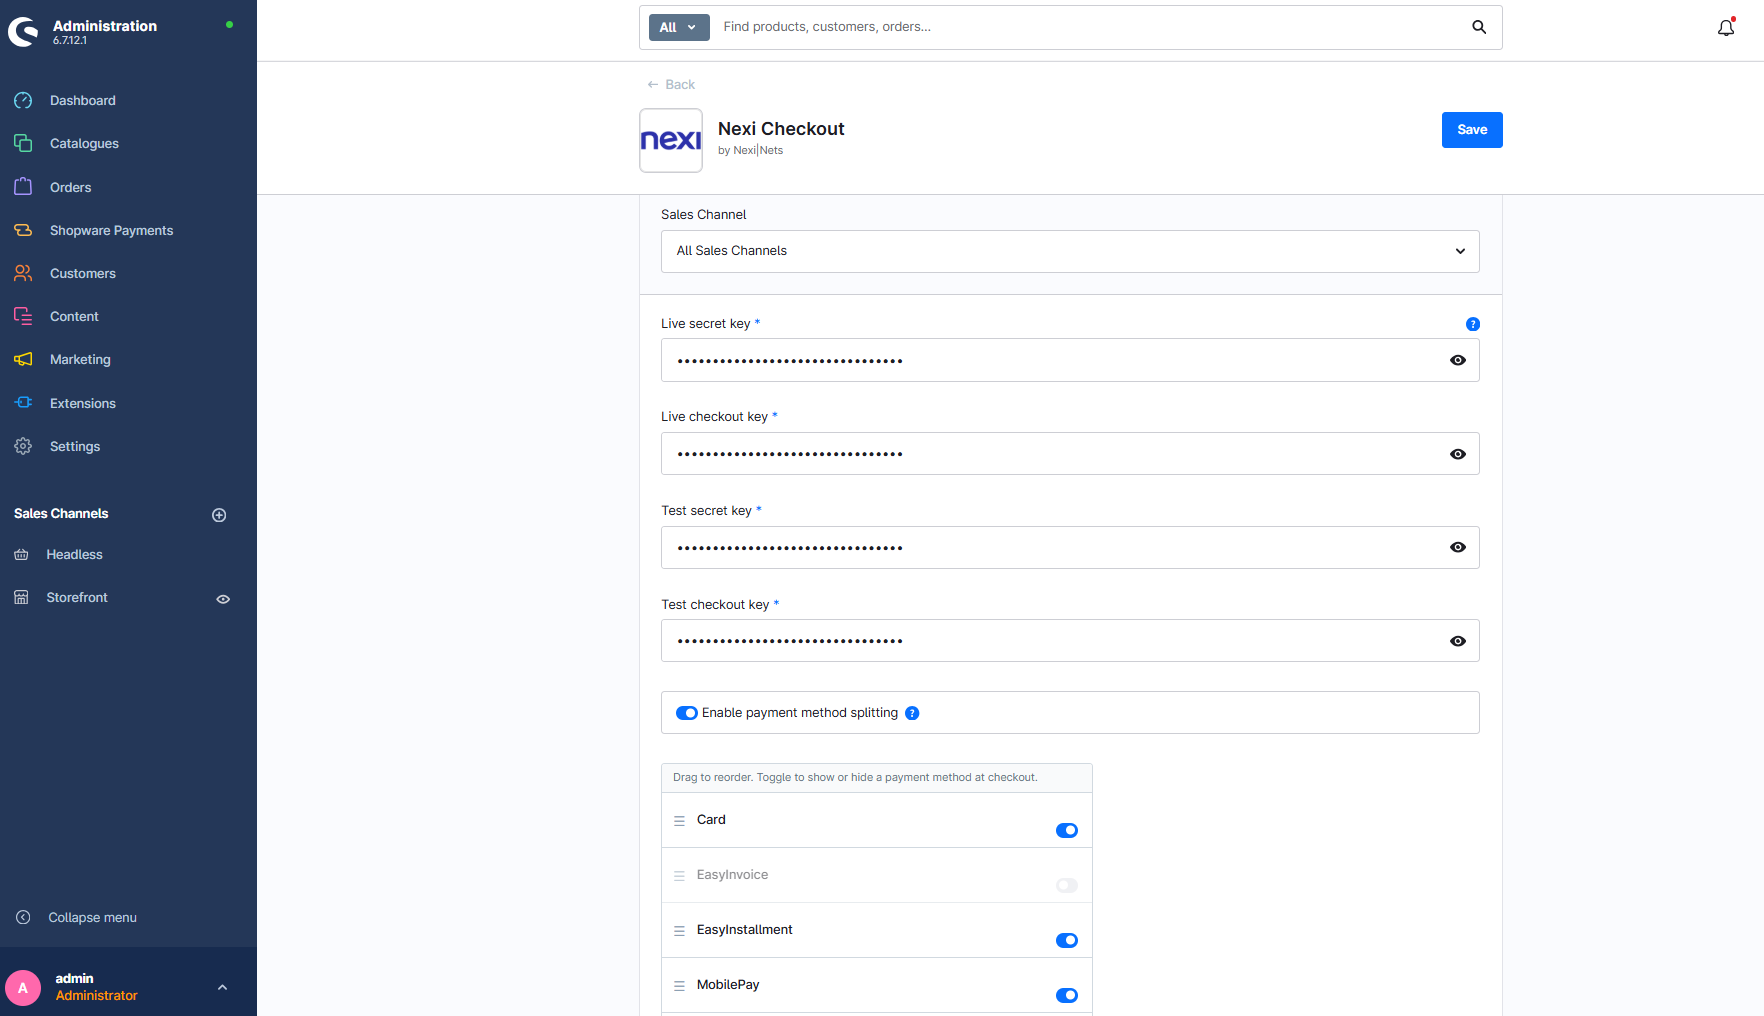
ON: Users select specific payment methods (e.g., Klarna, PayPal). OFF: Only "Nexi Checkout" is displayed.
Below is a screenshot of the configuration page with payment method splitting set to ON:
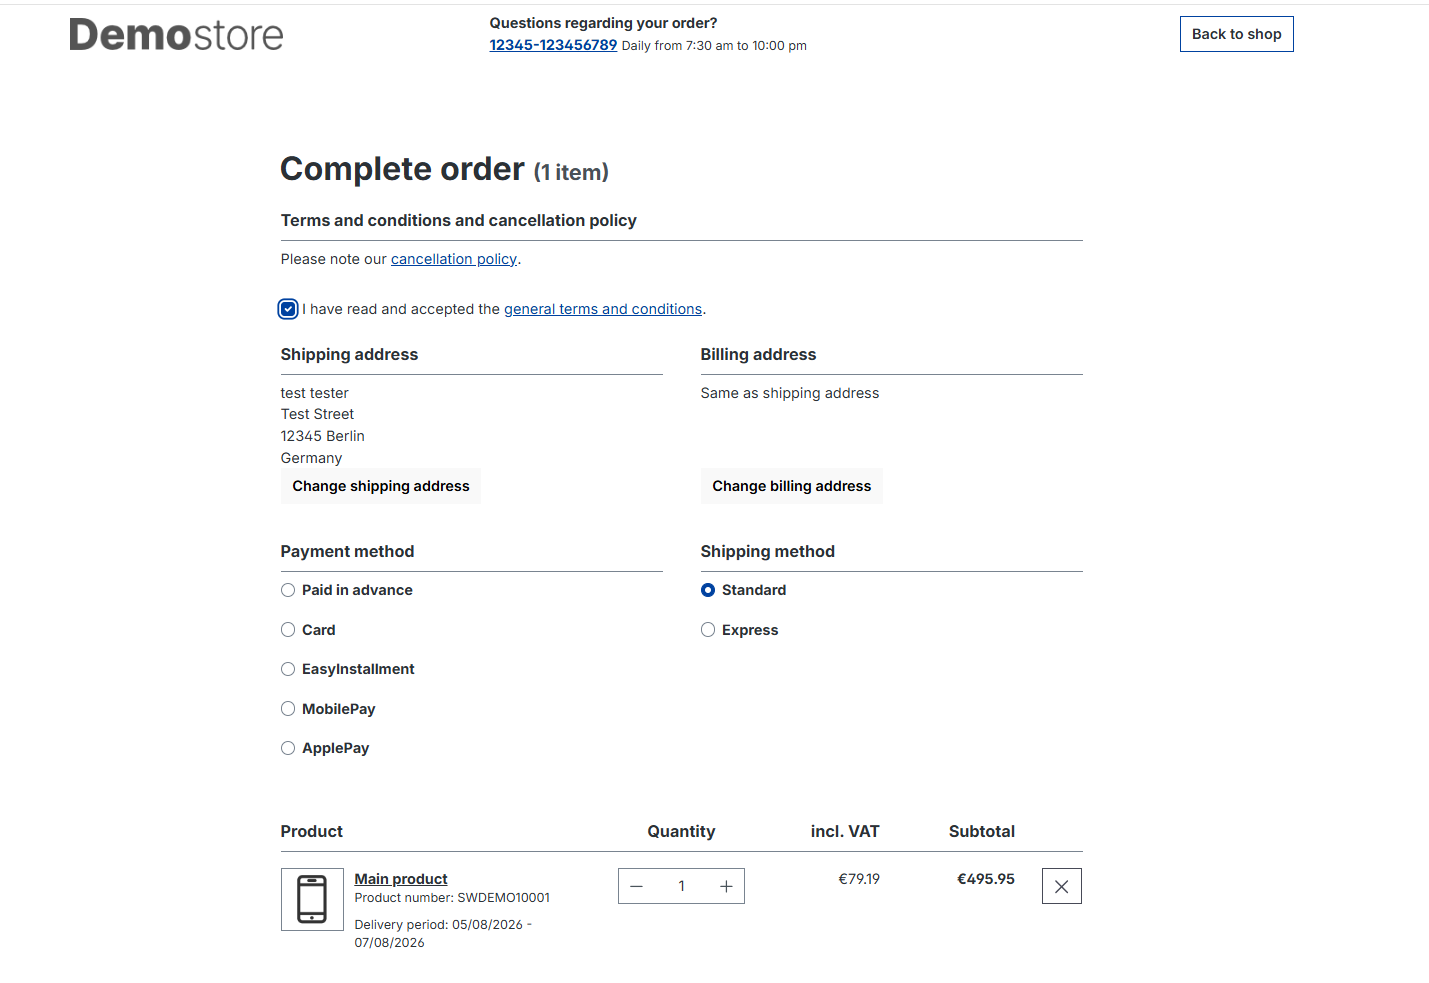
In the store you will see the selected payment method individually and the customer can select their preferred method:
Order management
It's possible to manage orders directly in the Shopware administration:
Navigate to Admin > Orders > Overview. Press on an order line to access order details. Go to the Details section, with the new Nexi order management component.

Now all the actions (Charge, Refund, Cancel) can be done via the new modal component.

Clicking on Max. amount will automatically pass the maximum value to the amount field.
Partials Charge & Refund
The biggest change from the currently used component is that partial charge and refund will be able to be made by selecting the item from the order list rather than manually typing out the value into the field. The list can be accessed by the checkbox field.

All transactions performed by Nexi Group are accessible in Checkout Portal.
For information
All transactions performed by Nexi Checkout are accessible in Checkout Portal.
Flow Builder
Flow Builder With Shopware 6.6, our Nexi flow can be aligned with Shopware flow to automate various processes within the payment system.
Klarna
The payment method Klarna requires a phone number to function properly. To ensure that Klarna will appear as a payment option in the Nexi Group payment window, it is essential to configure the phone number field correctly. For more information, please refer to the Klarna guide.
To add the phone number field in Shopware 6, follow these steps:
- Navigate to Settings > Shop > Log-in & Sign-up.
- Check the box for Show phone number.
- Check the box for Phone number field required.
To learn more, visit Shopware 6's documentation.


Important Note
We do not support third-party plugins that provide phone number functionality, and we cannot guarantee that their solution will be compatible with the Klarna payment method.
Apple Pay
Apple Pay configuration for Shopware plugin is described on the Apple Pay payment method page.
Go live checklist
For more information, refer to the section Go-live checklist.