Customize text and language
This guide is for developers who want to localize and customize text resources on their checkout page.
Before you start
This guide assumes that you already have a Checkout Portal account and have integrated Checkout on your website.
What you are building
Once you have the checkout process on your Checkout page integrated into your site, it’s time to customize it to make it fit your site and provide the best possible service to your customers. This page will guide you through the following customizations:
- Select language - the language to be used on the checkout page
- Set text on the payment button - the text resources on the pay button can be customized when using subscriptions (recurring payments).
- Display webshop name - the name of your webshop can be added to the checkout page.
- Show order items - the order items can be listed on the checkout page.

Set display language
You can change the language to be used on the checkout page by adding an optional language parameter to the URL to hosted checkout page. The following example changes the default display language from English to Swedish when redirecting to the pre-built checkout page hosted by Nets:
Specify display language
- PHP
- Node
function redirect_to_checkout($json) {
  $a = json_decode($json, true);
  if (json_last_error() != JSON_ERROR_NONE) {
        echo(json_last_error_msg());
The redirect happens right after a payment object has been created from the backend. The example above is extracted from the direct integration guide where you can see a complete example of creating a payment object and performing a redirect.
The complete list of available language can be found in the API reference.
Customize payment button text
The text label on the payment button can be customized. The Payment API defines a set of predefined values that can be selected among when creating the payment object from the backend of your site. See the direct integration guide for a complete example of how to create a new payment object.
To customize the payment button, the JSON request object posted with the create payment method should define the property completePaymentButtonText. Here is an example of a request body:
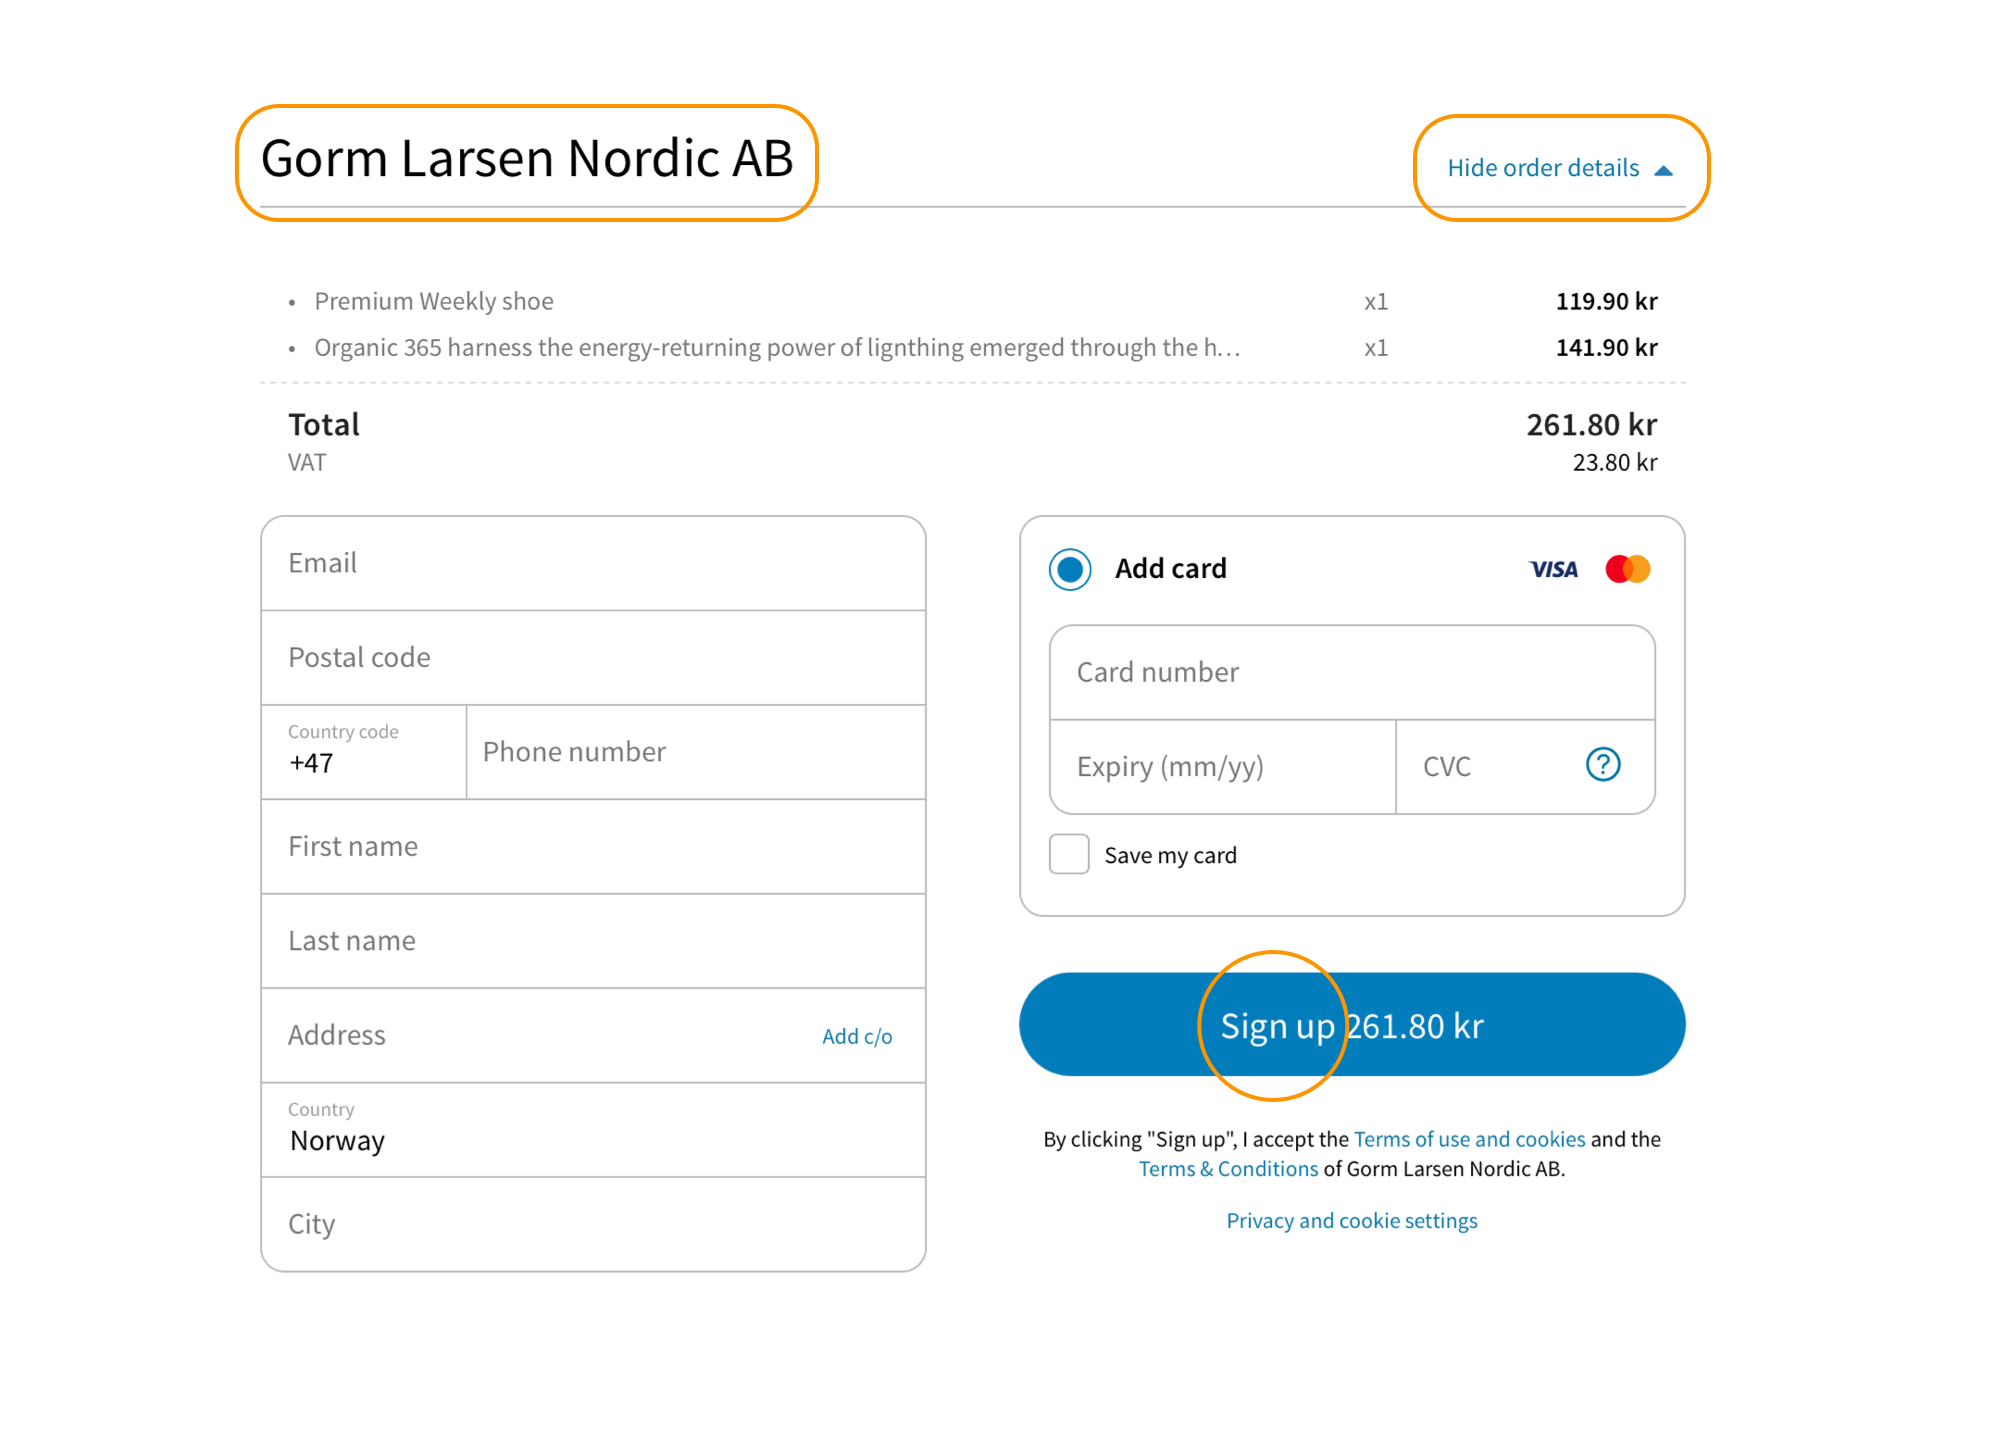
The string value signup is one of the predeifined values that can be specified. If you are using English on the checkout page, the payment button will now include the text "Sign up". The payment button text is localized.
You can determine the button's background color as well by using the buttonbackgroundColor parameter.
Display merchant name
It is possible to show the name of your webshop (merchant name) on the checkout page. The option to show or hide the merchant name is specified when creating the payment object using the Payment API from your backend.
Use the property showMerchantName to show or hide the merchant name on the checkout page, like this:
Show merchant name on checkout page
{
  "checkout": {
    "integrationType": "EmbeddedCheckout",
    "url": "https://<YOUR_SERVER>/checkout.html",
The example above makes the merchant name appear on the checkout page.
Troubleshooting
The merchant name to be displayed on the checkout page can only be specified once your account is in live mode. There is no way to specify the merchant name while in test mode.
Include order summary
The order items associated with the current payment can be listed on the checkout page. A button that makes it possible for your customer to show or hide the order items is then included on the checkout page. Again, this customization is defined when creating the payment object from your backend.
Use the property showOrderSummary to include the order items on the checkout page as in the following example:
Show order summary
{
  "checkout": {
    "integrationType": "EmbeddedCheckout",
    "url": "https://<YOUR_SERVER>/checkout.html",
This guide has demonstrated how to customize the language and what content to be included on the checkout page. It's also possible to customize UI properties such as colors and fonts. See the guide Styling and accessibility.
Display payment methods
In addition to which payment methods you have enabled in your Checkout account configurations, you can define what payment methods are displayed on the payment window.
Country and currency parameter
One way to determine which payment methods are displayed during checkout is to set the country and currency parameters, so that only payment methods available for the specific country - currency combination are displayed.
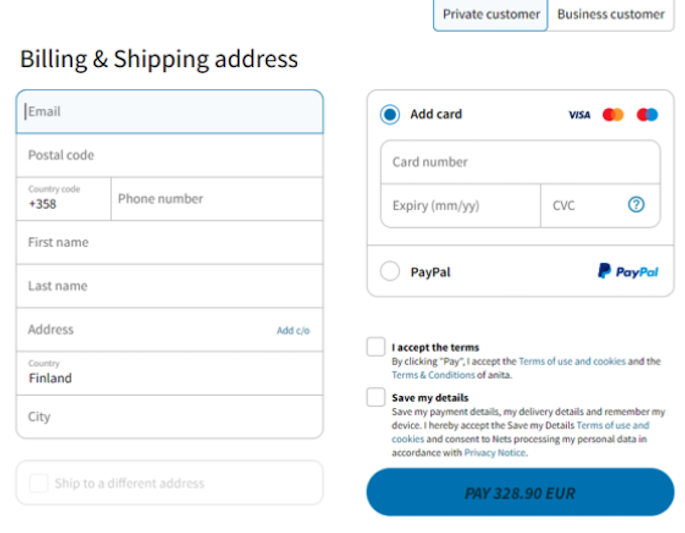
Another benefit is, that the Billing & Shipping address form allows to have the relevant fields prefilled according to the countryCode parameter. Also, the Terms and Conditions can be displayed according to the country.
Below is a sample.
countryCode : FIN, currency : EUR
{
  "order": {
      "items": [
      {
Here, the order.currency parameter is set to EUR, while the checkout.countryCode is set to FIN. Depending on the payment methods enabled in the Checkout account, the payment window would look as here:

PayType filtering
An additional way to control what payment methods are displayed on the Payment Window is to use the paymentMethodsConfiguration array in the Create Payment method's request body.
That is useful if you want to offer specific payment methods dependent on certain scenarios such as
- products, if for certain products you just want to accept card payments
- amounts, if for example you accept all payment methods for smaller amounts, but just a few for larger ones
- devices, if you want to offer a specific set of payment methods for users on their mobile device, but others for desktop users
The sample below shows how you would set the paymentMethodsConfiguration array, if you only want to offer Cards and PayPal as payment methods:
Set paymentMethodsConfiguration
{
  "order": {
   ...
  },